


While there are numerous ways for you (or your students) to check spelling, 1 simple way is to open a new tab in Google Chrome. When you do say make sure to select the microphone on the far right of the search bar.
When you do so, it may state
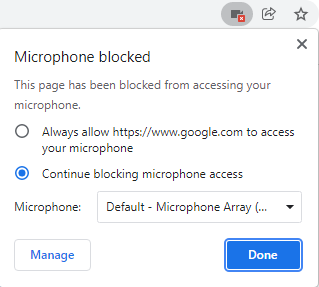
- that voice search has been turned off (see image below).
- to correct this look in the upper right of your search bar for the red x over a video icon. Make sure to allow and choose your microphone.
- to correct this go into settings > privacy and security > site settings > scroll to microphone and select it > sites can ask to use your microphone

- make sure to Allow the use of your microphone

Give it a try and ask your students some tough words!
Embedded below is a 1 minute and 31 second YouTube tutorial.
Take care,
Brad


