🎙️📚 Be the Storyteller! Narrating with Vooks' Storyteller Mode 🎥✨
In a world where digital storytelling continues to evolve, Vooks offers an exciting feature called Storyteller Mode that allows educators and parents to bring stories to life in their own voices. If you love reading aloud and want to create a personalized narration of a book, this feature is a game-changer.
Getting Started with Storyteller Mode
With Vooks Storyteller Mode, you can record yourself reading a book page by page or all at once. Here’s how it works:
Select a Book – Choose from a variety of illustrated stories.
Start Recording – You’ll have options to record each page individually or the entire book at once.
Review and Submit – Playback your narration, make any changes, and finalize your recording.
Share with Others – Once completed, you can share your narrated story with up to 50 people at a time via email, making it easy to distribute to students, parents, or fellow educators.
Why Storyteller Mode is a Great Tool
Engagement – Students can hear a familiar voice narrating the story, which can help with comprehension and engagement.
Personalized Learning – Teachers can create custom read-alouds for their classrooms, reinforcing literacy skills in an interactive way.
Final Thoughts
Vooks' Storyteller Mode brings a fresh approach to digital storytelling, making it easier than ever to create engaging, personalized read-aloud experiences. Whether you're an educator looking to enhance literacy instruction or a parent wanting to share a bedtime story in your own voice, this feature provides a simple yet effective way to make reading more interactive.
Have you tried Vooks Storyteller Mode? Let me know how you use it in your classroom or at home!
📊🔥 Visualize Numbers as 🎭🎯 Emojis in Google Sheets! 🚀📈
When it comes to engaging students in math and data visualization, sometimes a little creativity goes a long way. In a recent video, Brad demonstrates a fun way to make numbers more interactive by incorporating emojis into a spreadsheet. This approach not only makes data more visually appealing but also helps students develop a stronger connection to numerical concepts.
Setting Up the Spreadsheet
The core idea behind this technique is to sum up task values while dynamically displaying emojis that correspond with those values. Here's a quick breakdown of how it works:
Summing Tasks – The spreadsheet is set up with names and task values. Using a simple SUM function, students can input numbers, and the total updates automatically.
Adding Emojis with Formulas – Instead of just showing numbers, emojis are introduced using a custom function. This makes the output more engaging.
The formula format follows:
=RT("emoji", CellReference)
In this example, Sherlock Holmes is represented with a magnifying glass emoji, and Gandalf gets a wizard emoji.
The Magic of Wrapping and Formatting
To ensure the emojis display correctly, the text wrapping feature is enabled. This allows the emojis to expand with the values, making the spreadsheet both functional and visually appealing.
By applying this approach, students not only practice math skills but also engage with a more interactive and personalized learning experience. Whether it's using magnifying glasses for problem-solving or wizards for powerful calculations, adding emojis brings a fresh perspective to working with data.
Why This Matters
Visualizing numbers with symbols and images has long been a powerful teaching strategy. By integrating emojis into spreadsheets, students can:
Enhance Comprehension – Associating numbers with images helps in better recall and understanding.
Boost Engagement – A simple sum function might be dull, but when linked with recognizable characters and symbols, it becomes an interactive learning experience.
Encourage Exploration – Students can experiment with different emojis, connecting math with creativity.
Try It Out!
If you're looking for a simple yet effective way to make spreadsheets more exciting, give this method a try. Whether you're working with young learners or just want to spice up data entry, emojis can be a game-changer.
Have any questions or ideas on how to expand this?
In today’s digital world, finding high-quality, ad-free reading experiences for students can be a challenge. Enter Vooks, a kid-safe streaming platform that transforms books into animated stories, making literacy engaging and accessible. Whether you're leading a whole-class read-aloud, supporting small-group instruction, or curating a digital library of animated books, Vooks offers a dynamic way to bring stories to life.
Getting Started with Vooks
Signing up for Vooks is a simple process. Educators can log in with their credentials and create a profile, but it’s important to note that a single account is for teacher use only—students would need their own accounts to access the platform independently. Once set up, you can personalize your library by selecting areas of interest and applying content filters as needed.
Exploring the Digital Library
The homepage provides an easy-to-navigate interface where you can browse featured books, new releases, and collections curated by themes or age groups. Each title includes a run time, allowing you to plan accordingly for read-aloud sessions. If a book catches your interest, you can mark it as a favorite or add it to a custom playlist—a handy feature for organizing books by unit, theme, or reading level.
Interactive Features for Educators
One of the standout aspects of Vooks is its built-in activity guides. Many books include downloadable PDFs with activities, discussion prompts, and extension ideas, making it easy to integrate literacy skills into lessons. Whether it’s a bedtime story, an SEL-focused book like I Am Not Scared, or a curriculum-aligned title, these resources support deeper engagement with the text.
Customizing the Experience
For educators looking to personalize the storytelling experience, an upcoming feature in Vooks allows you to record your own narration, replacing the default voiceover. This is an excellent way to add a familiar voice, model fluency, and provide a more personalized reading experience for your students.
Why Use Vooks in the Classroom?
Vooks is an excellent tool for: ✅ Engaging reluctant readers with visually appealing, narrated stories. ✅ Supporting listening comprehension through high-quality audio and animation. ✅ Providing a screen-time alternative that emphasizes literacy. ✅ Enhancing classroom routines, whether through morning read-alouds, literacy centers, or wind-down activities.
Final Thoughts
If you're looking for a safe, ad-free, and engaging way to bring books to life, Vooks is worth exploring. Whether you're introducing a new story, reinforcing comprehension, or simply making reading more interactive, this platform provides valuable tools for educators.
Want to see Vooks in action? Try it out and start building your own digital story collection today!
Hey everyone, this is Brad! Maybe you, a student, or someone you know needs text read aloud. Well, here’s one way to do it—using https://voicegenerator.io/!
How It Works
Paste Your Text – Simply drop in the text you want to be read aloud. You can expand the input box to see everything clearly.
Choose a Voice – The default Microsoft David voice might sound a bit robotic, but you can switch to other options, like Google US English, which tends to sound more natural.
Adjust Settings – Modify the pitch and speed to better match your preference.
Listen and Download – Play back the audio, tweak as needed, and download it for later use.
Here’s a quick example: The robotic voice? Not great. The Google voice? Much better! Once satisfied, just download and use the file as needed.
Give it a try and let me know if you have any questions. Thanks for reading, and take care!
Magic School AI for Writing Feedback A Teacher and Student Perspective
Today, we’re diving into Magic School and how you can use it for writing feedback. If you want more information, just type "Magic School" into my blog search, and you'll find plenty of resources. And as always, if you have any questions, let me know!
Setting Up Writing Feedback in Magic School
Launch a Room
Start by selecting Launch to Students and then Launch New Room.
Name it something simple like Writing Feedback.
Add the Writing Feedback Tool
You can add multiple resources, but for this example, we’re just using one.
Scroll down and select Add for writing feedback.
Customize the Experience
Keep or change the voice settings.
Paste in the writing prompt. (I grabbed an example from Chat.)
Upload a rubric—either one you created or generated through AI.
What Students See
Once set up, students will:
View the assignment and submit their responses.
Receive AI-generated feedback on areas of strength and growth.
Have the option to listen to the feedback, slow it down, or speed it up.
Engage in a back-and-forth conversation to refine their writing.
Encourage students to use a Google Doc first, then copy and paste their work into Magic School. If the feedback feels overwhelming, remind them they can ask the AI to simplify it.
Teacher View
On your end, you’ll:
See students' submissions and their interactions with the feedback tool.
Monitor flagged words (like “stealing”) to ensure appropriate use.
Track progress and provide additional guidance as needed.
Sharing the Room
You can invite students via:
Join URL
Google Classroom
Join Code
Once they join, they acknowledge the prompt, submit their writing, and receive feedback—all within a structured, interactive environment.
This is a fantastic way to empower students in the writing process while keeping feedback meaningful and personalized. Let me know if you have any questions. Thanks for reading!
Turn your QR code into catchy artworks with Qrtoon.com
Today, we're diving into how to take your QR code and add a little artwork to it. In the past, we've used Canva to create a customized QR code, and I’ll include a link in this post if you’re interested in trying that method.
For this approach, make sure you have an image already downloaded. Start by selecting Try Web App, enter your link, and hit Next. Then, choose the photo you’d like to incorporate. In my case, I used a picture of my son enjoying the snow the other day.
Let it process, and if you’re not happy with the first version, no worries—just regenerate it. You can keep generating until you find the one that works best. For my son, the second version wasn’t his favorite, but the third one was just right.
Once you’ve got the QR code you like, you can right-click to download it or use the built-in Download button. Open it up, scan it, and see how it looks!
If you have any questions, feel free to reach out. Thanks for reading, and take care!
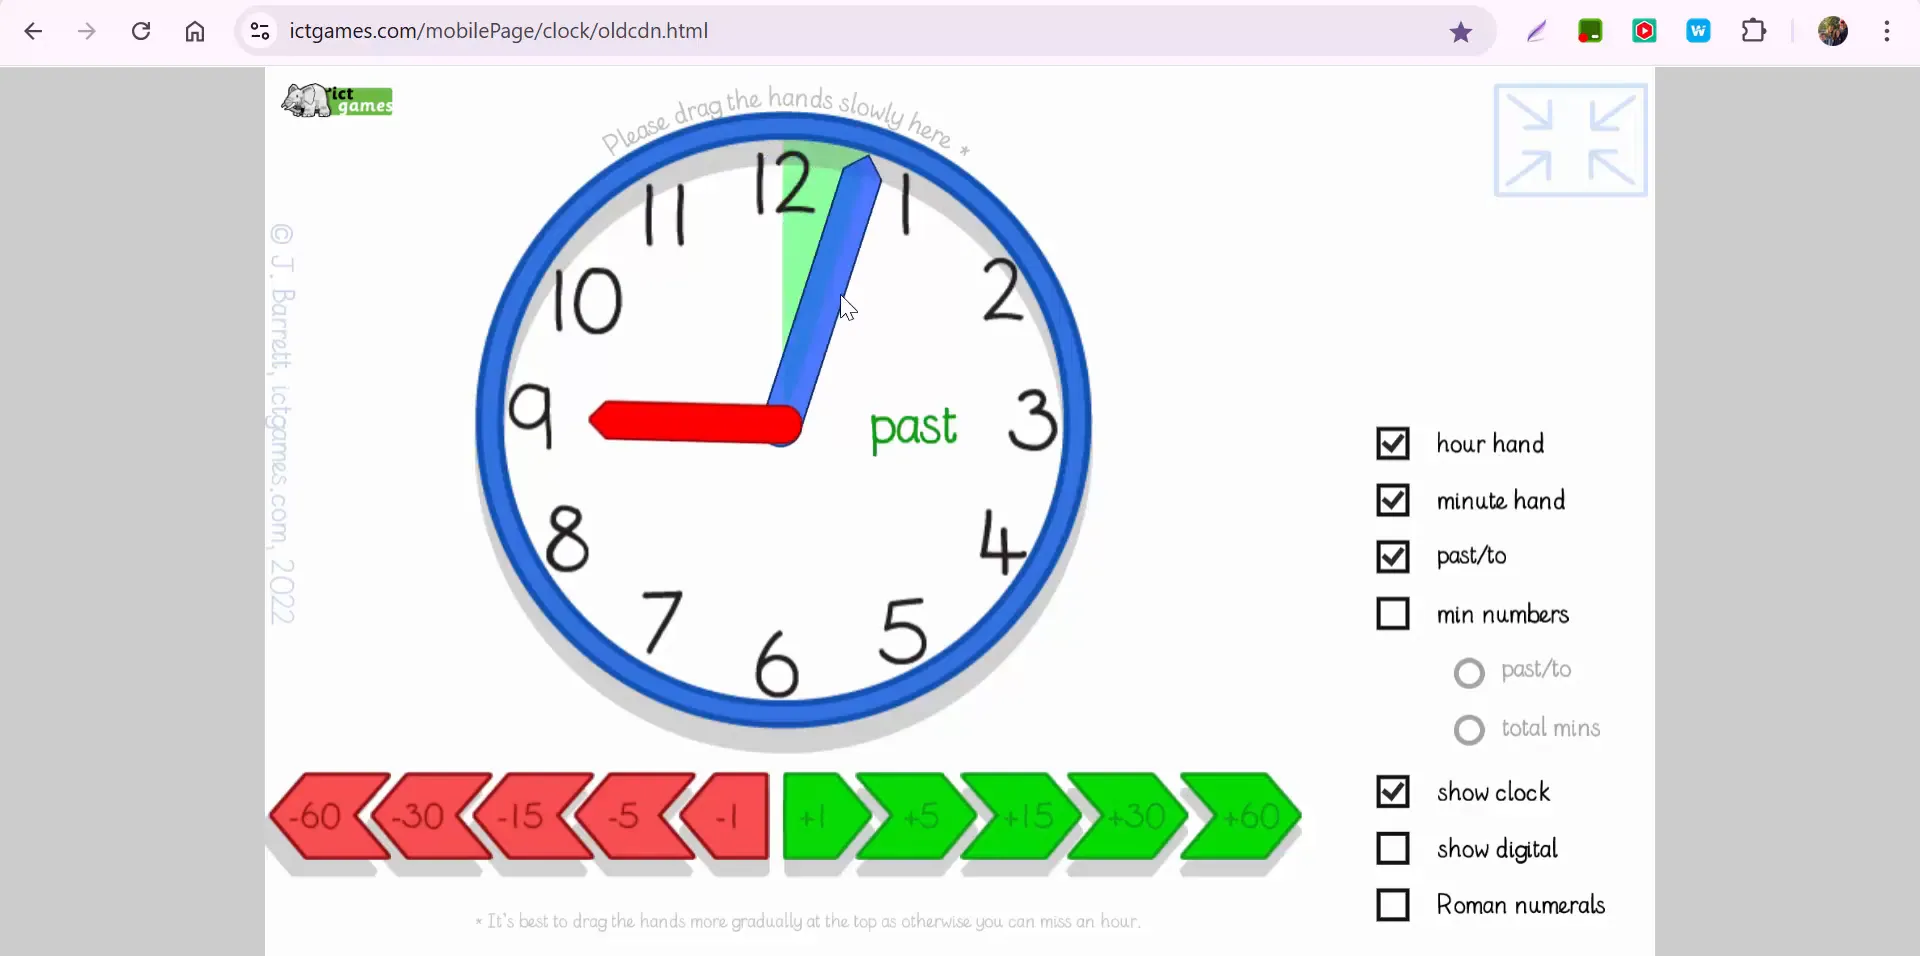
Hey there, it's Brad here! Today, we're diving into an exciting tool for teaching time - the Clock Demonstrator by ICT Games. If you've ever struggled to explain the intricacies of clock reading to your students, this tool is a game-changer. Let's explore how it can transform your lessons into a fun and interactive experience.
Getting Started with the Clock Demonstrator
First things first, let's get familiar with the interface. As you open the Clock Demonstrator, you'll notice it provides clear visuals of the hour and minute hands. The design is clean, minimizing distractions, so students can focus on learning how to tell time effectively.
One of the standout features is the ability to enable 'past' and 'to' options, which helps students understand the concept of time transitions. This feature is particularly useful when explaining how time is measured as it progresses through each hour.
Interactive Features for Enhanced Learning
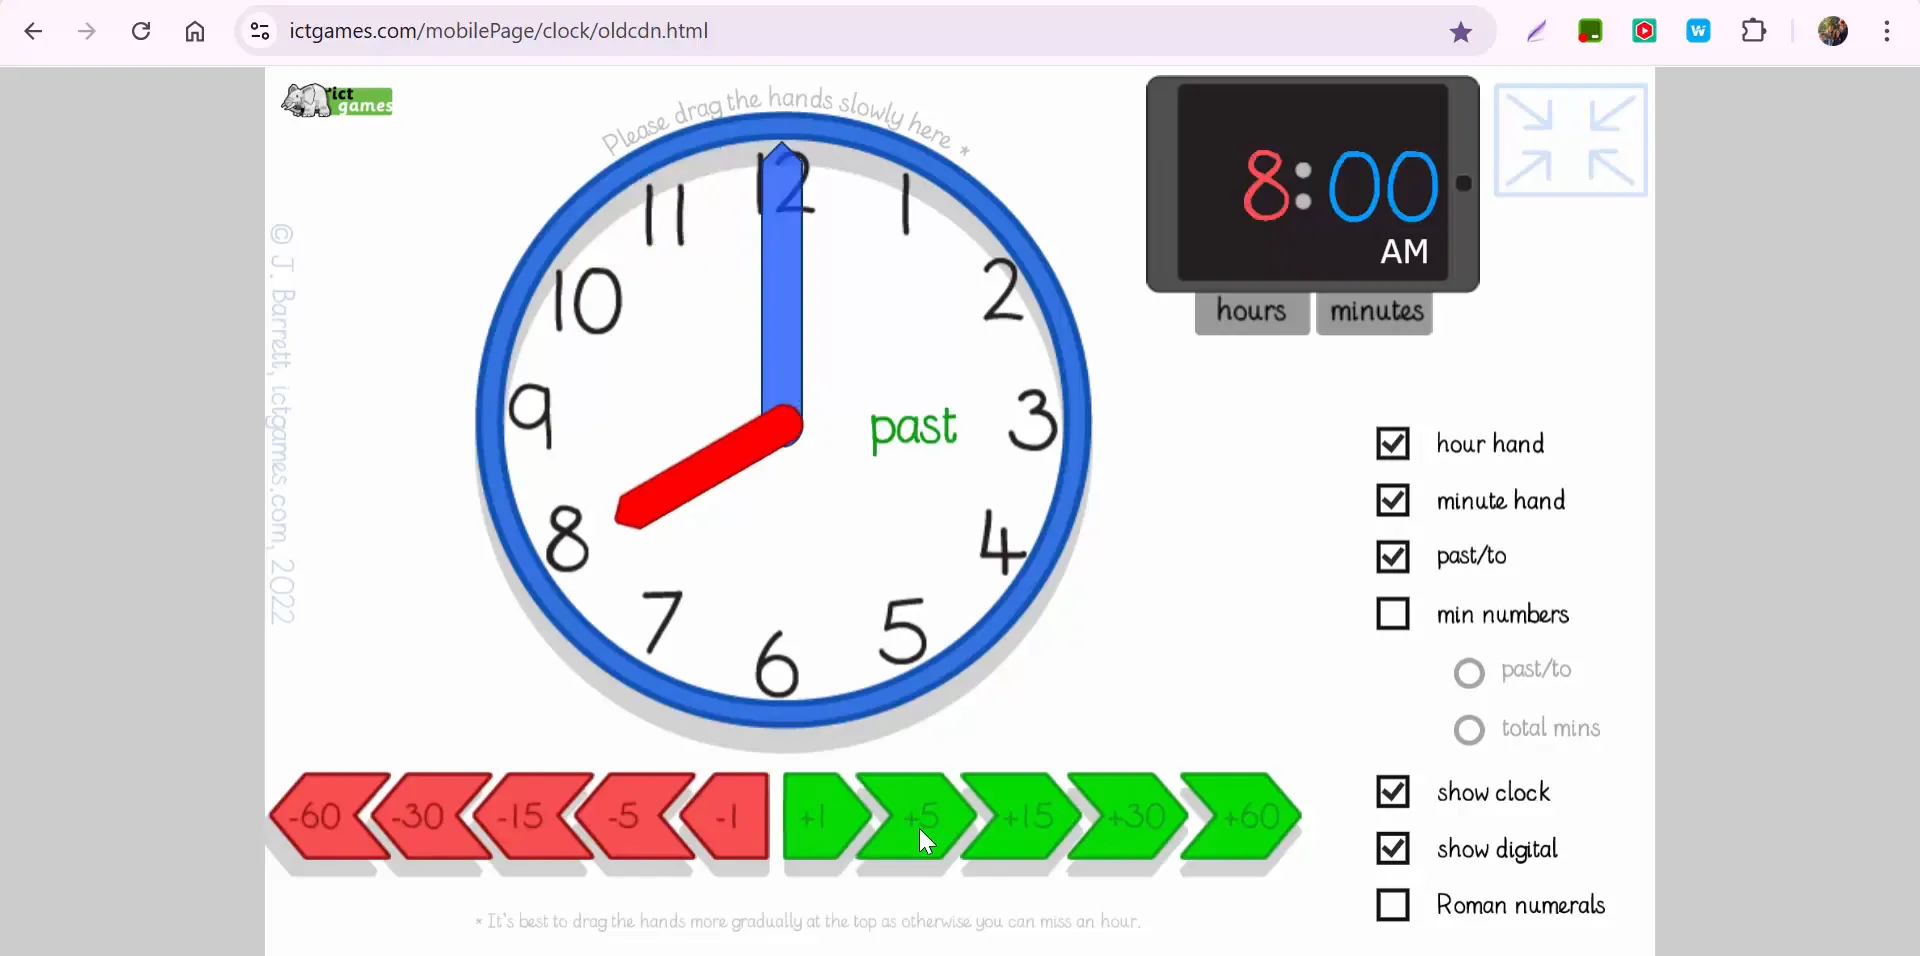
The Clock Demonstrator isn't just about showing the time; it's interactive and adaptable to your teaching needs. You can toggle between different settings to enhance the learning experience. For instance, you can show or hide the digital clock display, depending on whether you want to focus on analog time reading.
There's a nifty feature that allows you to add or subtract five-minute increments, making it easier for students to grasp the concept of time intervals without manually dragging the clock hands. This can be a huge time-saver and makes the learning process more intuitive.
Customizing Your Clock Demonstration
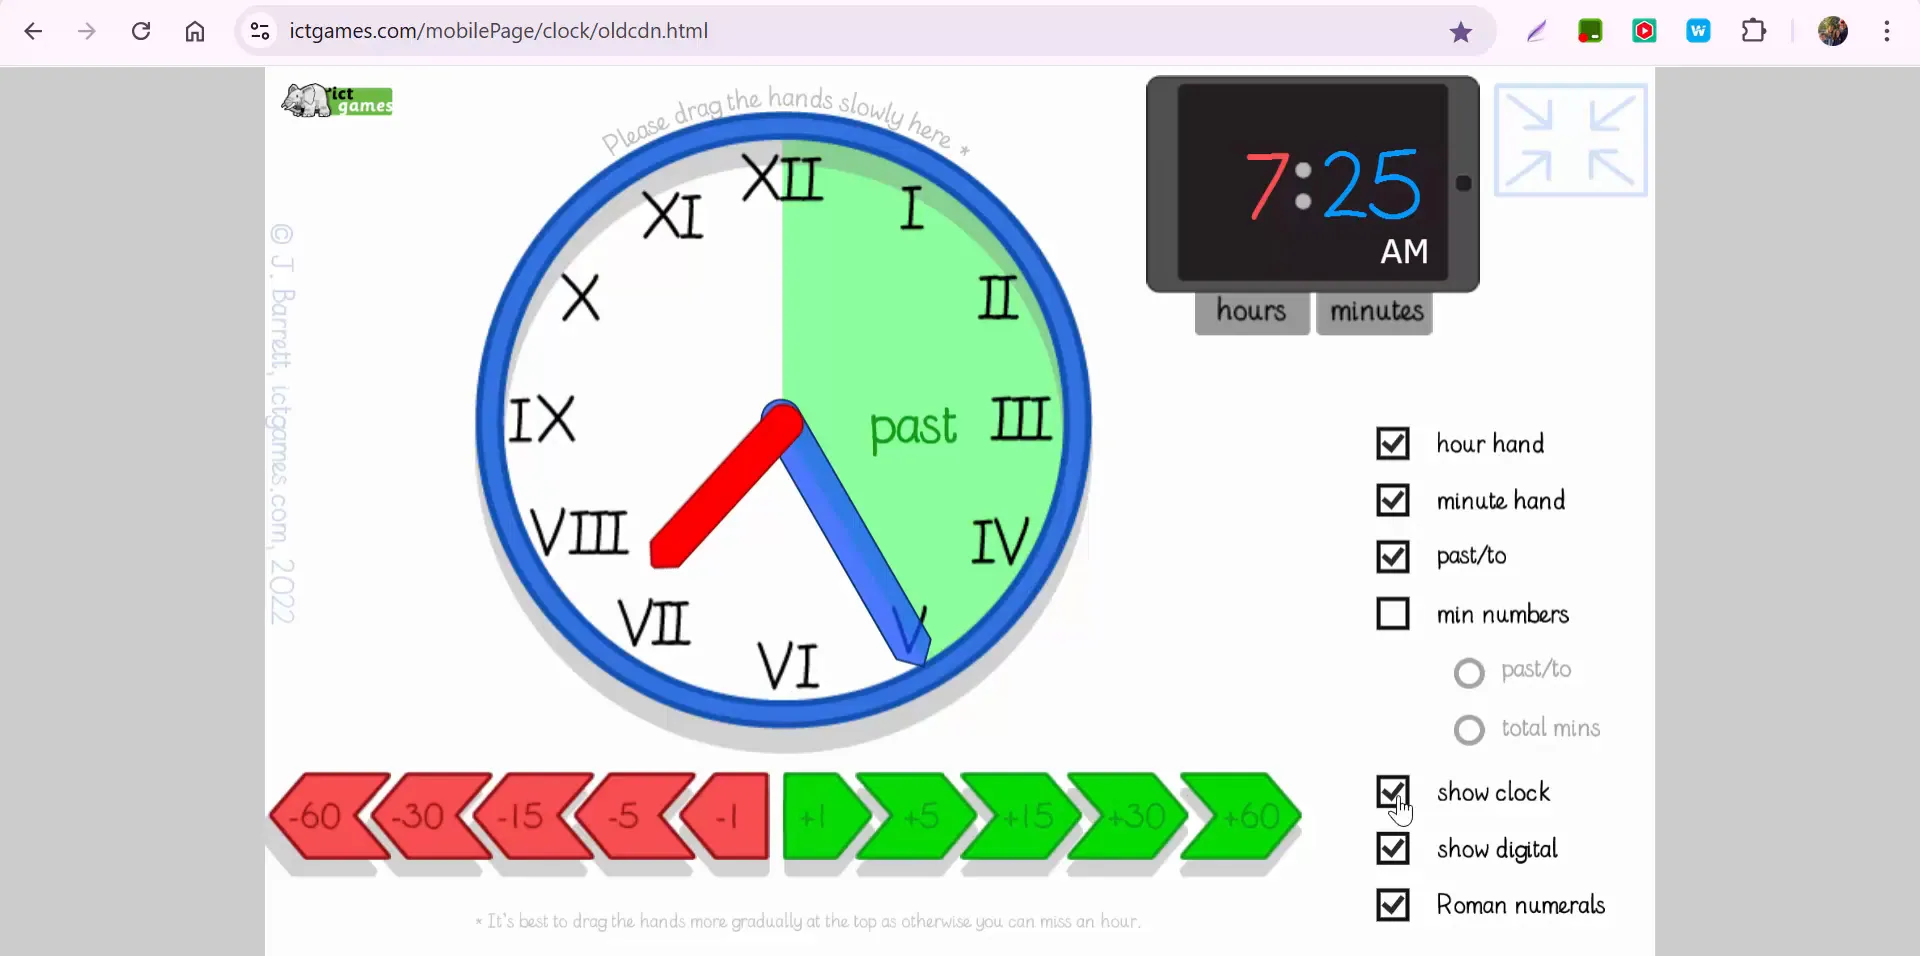
Customization is key in any educational tool, and the Clock Demonstrator delivers on this front. You have the option to display Roman numerals, which can be a great way to introduce historical timekeeping methods. If you prefer to stick with modern numerals, you can easily switch back.
For those who want to get into the nitty-gritty of time, there's an option to display total minutes. This feature is particularly helpful in teaching students how to calculate time differences and understand elapsed time in a practical context.
Solving Common Time-Telling Challenges
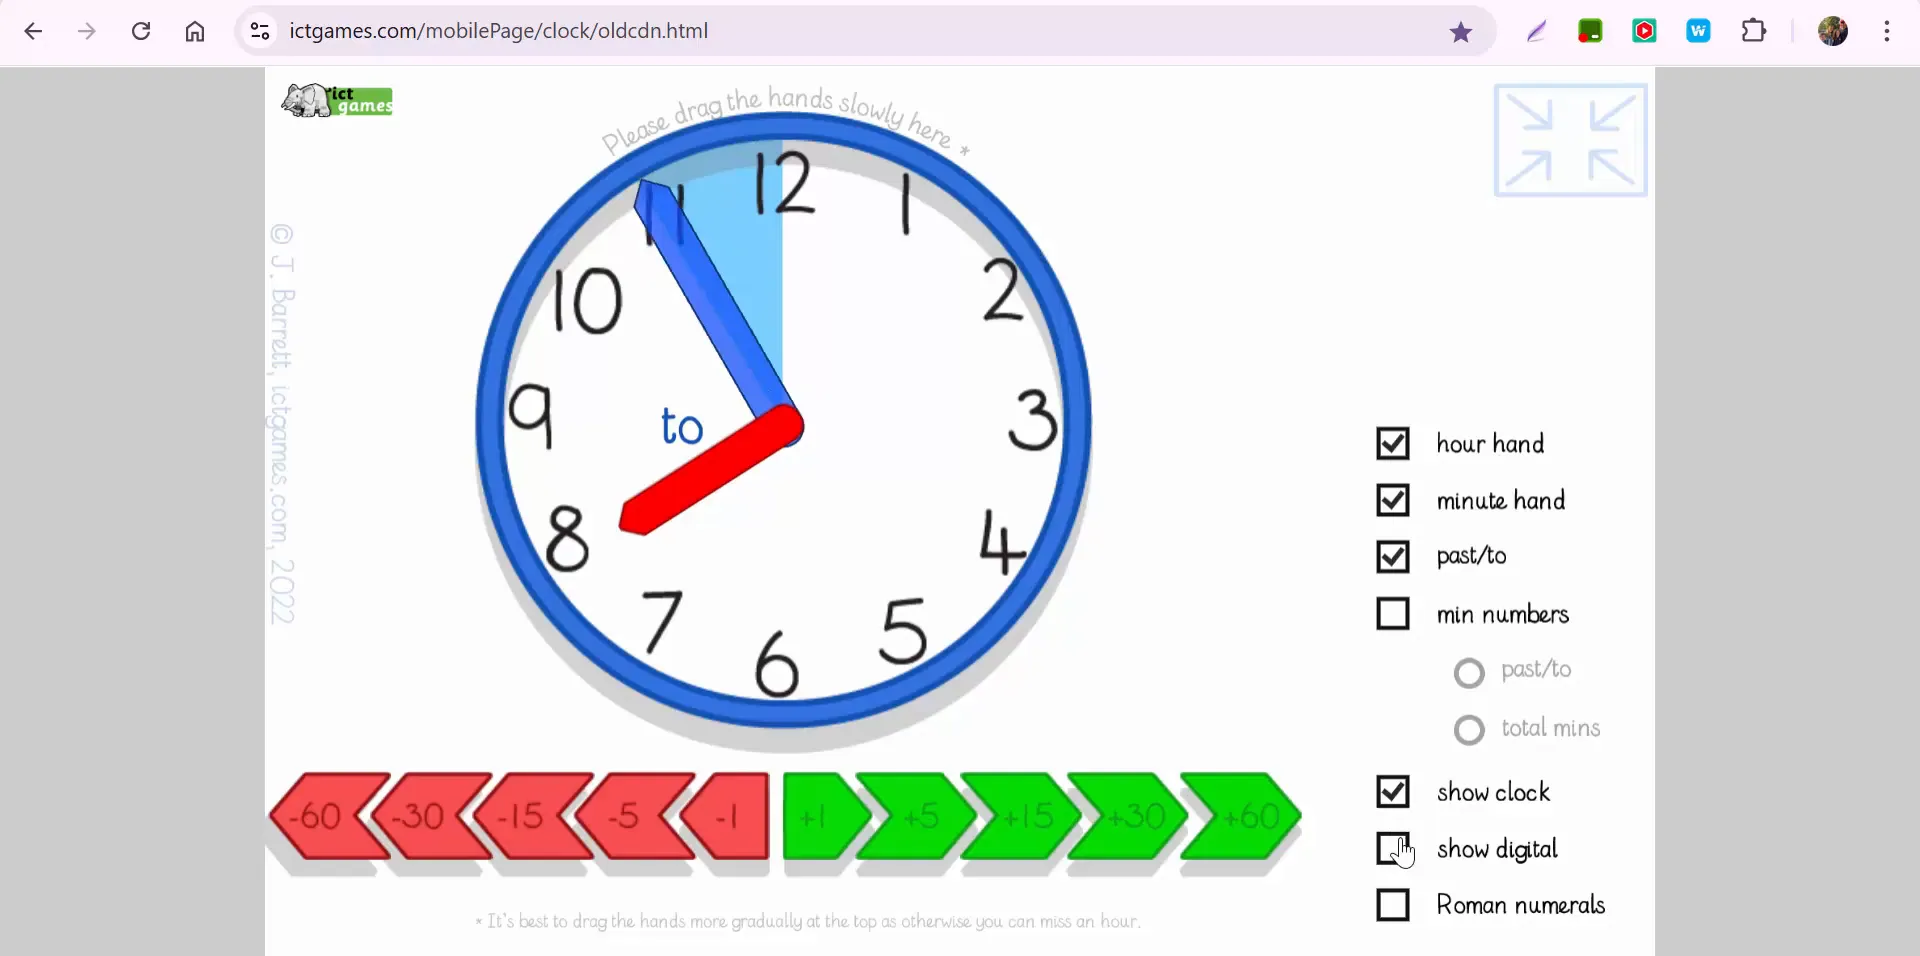
We all know that teaching time can come with its own set of challenges. One common issue is reading the clock when the hands are in the 'nines,' where visibility can be tricky. The Clock Demonstrator addresses this by allowing you to zoom in, ensuring students can clearly see the clock hands and understand the time accurately.
Additionally, the tool provides a seamless transition between past and future times, helping students visualize how time moves forward and how to calculate what comes next. It's a simple yet effective way to illustrate the flow of time.
Why the Clock Demonstrator is a Must-Have Tool
This tool is more than just a digital clock; it's a comprehensive teaching aid that enhances time-telling lessons. Whether you're teaching young learners or students who need a bit more practice, the Clock Demonstrator is versatile enough to meet various educational needs.
It's an excellent resource for remote teaching as well, allowing you to demonstrate concepts in a virtual classroom setting. With its user-friendly interface and interactive features, it's perfect for keeping students engaged and making learning fun.
Conclusion: Making Time-Telling a Breeze
In conclusion, the Clock Demonstrator by ICT Games is a fantastic tool for educators looking to simplify the process of teaching time. Its interactive features, customizable settings, and clear visuals make it an invaluable resource in any classroom.
If you have any questions or need further assistance, feel free to reach out. Thanks for tuning in, and happy teaching!
Time Matters: A Fun and Easy Clock Demonstrator
Today, I want to share a fantastic tool for teaching time in the classroom: the Clock Demonstrator from ICT Games. This tool is simple, effective, and packed with features that make learning about clocks fun and interactive for students.
Features That Shine
When you first open the Clock Demonstrator, you’ll notice its clean design and focus on key learning objectives. To make the experience even better, you can enlarge the display, removing any distractions and allowing students to clearly see both the hour hand and the minute hand.
What Makes It Great?
Past and To Enabled:
Students can easily see how times like "10 past" or "5 to" are represented on the clock. The dynamic visuals help solidify their understanding of these concepts.
One thing to note: around the nines, it can be tricky to see "to," but the feature is still a fantastic addition.
Interactive Controls:
Add or subtract 5 minutes with just a click—no need to drag the hands manually!
Want to jump back or forward by 30 minutes? You can do that too. Perfect for practicing elapsed time scenarios.
Digital and Roman Options:
Display the time digitally alongside the analog clock or hide it to challenge your students.
If you’re diving into history or a lesson on Roman numerals, you can even display those on the clock.
Total Minutes:
For a deeper understanding of how minutes accumulate, toggle the "Total Minutes" option. It’s a great way to connect the concept of hours and minutes.
Precision Control:
The demonstrator allows you to explore time differences and manipulate the clock with pinpoint accuracy, making it an excellent tool for discussions and demonstrations.
Why Use the Clock Demonstrator?
This digital clock is an amazing resource for helping students grasp the concept of time. Whether you’re focusing on telling time, elapsed time, or even Roman numerals, this tool has you covered. Plus, the interactive features ensure students stay engaged and excited about learning.
If you have questions about using this tool or want to share how it’s working in your classroom, feel free to reach out. Let’s make learning time a breeze!
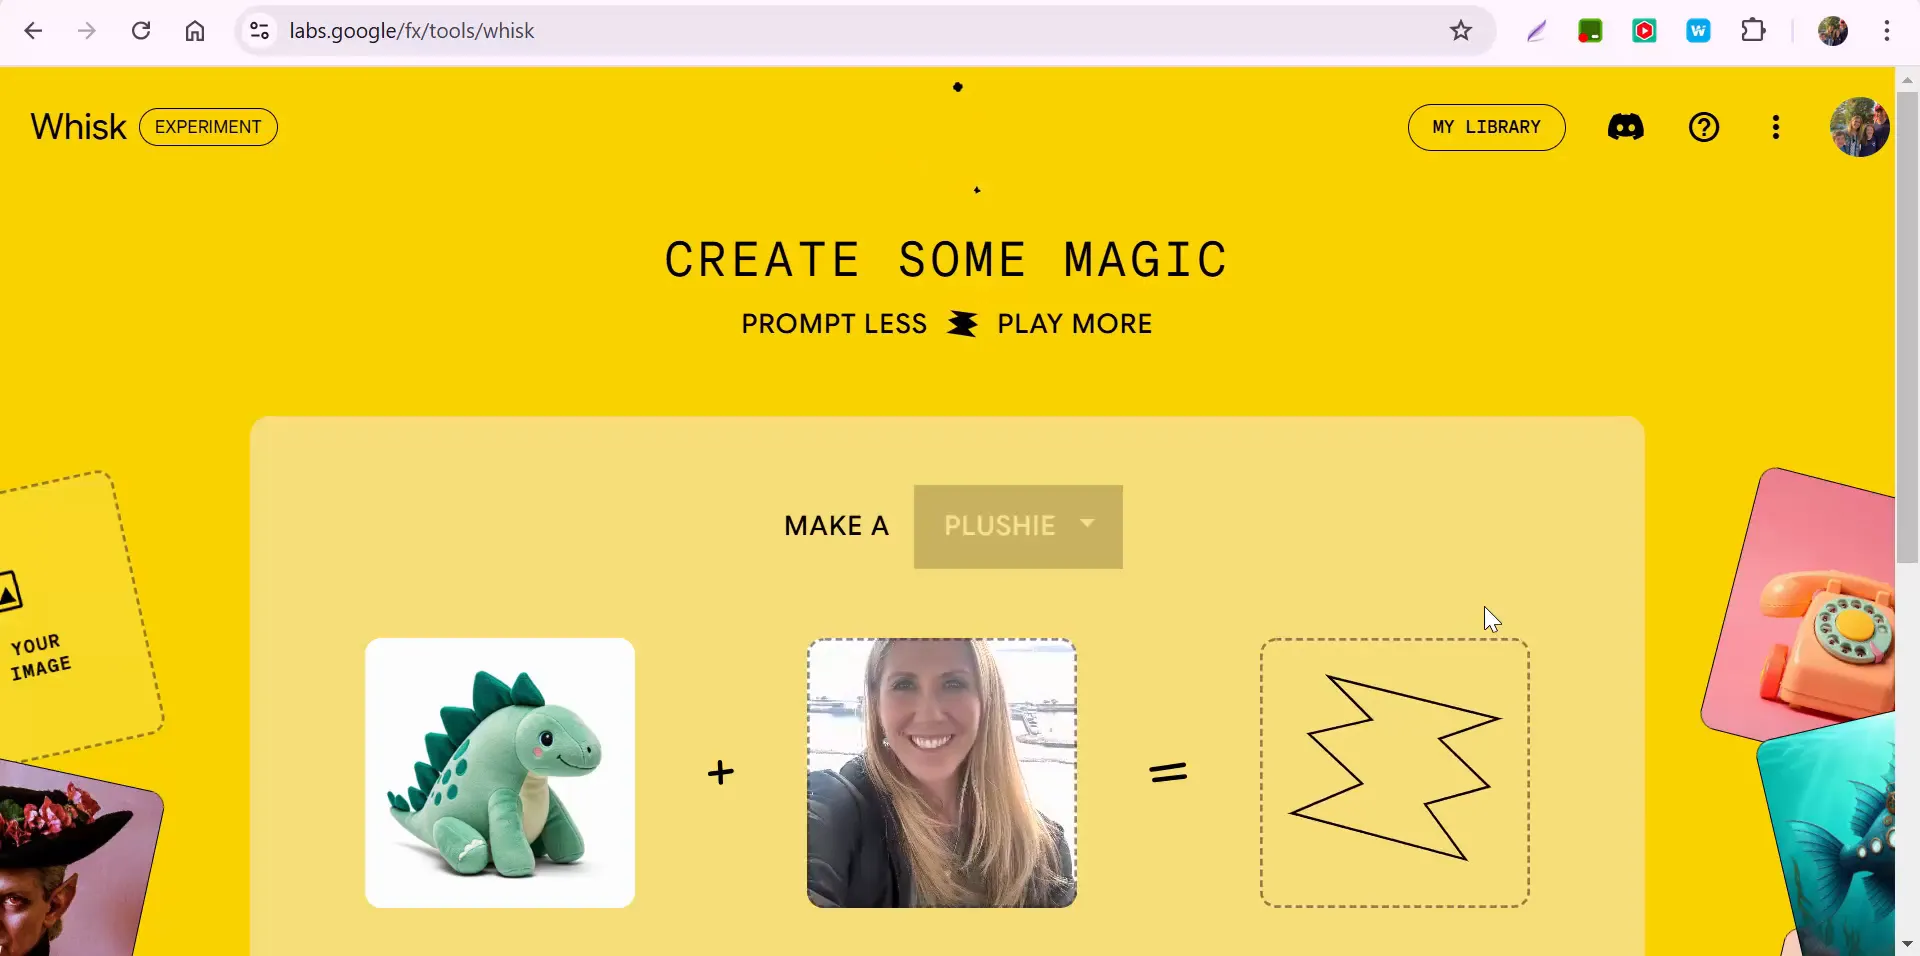
Welcome to the world of Google Labs, where innovation meets creativity! Today, we’re diving into an exciting experimental tool called Whisk. This platform encourages users to “prompt less and play more,” allowing for a unique blend of fun and creativity. If you’re curious about how to navigate this tool, share your creations, or learn more about its functionalities, you’re in the right place! Let’s jump right in and explore what Whisk has to offer.
What is Whisk?
Whisk is an experimental tool developed by Google Labs that allows users to create unique images based on existing photos. The idea is simple: you can use your photos as prompts to generate new, imaginative visuals. This tool is designed to inspire creativity, enabling you to express your ideas in a visually appealing way.
Getting Started with Whisk
To get started, head over to the Whisk platform. Once you’re there, you’ll notice a selection of options to choose from. The current presets include:
Sticker
Enamel Pin
Plushie
Let’s focus on creating a plushie. This option adds a playful touch to your creations, making it a popular choice among users.
Creating Your First Plushie
Once you’ve selected the plushie option, it’s time to choose an image to serve as your base. You can scroll through your images to find the perfect one. Here’s where the magic begins! After selecting an image, Whisk will generate a plushie based on your choice.
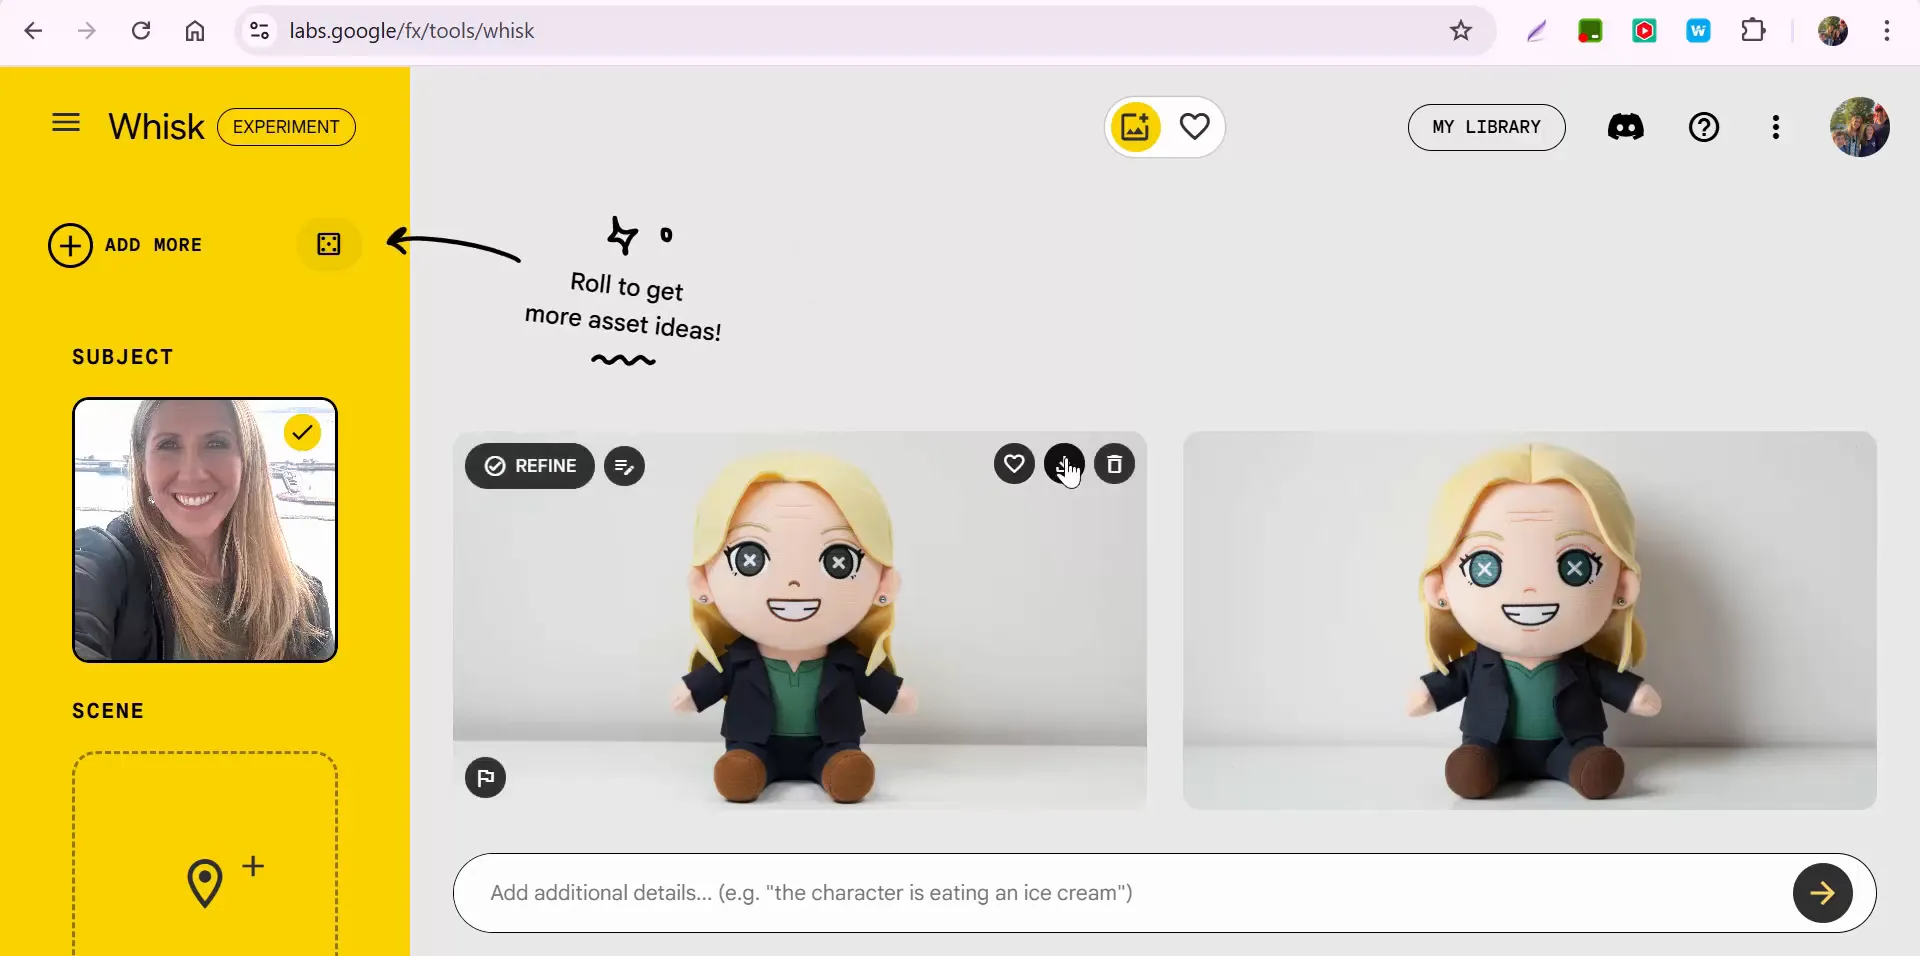
After a brief moment, your unique plushie will appear on the screen. Isn’t it amazing to see how the AI interprets your image and transforms it into something new? If you’re happy with the result, you can easily download it to save your creation.
Exploring Additional Features
Whisk offers more than just basic image creation. You can also add fun details to your plushie! For instance, you might want to specify that your character is enjoying a scoop of ice cream. This level of customization allows for a more personalized touch, enhancing your creative experience.
Adding Fun Details
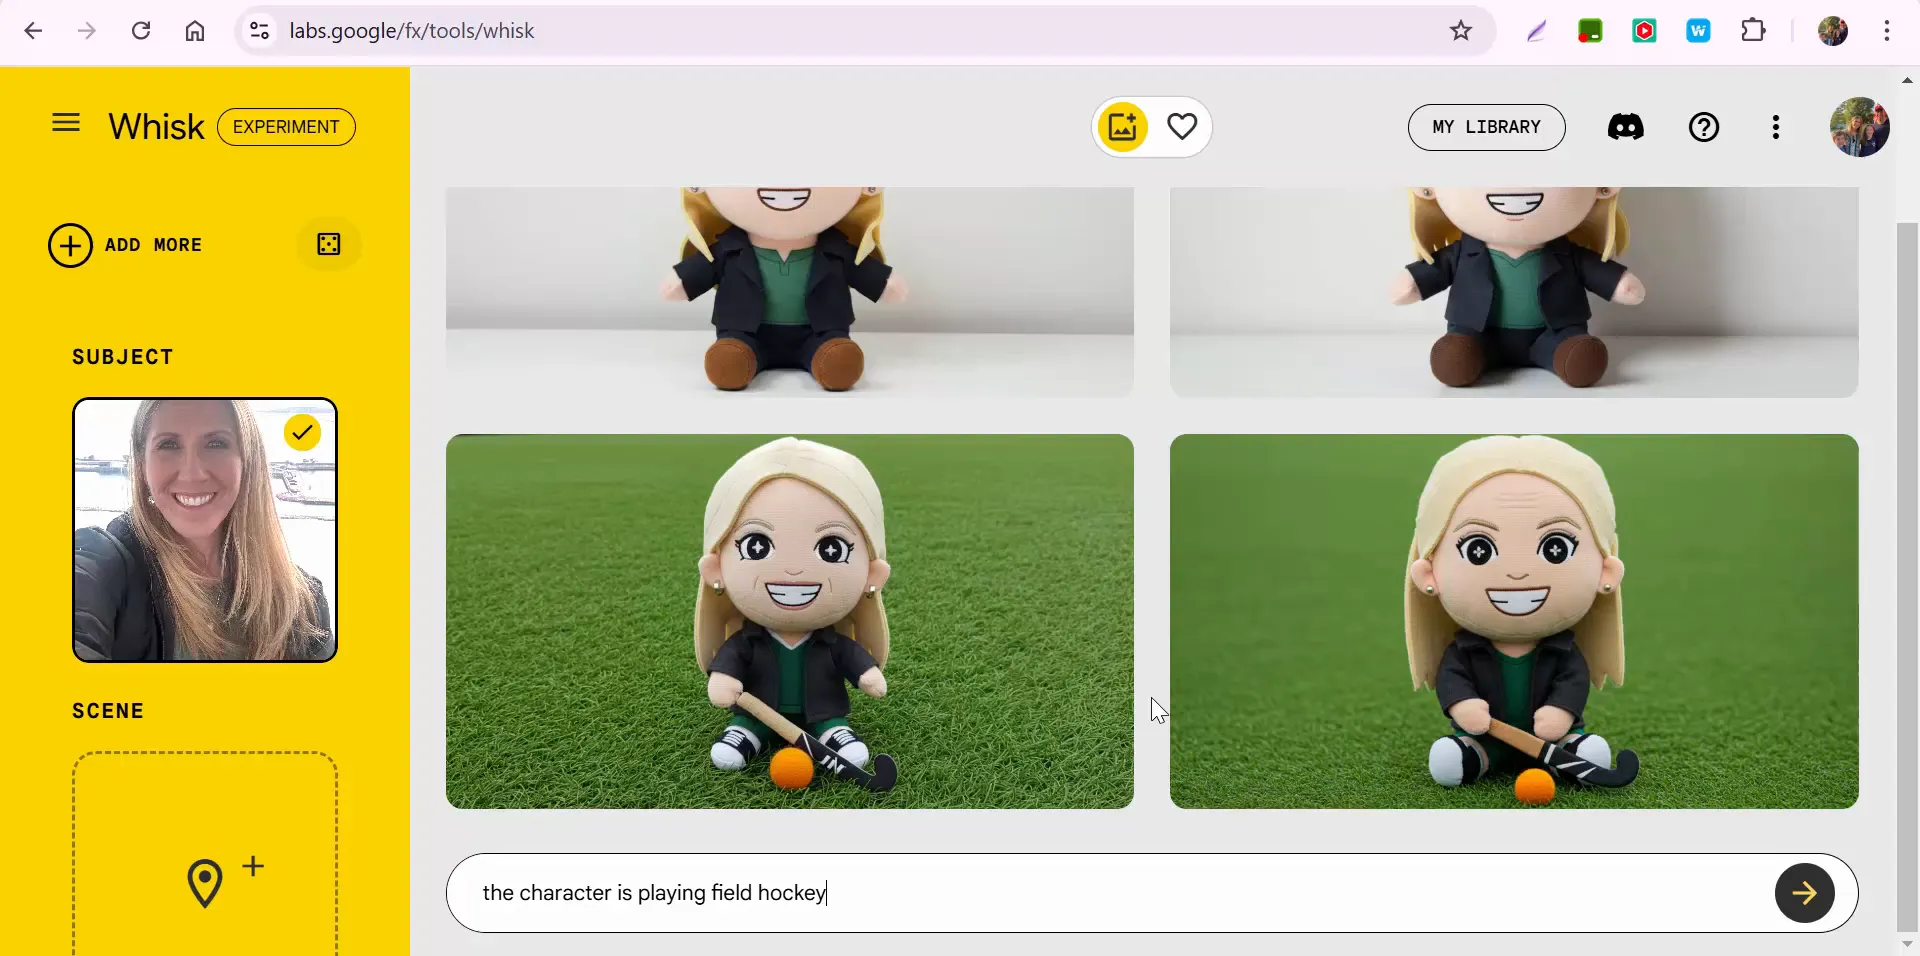
Let’s try adding a different action. What if our plushie character is playing field hockey? You can simply type in this new detail, and watch as Whisk generates a fresh version of your plushie, now engaged in a fun activity!
Why Use Whisk?
Whisk is not just about creating adorable images; it’s about exploration and playfulness. This tool encourages users to experiment with their ideas and see how AI can enhance their creative process. Whether you’re an artist looking for inspiration or simply someone who enjoys creating unique visuals, Whisk provides an engaging platform to unleash your creativity.
For Creatives and Hobbyists Alike
Whisk is beneficial for both professional creators and casual users. Artists can use it as a brainstorming tool, while hobbyists can enjoy the fun of creating personalized items. The potential applications are endless, from designing custom merchandise to generating unique art pieces for personal projects.
Sharing Your Creations
Once you’ve created your images, you might wonder how to share them. Whisk allows you to download your creations easily, enabling you to showcase your work on social media, or even print them out for physical use. Sharing your unique designs can help inspire others to explore their creativity through Whisk as well.
Final Thoughts
Whisk is a delightful experiment from Google Labs that invites users to play and create with AI-powered tools. Whether you’re making plushies, stickers, or enamel pins, the process is designed to be fun and engaging. So why not give it a try? Dive into Whisk, unleash your creativity, and see what unique designs you can come up with!
If you have any questions or need further assistance, feel free to reach out. Happy creating!
Thanks for joining me on this exploration of Google’s Whisk experiment. Until next time, take care and keep playing with your creativity!
Exploring Google’s Whisk Lab: Prompt Less, Play More!
Hey everyone, it’s Brad here! Today, I’m diving into a fun and creative tool from Google Labs called Whisk, where the motto is to prompt less and play more. If you're curious to explore it yourself, I'll include a link in this blog post and in the YouTube description. The official site provides tutorials and answers to common questions like how it works and how you can share your creations.
Let’s take a quick look at Whisk in action!
Trying Out Whisk
When you open Whisk, you’ll see a variety of creative options to choose from. For this example, I decided to check out the Plushy option. After selecting an image, Whisk quickly generated a fun plushy design.
Once your creation is ready, you have the option to:
Download and save your design
Try different formats like enamel pins
Customize your creation with additional details
Adding Creative Details
One of the cool features of Whisk is the ability to add extra details to your character. For instance, I tried adding a scenario where the character was playing field hockey, and the results were fantastic! It's such an easy and enjoyable way to bring your ideas to life.
Give It a Try!
If you're looking for a creative way to experiment with design and customization, Whisk is definitely worth checking out. Whether you want to create a plushy, a pin, or something else, it’s all about having fun with minimal effort.
Got questions? Feel free to reach out. Thanks for reading, and happy creating!
Welcome to this exploration of WordSift.org, a powerful tool that helps visualize text data in a way that is both informative and engaging. Unlike some other tools that have fallen out of favor, WordSift remains a reliable option for anyone looking to analyze text effectively. Whether you're a teacher, student, or just curious about the words in a piece of writing, WordSift can help you sift through the noise and uncover valuable insights.
What is WordSift?
WordSift is a web-based tool designed to create word clouds, providing a visual representation of text. By inputting a body of text, users can quickly identify the most frequently used words, giving insight into the main themes and ideas present. This capability is especially useful for educators, writers, and anyone involved in text analysis.
Getting Started with WordSift
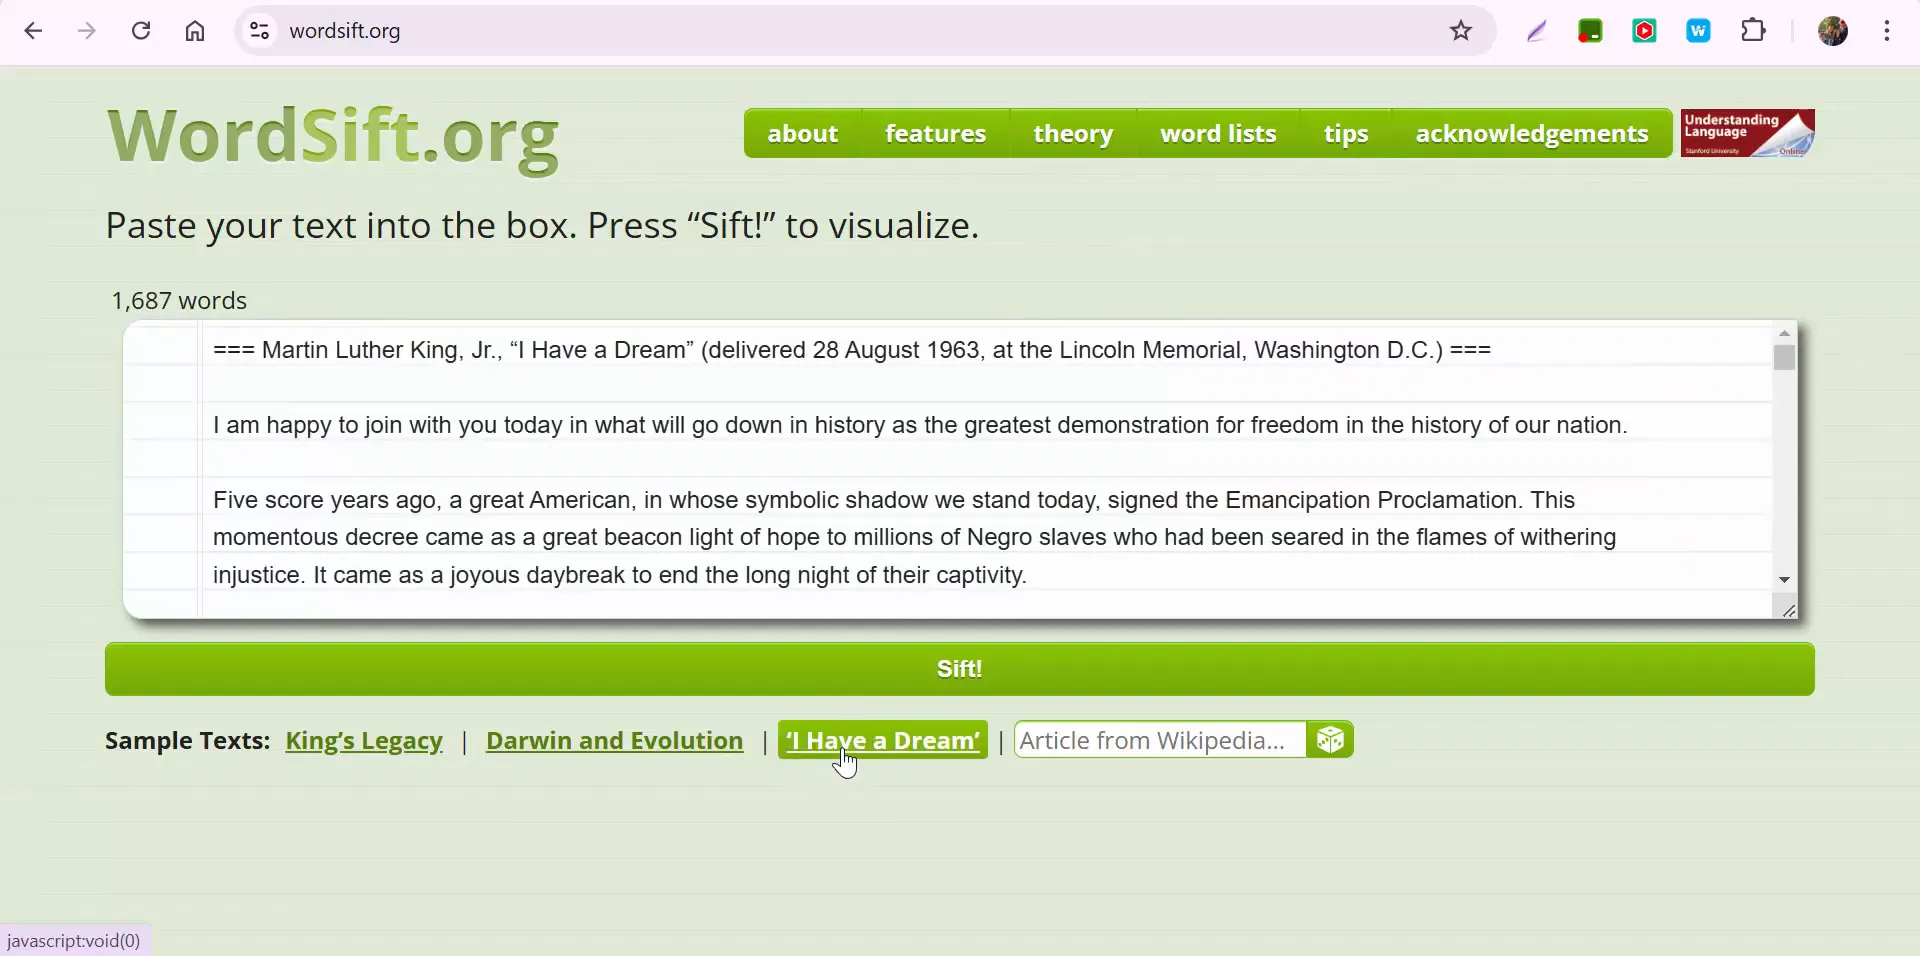
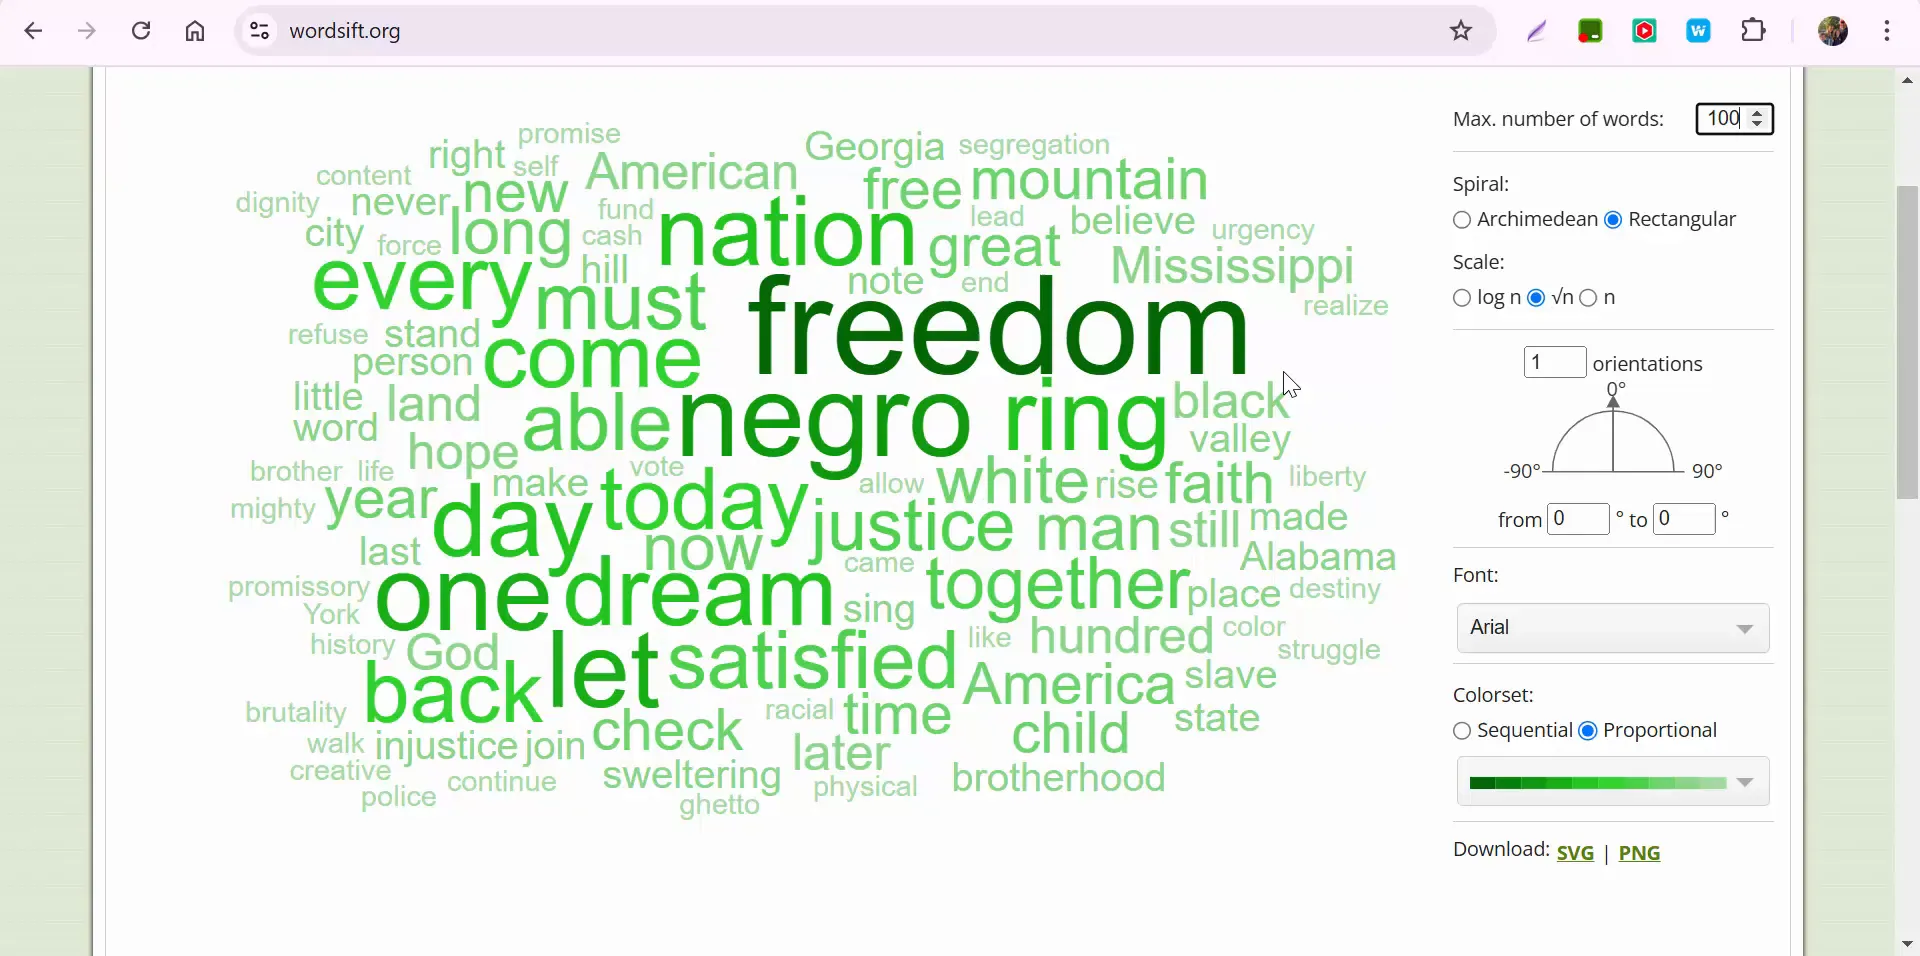
To begin using WordSift, simply visit the website and paste your text into the input box. For demonstration purposes, let’s use Martin Luther King Jr.'s iconic "I Have a Dream" speech, which contains 1,687 words. Once you input the text, select the "sift" button to generate your word cloud.
Understanding the Output
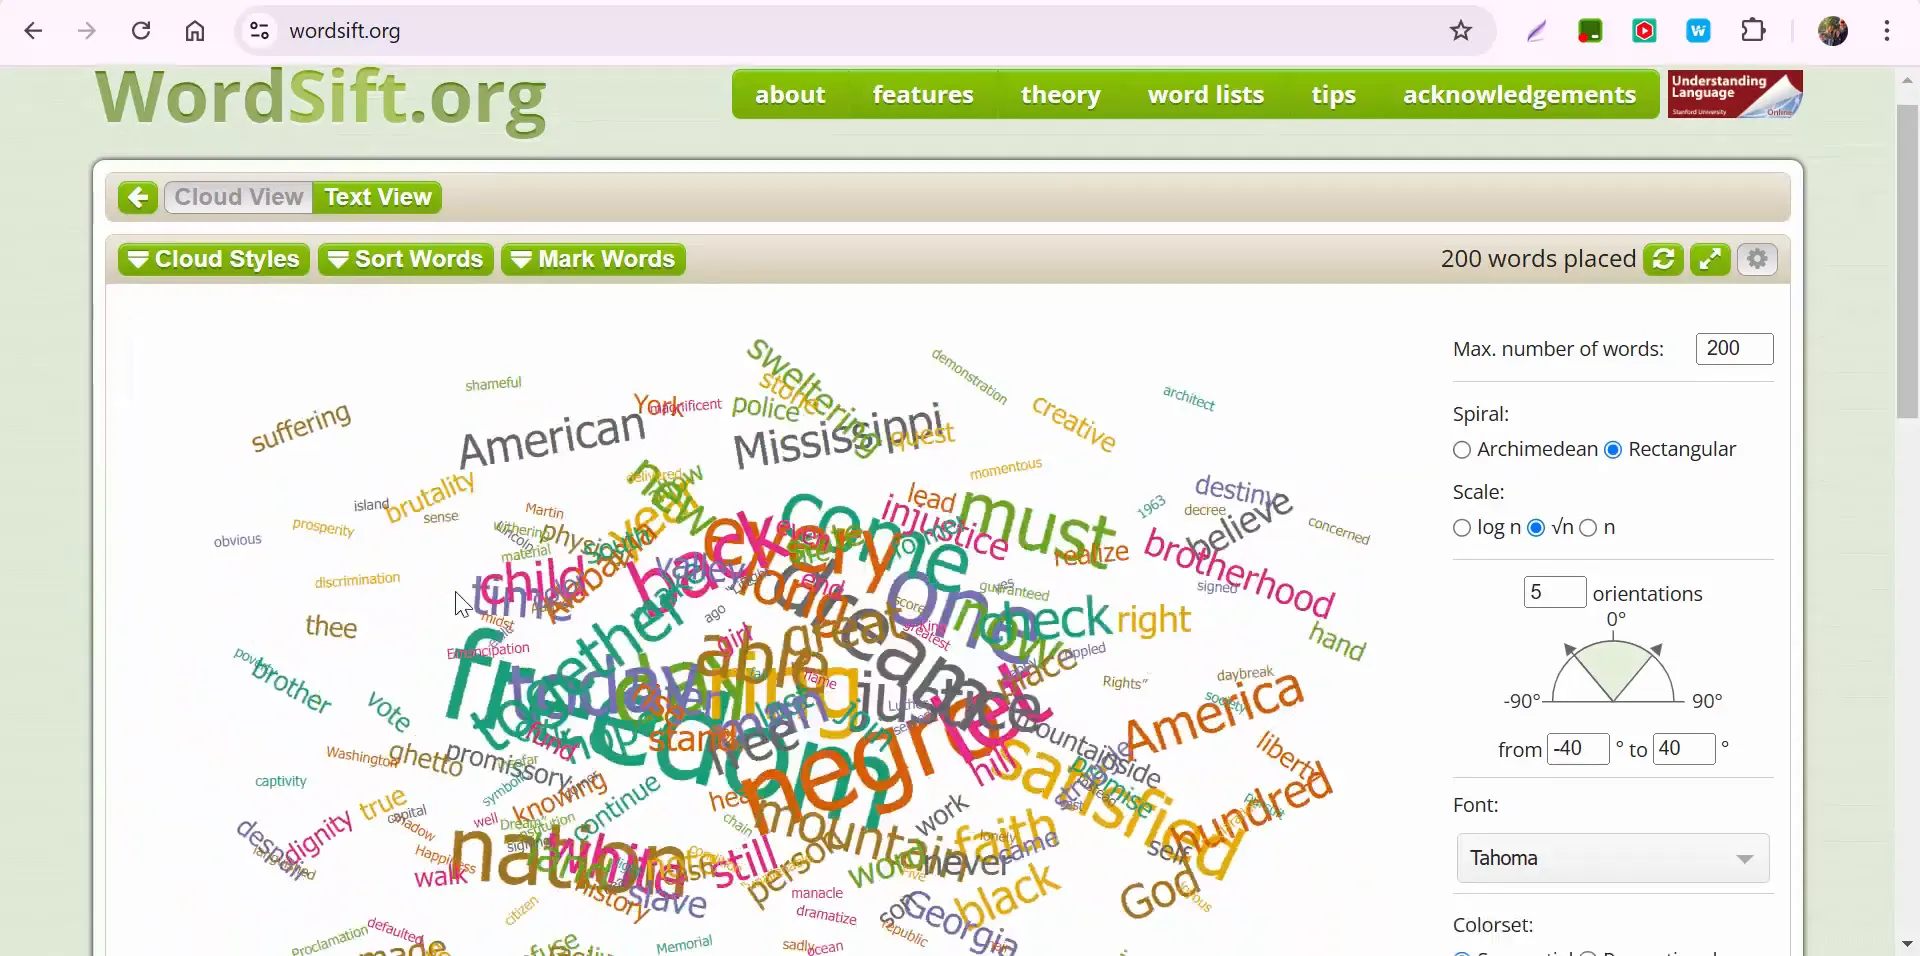
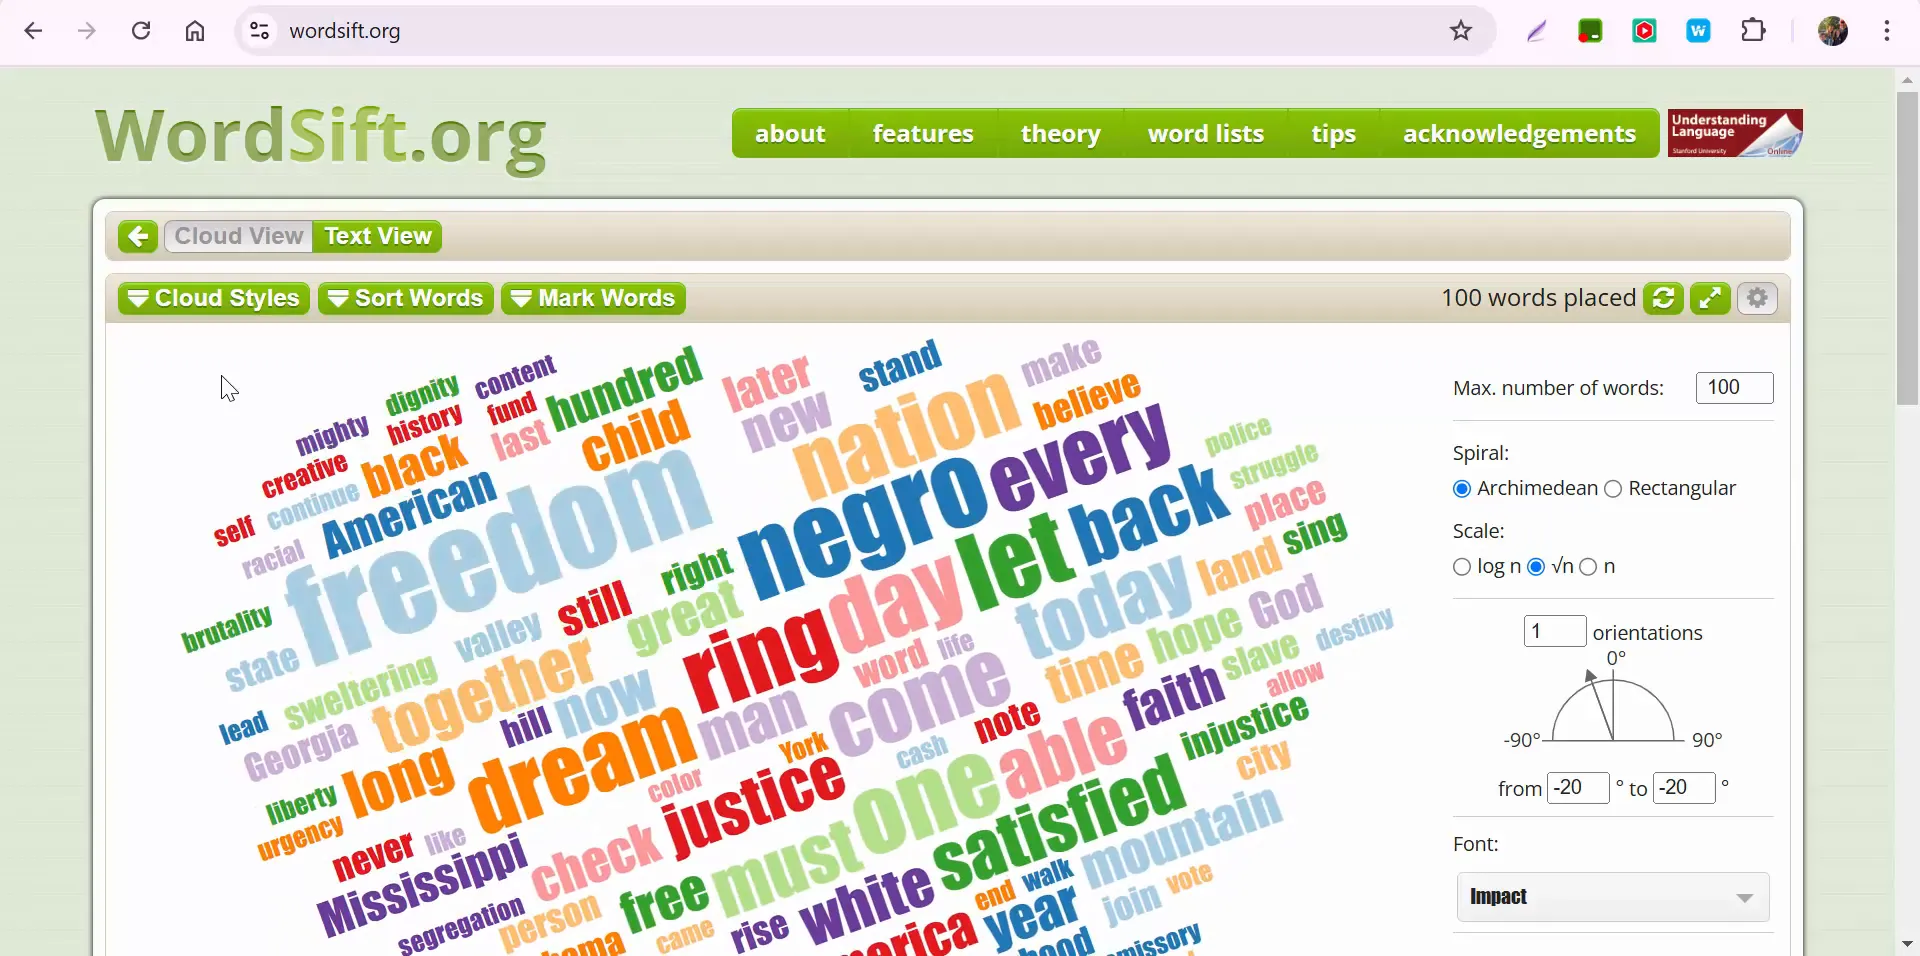
After sifting through the text, you'll see a visual representation of the most frequently used words. Initially, WordSift limits the output to 50 words. However, if you want to analyze more words, you can adjust the settings. Click on the "cloud settings" option, increase the word count to 100, and hit enter.
Customizing Your Word Cloud
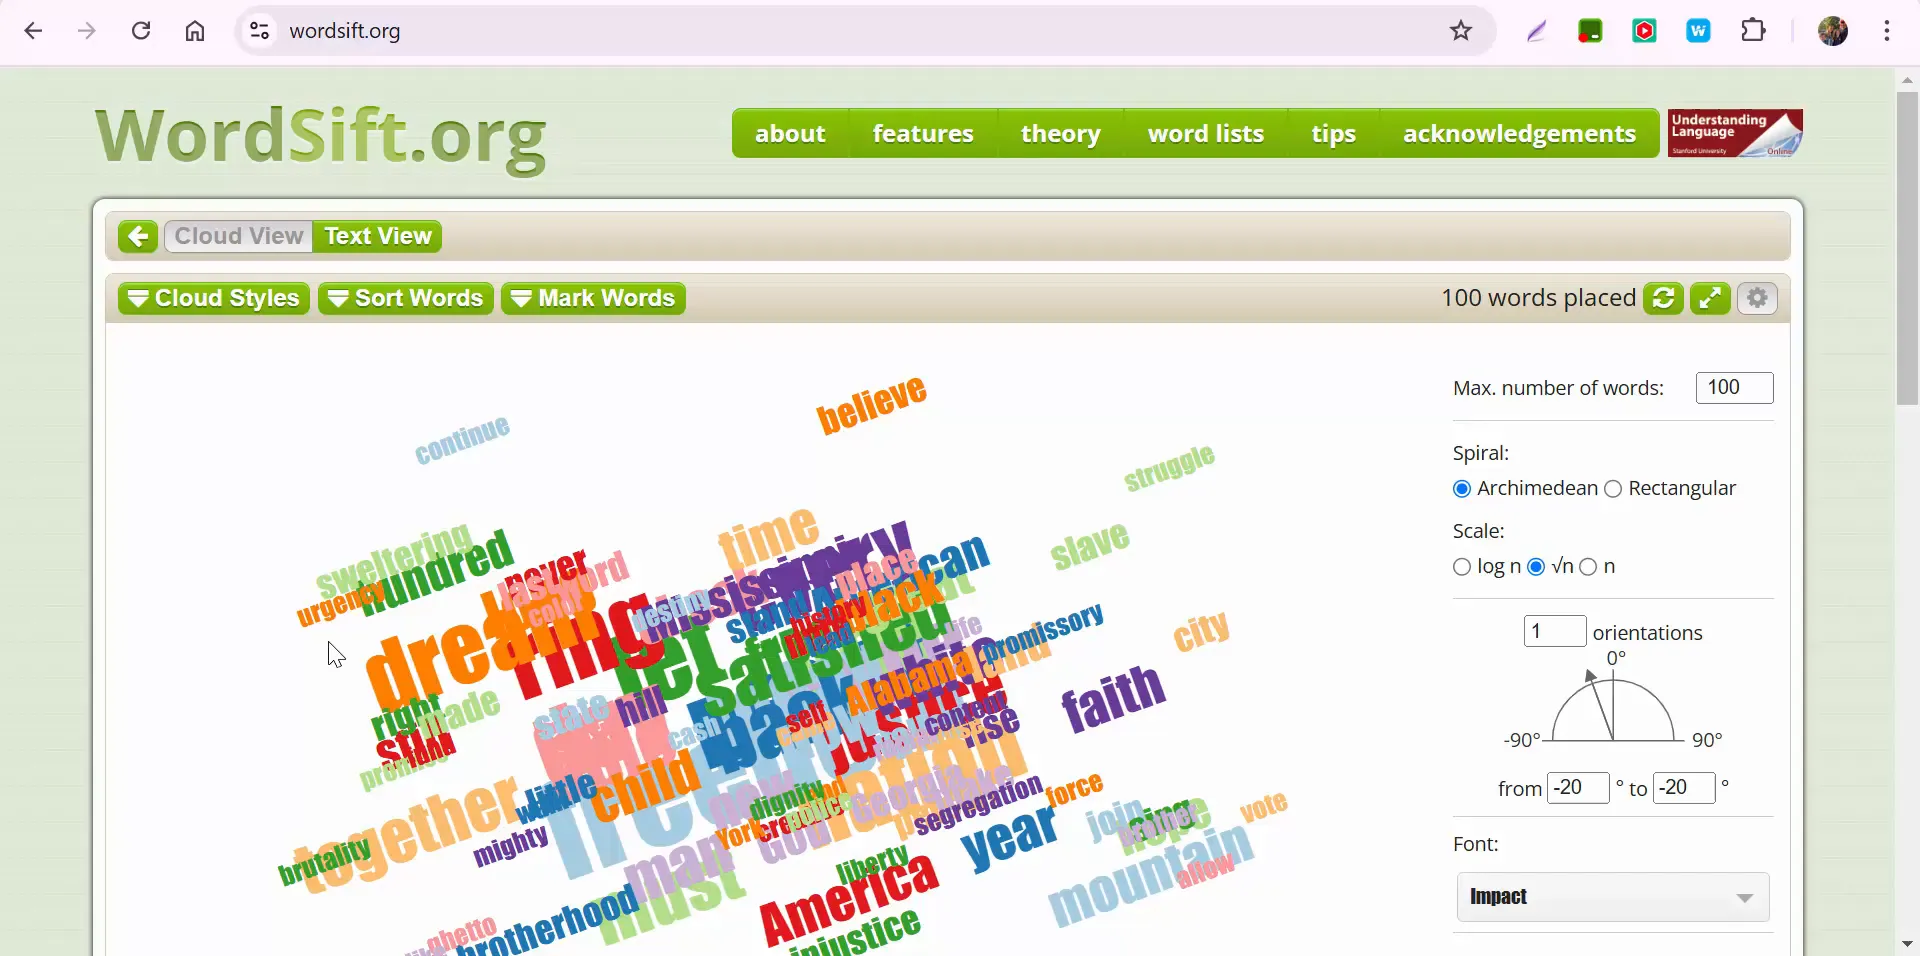
WordSift offers various customization options to enhance your word cloud. You can change the font, layout, and color scheme to suit your preferences or the needs of your audience. After making adjustments, click on "redraw the cloud" to see your updated visual.
Exploring Cloud Styles
In addition to basic settings, WordSift provides different "Cloud Styles." You can hover over each style to see how many times words have been used in the text. This feature allows you to explore the text's richness and frequency of word usage further.
Filtering and Sorting Options
Another excellent feature of WordSift is its sorting options. You can sift the words alphabetically, both from A to Z and Z to A. This is particularly helpful if you're looking for specific terms or want to see the text's structure in a different light.
Why Use WordSift?
WordSift stands out for several reasons:
Visual Learning: The word cloud format makes it easier to grasp complex texts and identify key themes at a glance.
Eliminating Redundancy: By visualizing word frequency, you can pinpoint overused words and phrases, helping you refine your writing.
Engagement: The interactive nature of the tool encourages exploration and deeper understanding of the text.
Educational Value: Teachers can use WordSift to help students analyze literature, speeches, and other texts effectively.
Practical Applications
WordSift can be applied in various contexts:
Education: Teachers can use it to analyze student essays or literature, helping students understand the importance of word choice and theme.
Content Creation: Writers can visualize their drafts to identify repetitive language and refine their work.
Research: Researchers can analyze large bodies of text, such as articles or reports, to uncover trends and themes.
Public Speaking: Speakers can use WordSift to analyze their speeches, ensuring clarity and impact in their messaging.
Conclusion
WordSift.org is an invaluable resource for anyone looking to unlock insights from text. Its user-friendly interface, coupled with powerful visualization capabilities, makes it a must-try tool for educators, writers, and researchers alike. Whether you're analyzing a famous speech or your own writing, WordSift can help you see the words in a whole new light. If you have any questions or need assistance, don’t hesitate to reach out!
Thanks for exploring WordSift with me. Happy sifting!
Exploring Word.org: A Powerful Tool for Visualizing Text
Hey everyone, it’s Brad! Today, let's dive into Word.org, an excellent tool for creating word clouds. If you've used similar sites in the past that no longer work, you’ll be happy to know that this one does—and it’s packed with features that make it a valuable resource for both educators and students.
Why Use Word Clouds?
Word.org is fantastic for several reasons, such as:
Visualizing Text: It offers a quick way to see which words appear most frequently in a given passage.
Identifying Overused Words: If you're working on refining writing, word clouds help spot overused terms.
Aesthetic Appeal: Sometimes, it’s just fun to create visually appealing representations of text.
Getting Started
To show how Word.org works, I tested it with famous speeches, like the Gettysburg Address. When pasting text, keep in mind that fewer than 300 words are not recommended for optimal visualization. Instead, I opted for Martin Luther King Jr.’s I Have a Dream speech, which contains 1,687 words—perfect for analysis.
Once you input your text, simply hit the Sift button. This generates a word cloud based on your input, and as you scroll down, you’ll find additional insights and data.
Customizing Your Word Cloud
One of the great features of Word.org is its flexibility. By default, it displays the top 50 words, but you can easily adjust this. Here’s how:
Change Word Count:
Select Cloud Settings, adjust the word count (e.g., increase it to 100), and hit Enter to update the visualization.
Modify Fonts & Styles:
Want a different look? Explore various fonts to personalize your word cloud.
You can also choose different Cloud Styles and see how often words appear by hovering over them.
Sorting Options:
Arrange words alphabetically, either A to Z or Z to A, for a different perspective on your content.
Final Thoughts
Word.org is an easy-to-use, versatile tool that can help students, writers, and educators analyze and present text creatively. Whether you're looking to identify key themes in a speech, avoid redundancy in writing, or simply create a fun visual, it’s definitely worth exploring.
If you have any questions, feel free to reach out. Thanks for reading, and happy word clouding!
Hey everyone! I’m Brad, and today we’re diving into Google's latest experiment, Music FX. This innovative tool allows you to unleash your creativity and bring fresh musical ideas to life in a fun and interactive way. Whether you're a seasoned musician or just someone looking to explore the world of music, Music FX has something for everyone. Let's jump in!
Getting Started with Music FX
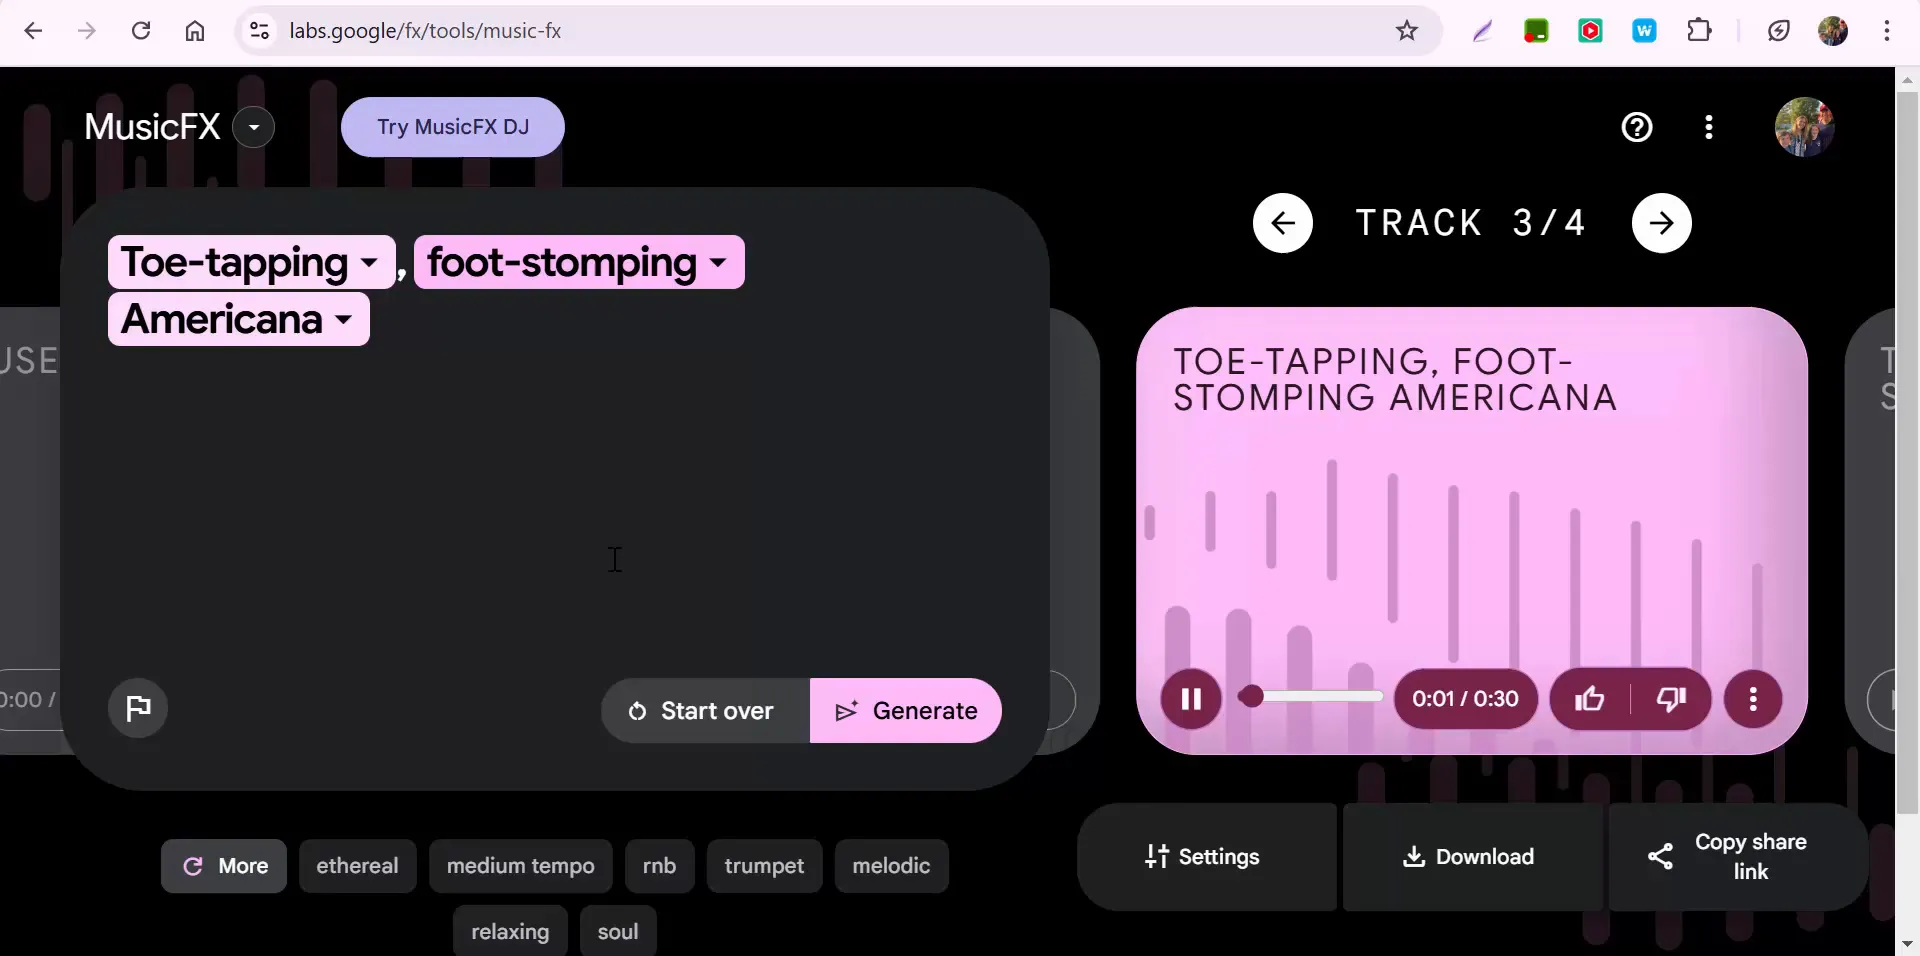
When you first open Music FX, you'll be greeted by a simple interface that invites you to start creating right away. Are you feeling lucky? You can use the “I’m feeling lucky” button to generate a random musical idea. Or, if you have something specific in mind, you can type in your own prompt. For instance, let’s try typing in “toe-tapping foot-stomping Americana.”
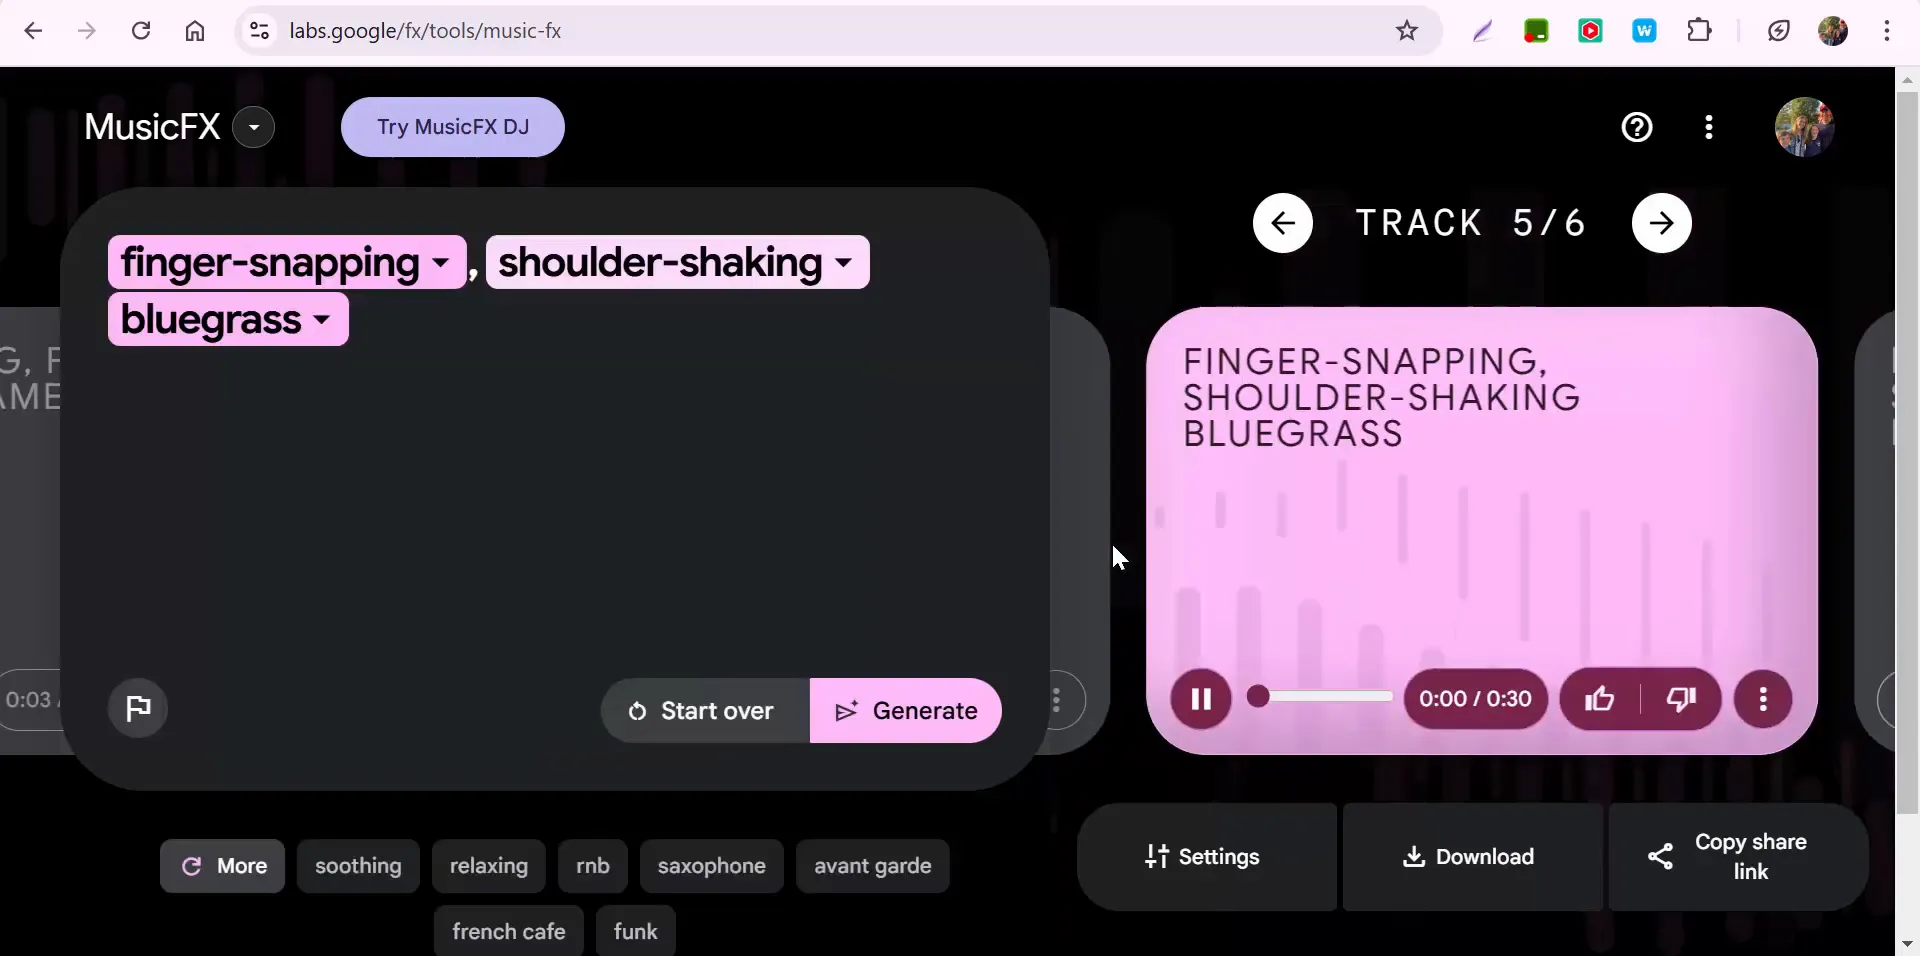
Customizing Your Musical Experience
Once you input your prompt, you can pause the music anytime to make adjustments. Feel like adding a little rhythm? You can switch it up to something like “finger snapping” or “shoulder shaking.” Let’s change our style to “bluegrass” and generate a new track!
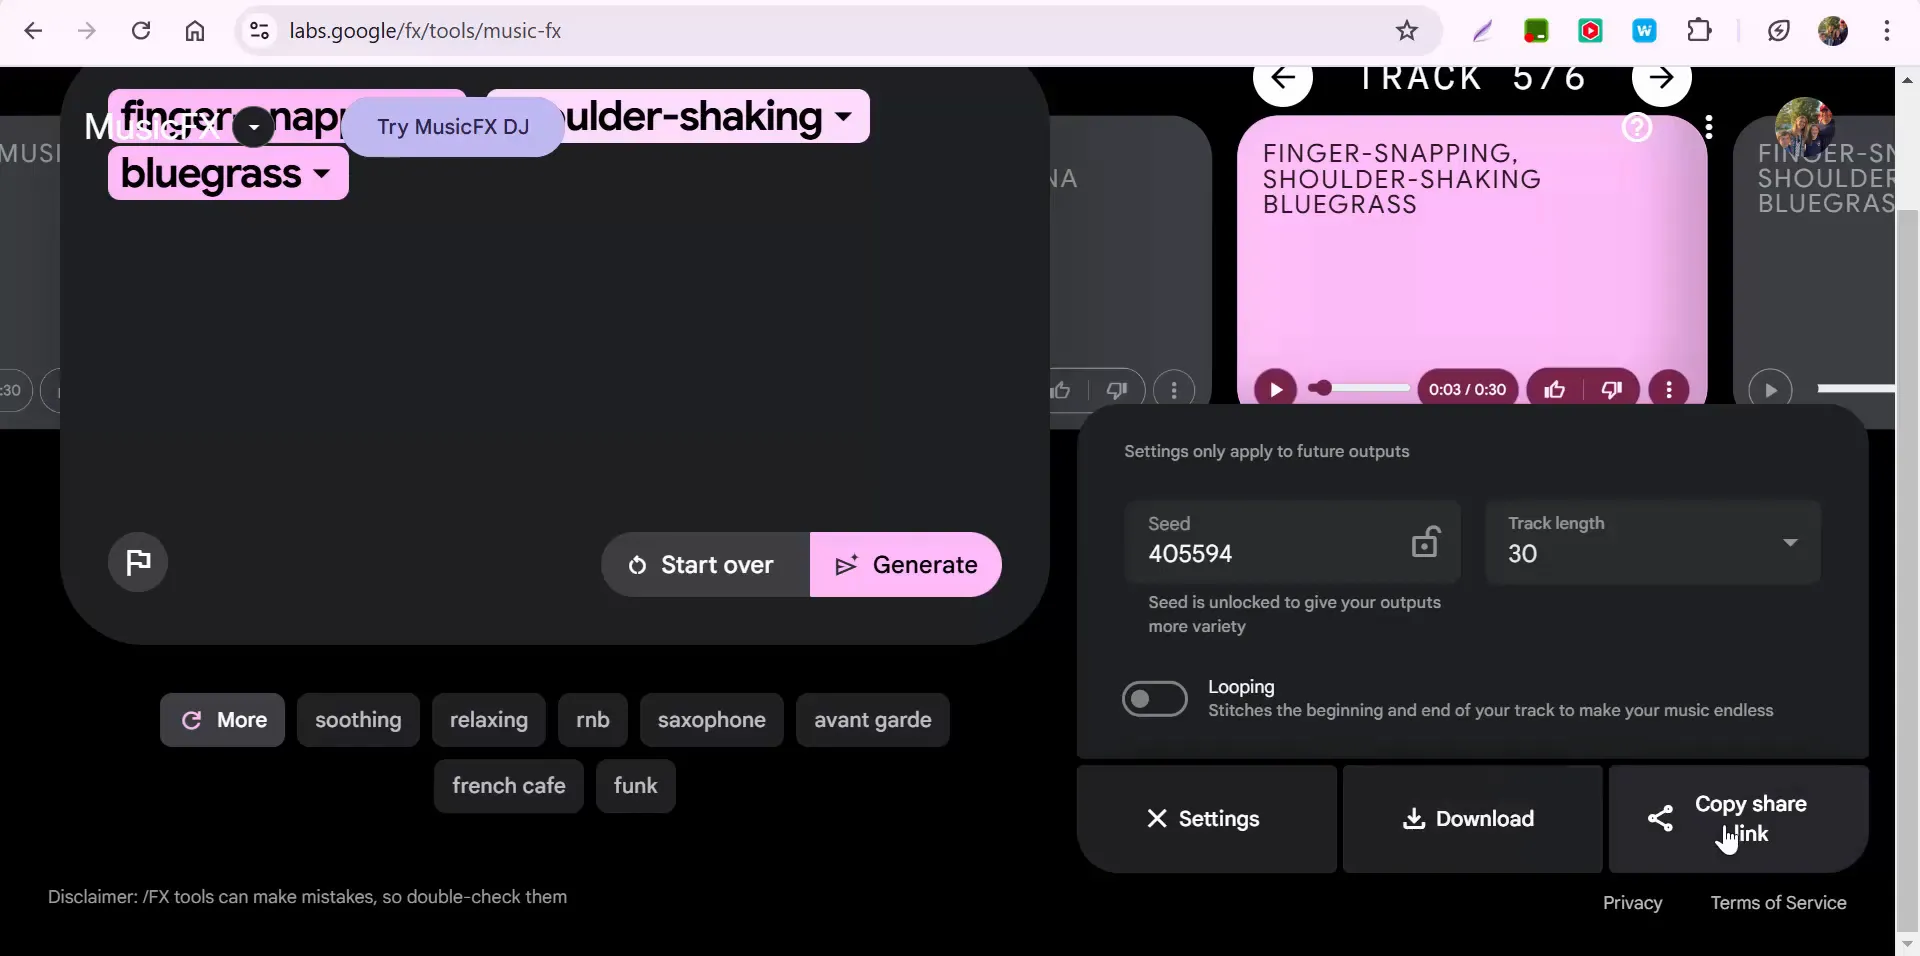
Exploring Features and Settings
After generating your music, you’ll notice several options available to enhance your experience. If you love what you hear, you can give it a thumbs up. You can also copy the prompt for future use or flag the output if it doesn’t meet your expectations. There are settings to adjust the track length, allowing you to create longer pieces or loop sections of the music for repetitive play.
Sharing and Downloading Your Creations
Music FX makes it easy to share your creations with friends. You can download your track or copy a shareable link to send it out. This feature is perfect for collaborating with others or just showcasing your musical prowess on social media.
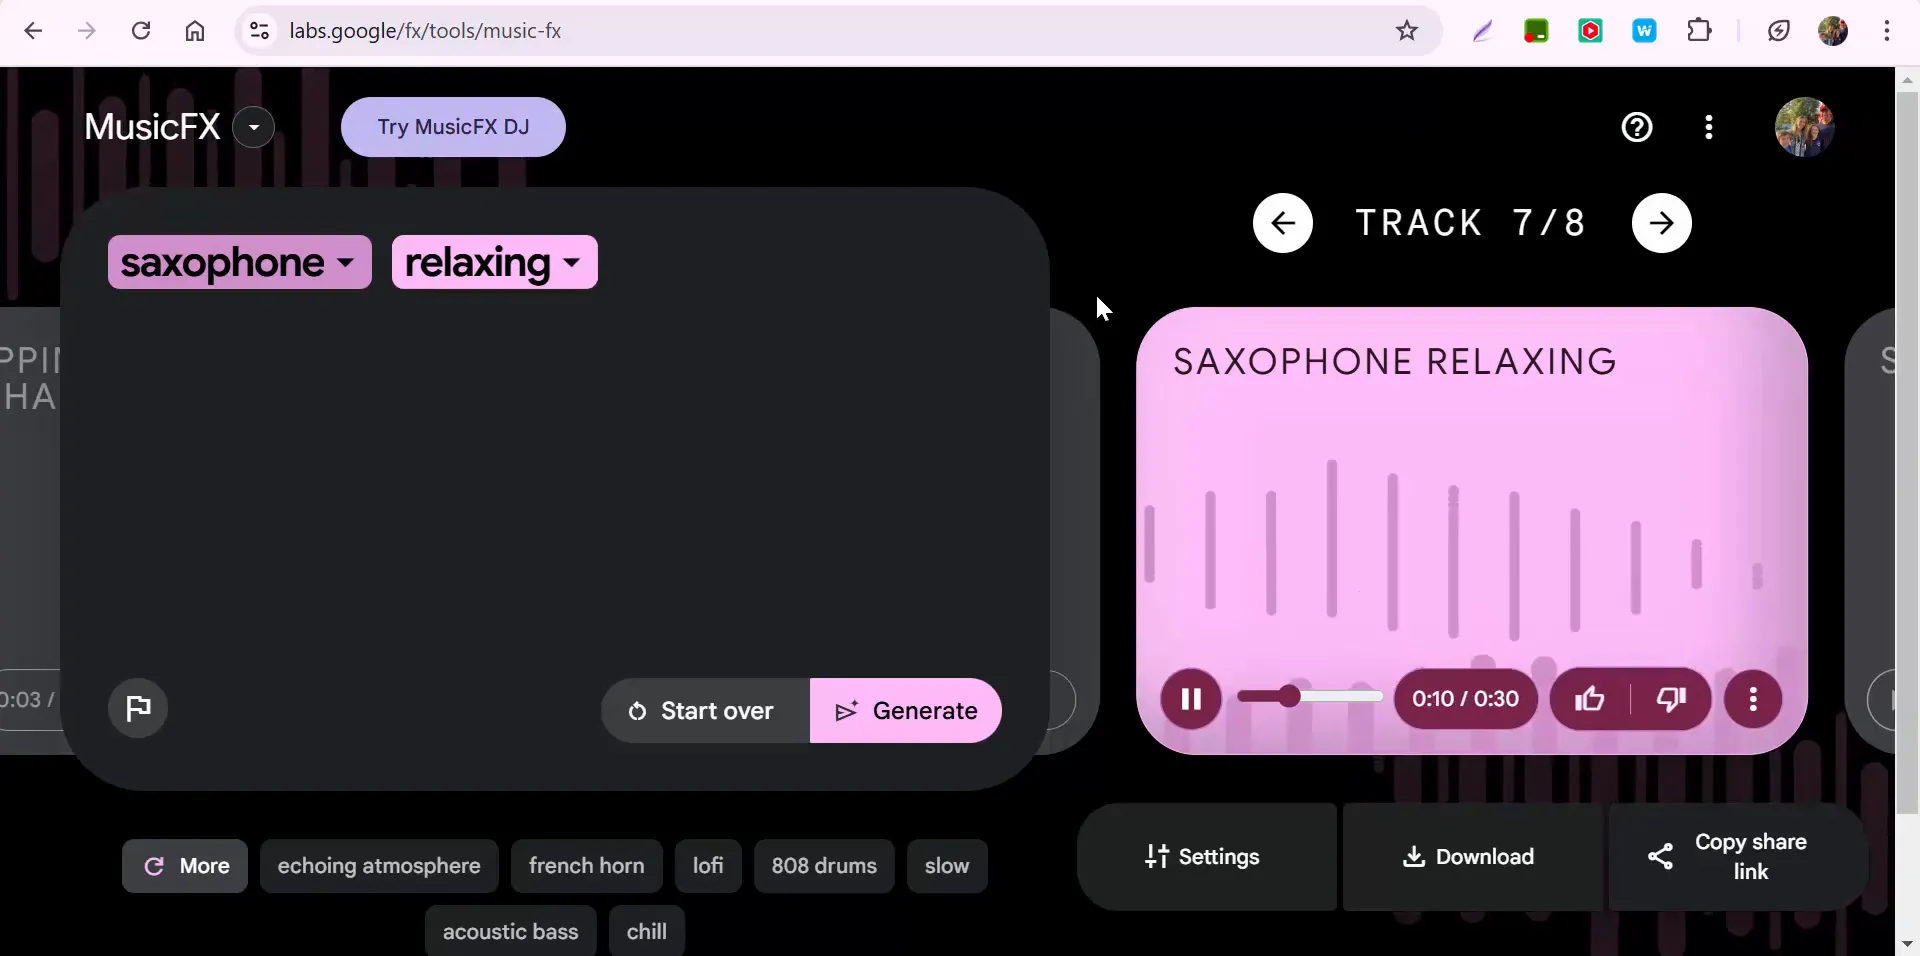
Starting Over with New Ideas
If you want to pivot and try something entirely different, you can easily start over. For instance, let’s add “saxophone relaxing” to our prompts and see what kind of vibe we get from that.
Experimentation is Key
The beauty of Music FX lies in its ability to encourage experimentation. You can play around with various prompts, styles, and instruments until you find the perfect combination that resonates with you. This tool is not just for seasoned musicians; it’s designed for anyone who wants to explore and create.
Final Thoughts
As we wrap up, I hope you feel inspired to dive into Music FX and start creating your own musical pieces. This tool is a fantastic way to experiment with music, whether you’re looking to unwind or spark some creativity. If you have any questions or need assistance, feel free to reach out. Thanks for joining me today, and happy music-making!
Exploring Google Lab’s MusicFX: Bring Your Musical Ideas to Life
Hi everyone, this is Brad! Today, we’re taking a look at another exciting Google Lab experiment—MusicFX—a creative tool that helps bring new musical ideas to life with just a few clicks.
Getting Started with MusicFX
MusicFX provides a user-friendly interface where you can input a musical prompt or select the "I'm Feeling Lucky" option to generate a random style. For example, you can try out prompts like "toe-tapping, foot-stomping Americana" and hear what the AI generates. If you'd like to refine your selection, simply pause the track and tweak the elements by adding descriptions such as "finger snapping" or "shoulder shaking."
Customizing Your Sound
Once you’ve generated a track, you have several options to personalize it:
Change the genre – Switch to styles like Bluegrass, Jazz, or other genres that suit your taste.
Adjust settings – Extend the track length, enable looping, or fine-tune other playback features.
Download and share – Save your favorite tracks or copy a shareable link to send to friends and collaborators.
If you ever want to start fresh, you can reset the tool and experiment with new prompts, such as adding elements like "saxophone relaxing" for a smooth vibe.
Final Thoughts
MusicFX is a great way to explore different musical styles and spark creativity, whether you're a musician, educator, or just someone looking for a little fun with AI-generated music. Give it a try and see what unique compositions you can create!
If you have any questions, feel free to reach out. Thanks for reading, and happy music-making!
Looking for a quick and easy way to relieve stress? Pixel Thoughts is a 60-second meditation tool designed to help you clear your mind and refocus. Whether you're feeling overwhelmed by an upcoming science test or just need a moment to relax, this tool provides a simple yet effective way to manage stress.
Using Pixel Thoughts is easy. Simply type your stressful thought into the star on the screen—perhaps you're worried about an upcoming assignment or project. Once you press Done, you'll notice something fascinating: the star begins to shrink, accompanied by calming expressions and affirmations that encourage mindfulness and perspective.
This brief but impactful exercise helps users visualize their stress gradually fading away, providing a sense of calm and clarity in just one minute. It's perfect for students, teachers, or anyone looking for a quick mental reset during a busy day.
Give Pixel Thoughts a try and see how it can help you manage your stress levels. If you have any questions, feel free to reach out.
Engaging Your Students with StrawPoll: A Quick and Easy Way to Gather Feedback
Looking for a simple way to check for understanding at the end of a lesson or meeting? StrawPoll (stwpoll.com) is a quick and effective tool that allows you to gather real-time feedback without the need for participants to sign up. While creating an account can help you store results, it’s not required—just head to the site and get started right away.
Creating a poll is simple. Click "Create a Poll" on the homepage. From there, you can:
Add a title to your poll
Choose a poll type, such as multiple choice, meeting poll, image poll, or ranking poll
Enter your response options and add more as needed
Adjust settings and explore advanced settings for customization
For example, a great way to check student comprehension might be a question like, "How confident do you feel explaining the stages of the water cycle to a friend?" You can create multiple-choice options such as "Very confident," "Somewhat confident," or "Not confident at all."
Once your poll is ready, click the blue "Create Poll" button at the bottom of the page. Sharing is flexible with several options available:
Link sharing: Copy and paste the link into Google Classroom, email, or any communication platform
QR code: Generate and share a QR code for easy access
PIN code: Create a unique PIN, allowing participants to enter it on strawpoll.live for quick access. This is a great option for frequent users
Once participants have submitted their responses, results are displayed in real time. As the poll creator, you can access these insights and even display them to your class or team for discussion.
Why use StrawPoll?
No sign-up needed, making it quick and hassle-free
Versatile sharing options to choose what works best for your audience
Instant feedback to monitor responses in real time
Whether you're wrapping up a lesson, gathering feedback in a meeting, or engaging participants in a discussion, StrawPoll provides a user-friendly and efficient solution. Give it a try and see how it can enhance your classroom or meetings!
If you have any questions or need further assistance, feel free to reach out. Happy polling!
Looking for a fun and interactive way to reinforce academic skills? Arcademics is a great free resource that combines arcade-style games with educational content, making learning enjoyable for students.
Arcademics offers a variety of subjects to explore. You can simply scroll through their site to check out the available topics, sign up for free, or even explore their membership options for additional features. However, you can also dive right in without signing up.
For example, if you're teaching 4th grade and want to focus on fractions, you can select that subject and try out the Dirt Bike Proportions game. Each game provides a brief description before you start, and when you hit “Play,” the system will generate a random name for you. Keeping the assigned name is recommended, especially for students, to avoid distractions.
In the game, students can race against the computer by answering fraction questions, such as identifying equivalent fractions. Correct answers keep them moving forward, while incorrect responses slow them down—a fun way to encourage accuracy while maintaining engagement.
Arcademics covers multiple subjects and grade levels, making it easy to find games tailored to specific learning goals. Whether it’s subtraction, multiplication, or other topics, students can engage in a unique and interactive learning experience.
If you’re looking for an engaging way to supplement lessons and keep students motivated, Arcademics is definitely worth exploring. Check it out and see how it can add a fun twist to your classroom activities.
If you have any questions, feel free to reach out. Happy teaching!
How to Connect Your Chromebook to an Epson Projector
A Step-by-Step Guide
Projecting your Chromebook onto an Epson projector can seem tricky at first, but with the right steps, you'll have it up and running in no time. Follow this simple guide to get started.
Step 1: Find the Right HDMI Cord
First, you'll need an HDMI cord. Look for one that matches the port on your projector. It doesn't have to be an exact match to the one shown in the manual, but it should fit securely. Once you've found it, plug it into the projector.
Step 2: Connect the USB-C to Your Chromebook
Next, locate the USB-C port on your Chromebook. It's typically on the side of the device. Plug the HDMI adapter into the USB-C port to establish the connection.
Step 3: Turn on the Projector and Select the Input Source
If the projector doesn't automatically display your Chromebook screen, you'll need to use the remote control. Look for the "Source Search" button, usually located in the upper-right corner of the remote. Press it to allow the projector to cycle through available input sources until it finds your Chromebook.
Step 4: Enable Mirroring on Your Chromebook
If your Chromebook screen isn’t appearing on the projector yet, don’t worry. Here's how to enable mirroring:
Click on the Settings icon in the bottom-right corner of your Chromebook screen.
In the search bar, type "Display" to quickly find display settings.
Look for the option labeled "Mirror Built-in Display" and toggle it on.
Once mirroring is enabled, your Chromebook screen should appear on the projector.
Step 5: You're All Set
Now you're ready to present and share your content with ease. If you run into any issues, feel free to reach out for assistance.
Title: Adjusting Time Stamps in Google Forms: A Quick Fix for Accuracy
Hi everyone, Brad here with a quick tip about the new Google Forms!
Recently, my friend Layla discovered an issue with the time stamps when linking Google Forms to a spreadsheet. If you're noticing that the time stamps in your form responses seem a little off, there's an easy fix to ensure accuracy.
In my district, I recommend taking the following steps to adjust the time settings correctly:
Open your linked Google Sheet.
Go to File > Settings.
Look for the "Time zone" section.
Depending on your location, update the setting accordingly. If you're on the East Coast, make sure it’s set to Eastern Time.
Once you've made this adjustment, your Google Forms and linked Sheets will reflect the correct time going forward. The best part? You only need to do this once, and it will apply to all future responses.
If you have any questions, feel free to reach out. Thanks for tuning in, and happy form-making!
Hi everyone, this is Brad! In today’s tutorial, I’m diving into the world of Google’s Image FX, an exciting tool that transforms your words into vibrant images. Whether you’re brainstorming creative projects or looking for ways to enhance your teaching tools, this feature has something for you.
Getting Started with Image FX
Using Image FX is simple. Here's how it works:
Access Image FX: Select the tool to get started.
Input Your Idea: Paste or type your description in the input box. For instance, I used: "Philadelphia Eagles vs. Los Angeles Rams, football, snowing, cartoon."
Create Your Image: Click "Create" and give it a moment to process. The tool generates an image based on your description. How cool is that?
Customizing Your Creations
What makes Image FX even more powerful is the ability to tweak your ideas. Let’s say you want to shift the setting from a cartoon-style football game in the snow to something different:
Change the weather to sunny.
Swap the style to impressionistic.
Imagine players switching from football to soccer.
The results can be fascinating and open up endless possibilities for creativity. Imagine the fun of introducing this tool to your classroom to spark student imagination!
A Few Notes for Educators
While Image FX is a fantastic resource for teachers, it’s important to note that students under 18 cannot access it via Google Workspace accounts. However, educators can still use it to create content, explore visual concepts, or even generate unique visuals for lesson plans.
Sharing and Feedback Options
Once your image is ready, you can:
Download it to your computer.
Use the share link to collaborate with others.
Provide feedback on the output with a thumbs up or down.
Keep in mind that while the tool is impressive, occasional errors (like spelling mistakes in text overlays) may appear. Be sure to review and refine your results.
Final Thoughts
Google’s Image FX is an excellent way to explore the intersection of language and visuals. Whether you’re a teacher looking to add some flair to your lessons or just exploring your creativity, this tool has you covered.
If you have any questions or want to share your Image FX creations, feel free to reach out. Thanks for reading, and happy creating!
Enhancing Your Google Forms: Updates and Tips for Effective Use
Hi everyone! It’s Brad here, sharing an exciting update in Google Forms, along with a few reminders to help you get the most out of this powerful tool. Whether you’re creating quizzes, surveys, or feedback forms, these tips will help streamline your process and ensure you’re using Google Forms effectively.
1. Managing Form Responders
Let’s say you’ve already created a form and are ready to manage who can respond. At the top of your form, you’ll notice a purple rectangle with white text. This is where you can manage settings for responders. For example, if your form is restricted to your organization, such as the Methacton School District, you can adjust permissions here.
Change Access: To allow anyone with the link to respond, select the purple rectangle, make your changes, and click "Done." You’ll notice the purple rectangle turns into a white rectangle with purple text—a simple visual cue that settings have been updated.
Turn Off Responses: If your form is no longer accepting responses, you can easily disable it here. Additionally, you can customize the message responders see when they try to access a closed form.
2. Notifications for Responses
Need to stay on top of incoming responses? Google Forms makes it simple:
Navigate to the Responses tab.
Click the three-dot menu in the upper right corner.
Select Get email notifications for new responses.
You can enable or disable notifications as needed to suit your workflow.
3. Creating Quizzes and Customizing Settings
Google Forms is not just for surveys—it’s also an excellent tool for creating quizzes! Here’s how to get started:
Enable Quiz Mode: Go to Settings and toggle on the quiz feature. You can then adjust settings like point values, correct answers, and feedback for each question.
Collect Emails: Decide whether to collect email addresses for tracking purposes.
Limit Responses: Restrict responses to one per person, or allow users to edit their responses after submission.
Provide Copies of Responses: Give respondents the option to receive a copy of their answers, either by request or automatically.
4. Presentation Options
Customize how your form appears to users under the Presentation section. Options include:
Showing a progress bar.
Shuffling question order.
Adding a confirmation message for completed forms.
These updates and tips are just a few ways to enhance your experience with Google Forms. If you have questions or need further assistance, don’t hesitate to reach out. Thanks for reading, and happy form-making!
In today's fast-paced world, finding a way to focus can be challenging. Whether you're in a classroom, an office, or at home, ambient noise can be a great solution to help you concentrate. One tool that can aid in creating a focused environment is SoftMurmur.com, a website that provides various ambient sounds to enhance your productivity. In this post, we'll explore how to use SoftMurmur effectively and the benefits of ambient noise.
Getting Started with SoftMurmur
When you first visit SoftMurmur, you'll see a simple interface that allows you to scroll through the available sounds. You can choose from a variety of ambient noises that can help create a calming atmosphere. The sounds range from nature sounds like rain and wind to more urban sounds like coffee shop chatter.
The Sound Options
The website offers a range of sounds, including:
Rain
Thunder
Wind
Crickets
Birds
These sounds can be mixed and matched to create your ideal background noise. For example, you might want a little wind and thunder combined with rain to create a stormy ambiance, or perhaps just the sound of crickets for a peaceful night setting.
Customizing Your Experience
One of the standout features of SoftMurmur is the ability to adjust the volume of each sound individually. This means you can create a personalized soundscape that suits your preferences. For instance, if you want the rain to be more dominant, you can increase its volume while decreasing the wind sound. This customization makes it easy to find the right balance for your focus needs.
Sharing Your Soundscapes
Another great feature is the ability to share your customized soundscapes with others. You can easily copy the link to your specific sound settings and share it via email or social media. This is particularly useful for teachers who want to create a calming environment in their classrooms or for coworkers who want to share a focus-enhancing soundscape.
Setting Timers for Focused Sessions
SoftMurmur also allows you to set a timer for your sound session. This feature is perfect for those who use techniques like the Pomodoro Technique, where you work for a set period followed by a short break. You can set the timer for however many minutes you prefer, allowing you to work with focused intent.
Benefits of Ambient Noise
Using ambient noise can significantly enhance your focus and productivity. Here are a few benefits:
Reduces Distractions: Ambient sounds can mask distracting noises from your environment, making it easier to concentrate on the task at hand.
Enhances Creativity: Background noise can stimulate your brain and encourage creative thinking, especially during brainstorming sessions.
Promotes Relaxation: Calming sounds like rain or soft wind can create a soothing atmosphere, reducing anxiety and stress levels.
Conclusion
SoftMurmur.com is an excellent tool for anyone looking to create a focused and productive environment. With its customizable soundscapes and user-friendly features, you can easily drown out distractions and enhance your concentration. Whether you're studying, working, or just relaxing, consider giving ambient noise a try. If you have any questions or need assistance, don't hesitate to reach out.
Thanks for reading, and happy focusing!
Create Focus: Use SoftMurmur.com to Drown Out Distractions with Ambient Noise
Hi everyone, this is Brad! If you're on the hunt for the perfect ambient noise to create a peaceful atmosphere in your classroom, office, or even at home, A Soft Murmur is the tool for you.
This free, easy-to-use website lets you mix and match sounds like wind, rain, thunder, and more to create a calming soundscape that suits your mood. Here's a quick walkthrough:
How to Use A Soft Murmur
Explore the Sounds: Scroll through the available options and discover a variety of sound effects. You can stick with popular ones like rain, wind, and thunder or try out others like crickets and birds.
Customize Your Mix: Adjust the volume of each sound by using the sliders at the top of the page. For example, you might combine soft rain with a touch of thunder and wind for a relaxing stormy backdrop.
Share Your Mix: Want to share your soundscape? Right-click to copy the link address and send it to friends, colleagues, or students. It's a great way to share a little serenity.
Set a Timer: Use the built-in timer feature to control how long the ambient sounds play. Whether you’re focusing on work or winding down after a busy day, this feature is perfect for creating structured relaxation.
Why Ambient Noise?
Ambient noise is a fantastic way to wash away distractions and boost focus. It can help students concentrate during independent work or create a calming environment for mindfulness activities.
If you have any questions or need help getting started, feel free to reach out!
Create a Podcast and More in Minutes with Notebook LM: A Quick and Easy Guide
Have you ever wished you could turn a document into a podcast or generate a study guide with just a few clicks? With Notebook LM, you can do that and more! Let’s dive into how this powerful tool can transform your workflow, using a simple PDF about the water cycle as an example.
Getting Started with Notebook LM
Notebook LM makes it easy to start exploring. Here’s a quick guide:
Upload Your Source: Begin by uploading a file. In this example, we used a water cycle PDF, but you can add multiple sources if needed.
Preview the Content: Once uploaded, Notebook LM generates an overview of your document, which you can review on the left-hand side.
Ask Questions: Curious about specifics? Type in a question or choose from the suggested ones to get tailored answers pulled directly from your document.
Features That Stand Out
Notebook LM offers a variety of tools on the right-hand side to help you make the most of your uploaded content:
Study Guide: Create a structured outline to aid learning.
Briefing Document: Summarize key points for quick reference.
Frequently Asked Questions (FAQ): Generate insightful Q&A for deeper understanding.
Timeline: Visualize the sequence of events or processes.
For example, the tool quickly generated a timeline for the water cycle, FAQs about its processes, and a detailed briefing document—making it a breeze to grasp even complex topics.
The Game-Changing Podcast Feature
One of the standout features of Notebook LM is its ability to turn your document into a podcast. Here’s how it works:
Select the Podcast Generation option.
Wait for the magic—depending on the document’s length, it can take 3 to 4 minutes to generate.
Preview the result! In this case, a 19-minute podcast about the water cycle was created. The content was engaging and informative, providing a unique way to consume information.
Pro Tip: Review Before Sharing
While Notebook LM’s podcast feature is impressive, always take a moment to listen before sharing it with others. This ensures the tone and content align with your audience's needs.
Why Notebook LM is a Must-Have
Notebook LM is more than just a content tool—it’s a productivity powerhouse. Whether you're creating educational materials, summarizing complex topics, or crafting engaging podcasts, Notebook LM helps you accomplish your goals in record time.
Ready to give it a try? Explore Notebook LM and let it transform the way you create, learn, and share content. If you have any questions, feel free to reach out—happy learning!
Google Meet Microphone Issue: Quick Fix for System Settings Muting
Have you ever joined a Google Meet, only to realize no one can hear you because your microphone is mysteriously muted? It can be frustrating, but don't worry—this guide has you covered! This issue came up recently for a friend of mine, Christopher, who was struggling to get his microphone working on a Dell computer. After some digging, we found the solution, and I’m here to share it with you.
The Problem
Your microphone appears muted in Google Meet, but the issue isn’t with the app itself—it’s your system settings. This can happen if your microphone levels are accidentally muted or set too low in your computer’s sound settings.
The Solution: Step-by-Step
Access Sound Settings
Go to the bottom-right corner of your screen and locate the speaker icon in the taskbar.
Right-click the speaker icon and select Sounds.
Navigate to Recording Devices
In the Sounds window, click on the Recording tab.
Locate your microphone (often labeled Microphone Array).
Adjust the Microphone Levels
Double-click your microphone to open its properties.
Switch to the Levels tab.
Check if the microphone is muted (indicated by a red circle with a line).
Slide the volume level up and ensure it’s unmuted.
Save and Exit
Click OK to save your changes and close the window.
Test It Out
Once you've completed these steps, open Google Meet and check if your microphone works. You should no longer see any issues, and your voice should come through loud and clear.
A Few Notes
These steps are specific to Dell computers, but they should be similar for other Windows devices.
If this doesn’t solve your issue, double-check that your microphone is set as the default recording device in the same Sounds window.
If you run into any more issues or have questions, feel free to reach out. Remember, tech hiccups happen, but with a little troubleshooting, you’ll be back in action in no time. Happy meeting!
How to Quickly Adjust Playback Speed on YouTube Videos and Podcasts
Ever feel like there aren’t enough hours in the day to get through your favorite YouTube videos or podcasts? Whether you’re cramming in some professional development, catching up on educational content, or enjoying a great show, adjusting playback speed can be a game-changer. Here’s a quick and simple guide to help you make the most of your time.
Adjusting Playback Speed on YouTube
Let’s start with YouTube. Did you know you can easily adjust the playback speed to slow things down or speed them up? Here’s how:
Find the Settings Gear:
While watching a YouTube video, look for the gear icon (usually in the bottom right corner of the video player). This is where the magic happens.
Select Playback Speed:
Click on “Playback Speed,” and a menu will appear with options ranging from 0.25x (super slow) to 2x (double speed).
Choose Your Speed:
If you want to breeze through content, try 1.5x or 2x. It might take a few seconds to adjust, but you'll be amazed at how much time you save. On the flip side, if something is too fast, slow it down to fully grasp the content.
Pro tip: Experiment to find your sweet spot. Personally, I find 2x speed great for clear speakers, but slower speeds can be helpful for deep-dive topics.
Speeding Through Podcasts on Your Phone
Podcasts are another area where playback speed can save the day. On an iPhone, it’s as easy as tapping a button:
Open Your Podcast App:
Play your chosen podcast and listen at the normal speed.
Find the Speed Option:
In the bottom left corner of the screen, look for the speed adjustment button. It often displays something like “1x” by default.
Adjust the Speed:
Tap the button to cycle through speed options, such as 1.5x or 2x. If you’re in a hurry, this feature can make a 24-minute podcast feel like a quick chat.
Access Episode Highlights:
Another great tip is to use the episode highlights feature (also accessible in many podcast apps). This lets you quickly skim through key points without listening to the entire episode.
Why Playback Speed is a Must-Know Tip
Being able to adjust playback speed isn’t just convenient; it’s empowering. Whether you’re brushing up on teaching strategies, staying current with tech trends, or enjoying a podcast in your downtime, this tip lets you customize your learning or leisure experience.
So, give it a try. Speed up when you’re in a hurry, slow down for deep dives, and make the most of every minute.
If you have any questions about this or other time-saving tech tips, feel free to reach out. Happy listening, and take care!