


If you would like to have a template set up for your students that includes slides with image placeholders, or you would like to have a Slide with image placeholders, try the following.
- Open a new Google Slide.
- Slide > Edit Theme
- In Layouts move the top text box where it says, "Click to edit theme title style" up a bit and shrink the size of the actual box.
- Delete the second text box where it says, "Click to edit theme subtitle style"
- Time to enter your placeholder
- Insert > Placeholder > Image > Choose rectangle, rounded rectangle, or oval
- Choose how large you would like the placeholder to be
- If you would like to copy, make sure to use Ctrl D to make an exact copy
- If you would like to add another slide with an image placeholder, go to another Slide and create as you would like.
- Rename the edited Slide deck (if you want) and close out of the editing by clicking on the x in the upper right to close the editing feature.
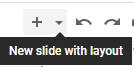
- To access your newly created Slides with image placeholder make sure to go above the slide (on the left side) and choose the carrot next to the + (see image below)
- Choose the Slides you would like to include (with the placeholders)
If you now want to share the template with your students make sure to name your presentation and then share with your class in Classroom (remember to force a copy).
Embedded below is a 2 minute and 14 second YouTube tutorial.
Take care,
Brad


No comments:
Post a Comment