Looking for a quick and easy way to relieve stress? Pixel Thoughts is a 60-second meditation tool designed to help you clear your mind and refocus. Whether you're feeling overwhelmed by an upcoming science test or just need a moment to relax, this tool provides a simple yet effective way to manage stress.
Using Pixel Thoughts is easy. Simply type your stressful thought into the star on the screen—perhaps you're worried about an upcoming assignment or project. Once you press Done, you'll notice something fascinating: the star begins to shrink, accompanied by calming expressions and affirmations that encourage mindfulness and perspective.
This brief but impactful exercise helps users visualize their stress gradually fading away, providing a sense of calm and clarity in just one minute. It's perfect for students, teachers, or anyone looking for a quick mental reset during a busy day.
Give Pixel Thoughts a try and see how it can help you manage your stress levels. If you have any questions, feel free to reach out.
Engaging Your Students with StrawPoll: A Quick and Easy Way to Gather Feedback
Looking for a simple way to check for understanding at the end of a lesson or meeting? StrawPoll (stwpoll.com) is a quick and effective tool that allows you to gather real-time feedback without the need for participants to sign up. While creating an account can help you store results, it’s not required—just head to the site and get started right away.
Creating a poll is simple. Click "Create a Poll" on the homepage. From there, you can:
Add a title to your poll
Choose a poll type, such as multiple choice, meeting poll, image poll, or ranking poll
Enter your response options and add more as needed
Adjust settings and explore advanced settings for customization
For example, a great way to check student comprehension might be a question like, "How confident do you feel explaining the stages of the water cycle to a friend?" You can create multiple-choice options such as "Very confident," "Somewhat confident," or "Not confident at all."
Once your poll is ready, click the blue "Create Poll" button at the bottom of the page. Sharing is flexible with several options available:
Link sharing: Copy and paste the link into Google Classroom, email, or any communication platform
QR code: Generate and share a QR code for easy access
PIN code: Create a unique PIN, allowing participants to enter it on strawpoll.live for quick access. This is a great option for frequent users
Once participants have submitted their responses, results are displayed in real time. As the poll creator, you can access these insights and even display them to your class or team for discussion.
Why use StrawPoll?
No sign-up needed, making it quick and hassle-free
Versatile sharing options to choose what works best for your audience
Instant feedback to monitor responses in real time
Whether you're wrapping up a lesson, gathering feedback in a meeting, or engaging participants in a discussion, StrawPoll provides a user-friendly and efficient solution. Give it a try and see how it can enhance your classroom or meetings!
If you have any questions or need further assistance, feel free to reach out. Happy polling!
Looking for a fun and interactive way to reinforce academic skills? Arcademics is a great free resource that combines arcade-style games with educational content, making learning enjoyable for students.
Arcademics offers a variety of subjects to explore. You can simply scroll through their site to check out the available topics, sign up for free, or even explore their membership options for additional features. However, you can also dive right in without signing up.
For example, if you're teaching 4th grade and want to focus on fractions, you can select that subject and try out the Dirt Bike Proportions game. Each game provides a brief description before you start, and when you hit “Play,” the system will generate a random name for you. Keeping the assigned name is recommended, especially for students, to avoid distractions.
In the game, students can race against the computer by answering fraction questions, such as identifying equivalent fractions. Correct answers keep them moving forward, while incorrect responses slow them down—a fun way to encourage accuracy while maintaining engagement.
Arcademics covers multiple subjects and grade levels, making it easy to find games tailored to specific learning goals. Whether it’s subtraction, multiplication, or other topics, students can engage in a unique and interactive learning experience.
If you’re looking for an engaging way to supplement lessons and keep students motivated, Arcademics is definitely worth exploring. Check it out and see how it can add a fun twist to your classroom activities.
If you have any questions, feel free to reach out. Happy teaching!
How to Connect Your Chromebook to an Epson Projector
A Step-by-Step Guide
Projecting your Chromebook onto an Epson projector can seem tricky at first, but with the right steps, you'll have it up and running in no time. Follow this simple guide to get started.
Step 1: Find the Right HDMI Cord
First, you'll need an HDMI cord. Look for one that matches the port on your projector. It doesn't have to be an exact match to the one shown in the manual, but it should fit securely. Once you've found it, plug it into the projector.
Step 2: Connect the USB-C to Your Chromebook
Next, locate the USB-C port on your Chromebook. It's typically on the side of the device. Plug the HDMI adapter into the USB-C port to establish the connection.
Step 3: Turn on the Projector and Select the Input Source
If the projector doesn't automatically display your Chromebook screen, you'll need to use the remote control. Look for the "Source Search" button, usually located in the upper-right corner of the remote. Press it to allow the projector to cycle through available input sources until it finds your Chromebook.
Step 4: Enable Mirroring on Your Chromebook
If your Chromebook screen isn’t appearing on the projector yet, don’t worry. Here's how to enable mirroring:
Click on the Settings icon in the bottom-right corner of your Chromebook screen.
In the search bar, type "Display" to quickly find display settings.
Look for the option labeled "Mirror Built-in Display" and toggle it on.
Once mirroring is enabled, your Chromebook screen should appear on the projector.
Step 5: You're All Set
Now you're ready to present and share your content with ease. If you run into any issues, feel free to reach out for assistance.
Title: Adjusting Time Stamps in Google Forms: A Quick Fix for Accuracy
Hi everyone, Brad here with a quick tip about the new Google Forms!
Recently, my friend Layla discovered an issue with the time stamps when linking Google Forms to a spreadsheet. If you're noticing that the time stamps in your form responses seem a little off, there's an easy fix to ensure accuracy.
In my district, I recommend taking the following steps to adjust the time settings correctly:
Open your linked Google Sheet.
Go to File > Settings.
Look for the "Time zone" section.
Depending on your location, update the setting accordingly. If you're on the East Coast, make sure it’s set to Eastern Time.
Once you've made this adjustment, your Google Forms and linked Sheets will reflect the correct time going forward. The best part? You only need to do this once, and it will apply to all future responses.
If you have any questions, feel free to reach out. Thanks for tuning in, and happy form-making!
Hi everyone, this is Brad! In today’s tutorial, I’m diving into the world of Google’s Image FX, an exciting tool that transforms your words into vibrant images. Whether you’re brainstorming creative projects or looking for ways to enhance your teaching tools, this feature has something for you.
Getting Started with Image FX
Using Image FX is simple. Here's how it works:
Access Image FX: Select the tool to get started.
Input Your Idea: Paste or type your description in the input box. For instance, I used: "Philadelphia Eagles vs. Los Angeles Rams, football, snowing, cartoon."
Create Your Image: Click "Create" and give it a moment to process. The tool generates an image based on your description. How cool is that?
Customizing Your Creations
What makes Image FX even more powerful is the ability to tweak your ideas. Let’s say you want to shift the setting from a cartoon-style football game in the snow to something different:
Change the weather to sunny.
Swap the style to impressionistic.
Imagine players switching from football to soccer.
The results can be fascinating and open up endless possibilities for creativity. Imagine the fun of introducing this tool to your classroom to spark student imagination!
A Few Notes for Educators
While Image FX is a fantastic resource for teachers, it’s important to note that students under 18 cannot access it via Google Workspace accounts. However, educators can still use it to create content, explore visual concepts, or even generate unique visuals for lesson plans.
Sharing and Feedback Options
Once your image is ready, you can:
Download it to your computer.
Use the share link to collaborate with others.
Provide feedback on the output with a thumbs up or down.
Keep in mind that while the tool is impressive, occasional errors (like spelling mistakes in text overlays) may appear. Be sure to review and refine your results.
Final Thoughts
Google’s Image FX is an excellent way to explore the intersection of language and visuals. Whether you’re a teacher looking to add some flair to your lessons or just exploring your creativity, this tool has you covered.
If you have any questions or want to share your Image FX creations, feel free to reach out. Thanks for reading, and happy creating!
Enhancing Your Google Forms: Updates and Tips for Effective Use
Hi everyone! It’s Brad here, sharing an exciting update in Google Forms, along with a few reminders to help you get the most out of this powerful tool. Whether you’re creating quizzes, surveys, or feedback forms, these tips will help streamline your process and ensure you’re using Google Forms effectively.
1. Managing Form Responders
Let’s say you’ve already created a form and are ready to manage who can respond. At the top of your form, you’ll notice a purple rectangle with white text. This is where you can manage settings for responders. For example, if your form is restricted to your organization, such as the Methacton School District, you can adjust permissions here.
Change Access: To allow anyone with the link to respond, select the purple rectangle, make your changes, and click "Done." You’ll notice the purple rectangle turns into a white rectangle with purple text—a simple visual cue that settings have been updated.
Turn Off Responses: If your form is no longer accepting responses, you can easily disable it here. Additionally, you can customize the message responders see when they try to access a closed form.
2. Notifications for Responses
Need to stay on top of incoming responses? Google Forms makes it simple:
Navigate to the Responses tab.
Click the three-dot menu in the upper right corner.
Select Get email notifications for new responses.
You can enable or disable notifications as needed to suit your workflow.
3. Creating Quizzes and Customizing Settings
Google Forms is not just for surveys—it’s also an excellent tool for creating quizzes! Here’s how to get started:
Enable Quiz Mode: Go to Settings and toggle on the quiz feature. You can then adjust settings like point values, correct answers, and feedback for each question.
Collect Emails: Decide whether to collect email addresses for tracking purposes.
Limit Responses: Restrict responses to one per person, or allow users to edit their responses after submission.
Provide Copies of Responses: Give respondents the option to receive a copy of their answers, either by request or automatically.
4. Presentation Options
Customize how your form appears to users under the Presentation section. Options include:
Showing a progress bar.
Shuffling question order.
Adding a confirmation message for completed forms.
These updates and tips are just a few ways to enhance your experience with Google Forms. If you have questions or need further assistance, don’t hesitate to reach out. Thanks for reading, and happy form-making!
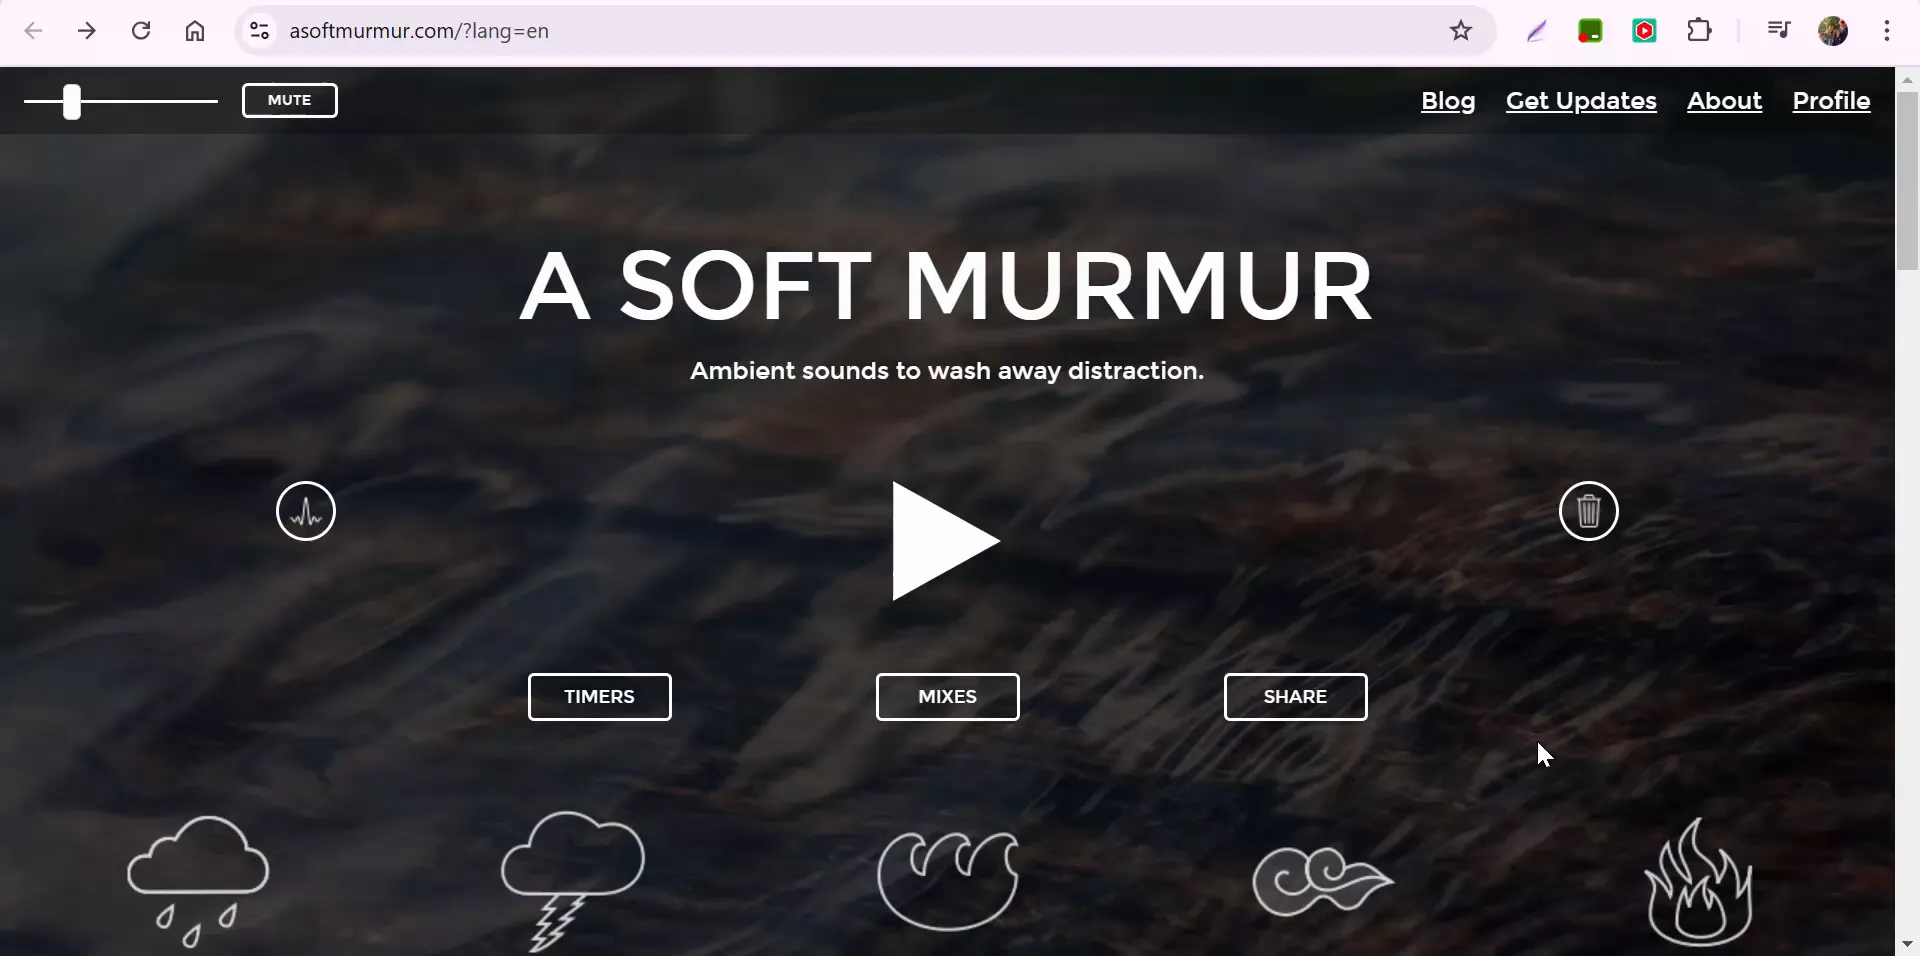
In today's fast-paced world, finding a way to focus can be challenging. Whether you're in a classroom, an office, or at home, ambient noise can be a great solution to help you concentrate. One tool that can aid in creating a focused environment is SoftMurmur.com, a website that provides various ambient sounds to enhance your productivity. In this post, we'll explore how to use SoftMurmur effectively and the benefits of ambient noise.
Getting Started with SoftMurmur
When you first visit SoftMurmur, you'll see a simple interface that allows you to scroll through the available sounds. You can choose from a variety of ambient noises that can help create a calming atmosphere. The sounds range from nature sounds like rain and wind to more urban sounds like coffee shop chatter.
The Sound Options
The website offers a range of sounds, including:
Rain
Thunder
Wind
Crickets
Birds
These sounds can be mixed and matched to create your ideal background noise. For example, you might want a little wind and thunder combined with rain to create a stormy ambiance, or perhaps just the sound of crickets for a peaceful night setting.
Customizing Your Experience
One of the standout features of SoftMurmur is the ability to adjust the volume of each sound individually. This means you can create a personalized soundscape that suits your preferences. For instance, if you want the rain to be more dominant, you can increase its volume while decreasing the wind sound. This customization makes it easy to find the right balance for your focus needs.
Sharing Your Soundscapes
Another great feature is the ability to share your customized soundscapes with others. You can easily copy the link to your specific sound settings and share it via email or social media. This is particularly useful for teachers who want to create a calming environment in their classrooms or for coworkers who want to share a focus-enhancing soundscape.
Setting Timers for Focused Sessions
SoftMurmur also allows you to set a timer for your sound session. This feature is perfect for those who use techniques like the Pomodoro Technique, where you work for a set period followed by a short break. You can set the timer for however many minutes you prefer, allowing you to work with focused intent.
Benefits of Ambient Noise
Using ambient noise can significantly enhance your focus and productivity. Here are a few benefits:
Reduces Distractions: Ambient sounds can mask distracting noises from your environment, making it easier to concentrate on the task at hand.
Enhances Creativity: Background noise can stimulate your brain and encourage creative thinking, especially during brainstorming sessions.
Promotes Relaxation: Calming sounds like rain or soft wind can create a soothing atmosphere, reducing anxiety and stress levels.
Conclusion
SoftMurmur.com is an excellent tool for anyone looking to create a focused and productive environment. With its customizable soundscapes and user-friendly features, you can easily drown out distractions and enhance your concentration. Whether you're studying, working, or just relaxing, consider giving ambient noise a try. If you have any questions or need assistance, don't hesitate to reach out.
Thanks for reading, and happy focusing!
Create Focus: Use SoftMurmur.com to Drown Out Distractions with Ambient Noise
Hi everyone, this is Brad! If you're on the hunt for the perfect ambient noise to create a peaceful atmosphere in your classroom, office, or even at home, A Soft Murmur is the tool for you.
This free, easy-to-use website lets you mix and match sounds like wind, rain, thunder, and more to create a calming soundscape that suits your mood. Here's a quick walkthrough:
How to Use A Soft Murmur
Explore the Sounds: Scroll through the available options and discover a variety of sound effects. You can stick with popular ones like rain, wind, and thunder or try out others like crickets and birds.
Customize Your Mix: Adjust the volume of each sound by using the sliders at the top of the page. For example, you might combine soft rain with a touch of thunder and wind for a relaxing stormy backdrop.
Share Your Mix: Want to share your soundscape? Right-click to copy the link address and send it to friends, colleagues, or students. It's a great way to share a little serenity.
Set a Timer: Use the built-in timer feature to control how long the ambient sounds play. Whether you’re focusing on work or winding down after a busy day, this feature is perfect for creating structured relaxation.
Why Ambient Noise?
Ambient noise is a fantastic way to wash away distractions and boost focus. It can help students concentrate during independent work or create a calming environment for mindfulness activities.
If you have any questions or need help getting started, feel free to reach out!
Create a Podcast and More in Minutes with Notebook LM: A Quick and Easy Guide
Have you ever wished you could turn a document into a podcast or generate a study guide with just a few clicks? With Notebook LM, you can do that and more! Let’s dive into how this powerful tool can transform your workflow, using a simple PDF about the water cycle as an example.
Getting Started with Notebook LM
Notebook LM makes it easy to start exploring. Here’s a quick guide:
Upload Your Source: Begin by uploading a file. In this example, we used a water cycle PDF, but you can add multiple sources if needed.
Preview the Content: Once uploaded, Notebook LM generates an overview of your document, which you can review on the left-hand side.
Ask Questions: Curious about specifics? Type in a question or choose from the suggested ones to get tailored answers pulled directly from your document.
Features That Stand Out
Notebook LM offers a variety of tools on the right-hand side to help you make the most of your uploaded content:
Study Guide: Create a structured outline to aid learning.
Briefing Document: Summarize key points for quick reference.
Frequently Asked Questions (FAQ): Generate insightful Q&A for deeper understanding.
Timeline: Visualize the sequence of events or processes.
For example, the tool quickly generated a timeline for the water cycle, FAQs about its processes, and a detailed briefing document—making it a breeze to grasp even complex topics.
The Game-Changing Podcast Feature
One of the standout features of Notebook LM is its ability to turn your document into a podcast. Here’s how it works:
Select the Podcast Generation option.
Wait for the magic—depending on the document’s length, it can take 3 to 4 minutes to generate.
Preview the result! In this case, a 19-minute podcast about the water cycle was created. The content was engaging and informative, providing a unique way to consume information.
Pro Tip: Review Before Sharing
While Notebook LM’s podcast feature is impressive, always take a moment to listen before sharing it with others. This ensures the tone and content align with your audience's needs.
Why Notebook LM is a Must-Have
Notebook LM is more than just a content tool—it’s a productivity powerhouse. Whether you're creating educational materials, summarizing complex topics, or crafting engaging podcasts, Notebook LM helps you accomplish your goals in record time.
Ready to give it a try? Explore Notebook LM and let it transform the way you create, learn, and share content. If you have any questions, feel free to reach out—happy learning!
Google Meet Microphone Issue: Quick Fix for System Settings Muting
Have you ever joined a Google Meet, only to realize no one can hear you because your microphone is mysteriously muted? It can be frustrating, but don't worry—this guide has you covered! This issue came up recently for a friend of mine, Christopher, who was struggling to get his microphone working on a Dell computer. After some digging, we found the solution, and I’m here to share it with you.
The Problem
Your microphone appears muted in Google Meet, but the issue isn’t with the app itself—it’s your system settings. This can happen if your microphone levels are accidentally muted or set too low in your computer’s sound settings.
The Solution: Step-by-Step
Access Sound Settings
Go to the bottom-right corner of your screen and locate the speaker icon in the taskbar.
Right-click the speaker icon and select Sounds.
Navigate to Recording Devices
In the Sounds window, click on the Recording tab.
Locate your microphone (often labeled Microphone Array).
Adjust the Microphone Levels
Double-click your microphone to open its properties.
Switch to the Levels tab.
Check if the microphone is muted (indicated by a red circle with a line).
Slide the volume level up and ensure it’s unmuted.
Save and Exit
Click OK to save your changes and close the window.
Test It Out
Once you've completed these steps, open Google Meet and check if your microphone works. You should no longer see any issues, and your voice should come through loud and clear.
A Few Notes
These steps are specific to Dell computers, but they should be similar for other Windows devices.
If this doesn’t solve your issue, double-check that your microphone is set as the default recording device in the same Sounds window.
If you run into any more issues or have questions, feel free to reach out. Remember, tech hiccups happen, but with a little troubleshooting, you’ll be back in action in no time. Happy meeting!
How to Quickly Adjust Playback Speed on YouTube Videos and Podcasts
Ever feel like there aren’t enough hours in the day to get through your favorite YouTube videos or podcasts? Whether you’re cramming in some professional development, catching up on educational content, or enjoying a great show, adjusting playback speed can be a game-changer. Here’s a quick and simple guide to help you make the most of your time.
Adjusting Playback Speed on YouTube
Let’s start with YouTube. Did you know you can easily adjust the playback speed to slow things down or speed them up? Here’s how:
Find the Settings Gear:
While watching a YouTube video, look for the gear icon (usually in the bottom right corner of the video player). This is where the magic happens.
Select Playback Speed:
Click on “Playback Speed,” and a menu will appear with options ranging from 0.25x (super slow) to 2x (double speed).
Choose Your Speed:
If you want to breeze through content, try 1.5x or 2x. It might take a few seconds to adjust, but you'll be amazed at how much time you save. On the flip side, if something is too fast, slow it down to fully grasp the content.
Pro tip: Experiment to find your sweet spot. Personally, I find 2x speed great for clear speakers, but slower speeds can be helpful for deep-dive topics.
Speeding Through Podcasts on Your Phone
Podcasts are another area where playback speed can save the day. On an iPhone, it’s as easy as tapping a button:
Open Your Podcast App:
Play your chosen podcast and listen at the normal speed.
Find the Speed Option:
In the bottom left corner of the screen, look for the speed adjustment button. It often displays something like “1x” by default.
Adjust the Speed:
Tap the button to cycle through speed options, such as 1.5x or 2x. If you’re in a hurry, this feature can make a 24-minute podcast feel like a quick chat.
Access Episode Highlights:
Another great tip is to use the episode highlights feature (also accessible in many podcast apps). This lets you quickly skim through key points without listening to the entire episode.
Why Playback Speed is a Must-Know Tip
Being able to adjust playback speed isn’t just convenient; it’s empowering. Whether you’re brushing up on teaching strategies, staying current with tech trends, or enjoying a podcast in your downtime, this tip lets you customize your learning or leisure experience.
So, give it a try. Speed up when you’re in a hurry, slow down for deep dives, and make the most of every minute.
If you have any questions about this or other time-saving tech tips, feel free to reach out. Happy listening, and take care!
Mastering the Art of AI Collaboration with Gemini for Google Workspace
Generative AI is revolutionizing the way we work, and Google Workspace's Gemini brings this power directly into your favorite apps like Gmail, Google Docs, and Google Sheets. But how do you make the most of it? The Gemini for Google Workspace: Prompting 101 Guide simplifies the art of creating effective prompts, offering strategies to improve productivity and creativity without sacrificing privacy.
Key Features of Gemini
Gemini integrates seamlessly across Workspace, enabling you to:
Summarize information and surface insights.
Generate personalized emails or presentations.
Organize and analyze data effectively.
Brainstorm creative ideas and draft professional documents.
Four Pillars of Prompt Design
Creating effective prompts is crucial for meaningful collaboration with AI. The guide emphasizes:
Persona: Define who the AI is acting as.
Task: Clearly state what you need.
Context: Provide relevant background details.
Format: Specify how you want the output to look.
For instance, you can prompt: "You are a project manager. Draft a concise email summarizing the attached meeting notes for the team, highlighting key action items in bullet points."
Tips for Prompting Success
Use natural language and clear instructions.
Be concise but specific.
Iterate with follow-up prompts to refine results.
Integrate your own files to provide context.
Why Gemini?
With Gemini, your data remains secure within the Workspace environment, ensuring your privacy while enhancing productivity. Whether you're crafting a press release, managing schedules, or brainstorming marketing strategies, Gemini adapts to your needs.
Start exploring the limitless possibilities of AI collaboration with Gemini and transform your daily workflows into seamless and creative endeavors.
Screencastify Submit from a Student and Teacher Point of View
Screencastify Submit is a powerful tool for classrooms, enabling students to submit video-based responses and allowing teachers to review and provide feedback seamlessly. Let’s dive into the process from both the student and teacher perspectives, based on a walkthrough of how the tool works in real-time.
For Students: Submitting an Assignment Imagine you’re a student using Screencastify Submit for the first time. Here’s what you’ll experience:
Accessing the Assignment
Head to Google Classroom and select the assignment that requires Screencastify.
Click the provided link to Screencastify Submit.
Signing In
Use your Google account to sign in. Make sure to click “Continue” and grant permissions by selecting “Allow.”
You’ll need to connect to Google Classroom twice to set up permissions fully. Don’t worry—this is only required the first time you use it.
Setting Up the Recording
Choose to enable your microphone and webcam. Select "Allow while visiting the site" to grant the necessary permissions.
Once everything is set up, start recording by clicking “Share.”
Recording and Reviewing
Record your response, whether it’s explaining your work, presenting a project, or sharing your thoughts.
After recording, you can preview the video to ensure it’s what you want.
If necessary, you can re-record. When satisfied, click “Submit.”
Submission Options
Once submitted, you’ll have the option to download your video for personal records or view it in Google Classroom.
For Teachers: Reviewing and Providing Feedback From the teacher’s perspective, Screencastify Submit streamlines the process of collecting and assessing student submissions. Here’s how it works:
Finding Submissions
Log into Google Classroom and locate the assignment to see student submissions.
Viewing Videos
Select a student’s submission. The video will load—sometimes it may take a moment, so be patient.
Play the video to review the content.
Providing Feedback
Use the “Private Comments” feature in Google Classroom to give detailed and constructive feedback.
If necessary, you can return the assignment for revision.
Why Use Screencastify Submit? Screencastify Submit empowers students to express their learning in a dynamic way, moving beyond traditional pen-and-paper assignments. For teachers, it’s an intuitive platform to assess understanding, encourage creativity, and offer meaningful feedback.
Final Thoughts Whether you’re a student sharing your ideas or a teacher evaluating assignments, Screencastify Submit bridges the gap between communication and technology in the classroom. Ready to explore this tool? Jump in and see the difference it can make in your teaching and learning journey!
If you have any questions or need further guidance, don’t hesitate to ask. Happy screencasting!
A Flipgrid Alternative: Empower Student Voices with Screencastify Submit
A New Tool for Amplifying Student Voice
Are you looking for an alternative to Flipgrid (now known as Flip) to give your students a platform to express their voices? Screencastify Submit is a fantastic option for creating video-based assignments seamlessly integrated into your classroom workflow. Whether you are using Google Classroom or other platforms, Screencastify Submit allows students to record their screen, webcam, or both to complete assignments creatively.
Let’s dive into how you can start using Screencastify Submit to empower your students.
What is Screencastify Submit?
Screencastify Submit is a feature within Screencastify that enables teachers to create assignments where students record videos in response. It’s similar to Flipgrid but offers a streamlined approach, particularly for classrooms already familiar with Screencastify or Google Classroom.
Students can record their thoughts, presentations, reflections, or even demonstrate processes, all without needing to download extensions or sign into separate accounts.
Getting Started with Screencastify Submit
Here’s a step-by-step guide to creating a video-based assignment:
1. Enable Screencastify Submit
First, ensure that Submit is enabled in your Screencastify account.
Navigate to the "Assessments" tab in Screencastify.
If you don’t see Submit, enable it in your account settings.
2. Create a New Assignment
Start by selecting "Create Assignment."
Choose from available templates, or create your assignment from scratch.
Write clear and concise instructions for your students.
Example: "Record a 1-minute video explaining your favorite book character and why you connect with them."
3. Choose the Recording Type
Decide how students will record their response:
Screen and Webcam (for presentations or demonstrations)
Webcam Only (for reflections or discussions)
Screen Recording Only (for screencasts or tutorials)
4. Share the Assignment
Screencastify Submit integrates seamlessly with Google Classroom:
Select the appropriate class and students.
Add a topic, assign a due date, and schedule the post if needed.
If you’re not using Google Classroom, you can still generate a link to share directly with students.
Why Use Screencastify Submit?
Here’s what makes Screencastify Submit a standout alternative:
Ease of Use: Students simply click the link and start recording. No downloads, logins, or extensions required.
Flexible Recording Options: Students can showcase learning in the way that works best for them.
Google Classroom Integration: Teachers can manage and assign video tasks seamlessly.
Perfect for Assessments: Use videos for formative or summative assessments aligned with learning standards.
Student and Teacher Perspectives
Curious about what this looks like in action?
In future videos, we’ll explore Screencastify Submit from both a student and teacher point of view to see how easy it is to submit and review responses.
Final Thoughts
Screencastify Submit is a versatile tool that helps students showcase their voice and learning in creative, personalized ways. If you’re already familiar with Screencastify, this tool will seamlessly fit into your existing workflow.
Ready to try it? Dive in, create your first assignment, and watch your students shine!
If you have questions or need support, feel free to reach out. Stay tuned for our next post, where we’ll take a deeper look into what the process looks like for students and teachers.
Winter Wonderland Fonts and How to Zoom In on the Details with a Chrome Extension
Winter is here, and with it comes the opportunity to add a little frosty charm to your digital projects! If you’re looking for ways to bring the magic of the season into your documents or presentations, I have two quick and exciting tips for you: exploring winter-themed fonts and using a handy Chrome extension to zoom in on any part of a webpage.
1. Winter Wonderland Fonts
Eric Curts recently shared a treasure trove of winter-themed Google Fonts. These fonts are perfect for creating holiday cards, festive classroom decorations, or just adding a sprinkle of seasonal joy to your documents.
Here’s how you can try them out:
Explore Fonts: Visit the collection of winter-themed fonts (I’ll include the link in the blog post). Scroll through the list and pick one you like—let’s say Bonbon.
Add to Your Google Fonts:
Open a Google Doc.
Click on the font menu and select More Fonts.
In the search bar, type the name of your chosen font, like Bonbon, and click to add it to your fonts list.
Start Typing: Once selected, you can begin typing away with your festive font and bring the winter wonderland to life on your screen!
2. Zoom In on the Details with Crafty Zoom
Sometimes, you need to focus on a specific part of a page or project. That’s where the Crafty Zoom Chrome extension comes in handy. This tool allows you to zoom in on a selected section of your screen—perfect for presentations, tutorials, or fine-tuning your work.
Here’s how to use it:
Install Crafty Zoom: Head to the Chrome Web Store and install the Crafty Zoom extension.
Activate Zoom:
Click on the Crafty Zoom icon in your browser.
Select Start, and hover over the section you want to zoom in on. This will magnify only that part of the screen, making it easy to focus on details.
Toggle On and Off:
To exit zoom mode, either click Cancel on the extension or use the keyboard shortcut:
Windows: Control + Shift + Z
Mac: Command + Shift + Z
Use the same shortcut to bring the zoom back if needed.
This tool is incredibly user-friendly and can be a game-changer for presentations or workshops where highlighting specific content is key.
Why Use These Tools?
Winter fonts help create a festive atmosphere, perfect for engaging audiences, students, or colleagues during the holiday season. The Crafty Zoom extension, on the other hand, offers precision and focus, making it easier to guide viewers through specific details.
If you have any questions about these tools or want to share how you’ve used them, feel free to reach out! Happy creating, and may your winter projects be as magical as the season itself. ❄️🎄
Unveiling the Writing Process Using the Brisk Extension to Analyze Edits, Time, and Trends
Have you ever wondered how a document came together? What edits were made? How much time was spent crafting it? The Brisk Extension's "Inspect Writing" feature offers an insightful way to analyze the writing process behind a Google Doc. However, there’s a key limitation you need to know upfront: Inspect Writing does not work on read-only documents.
The Inspect Writing tool is a powerful feature within the Brisk Extension that allows you to view the history of a Google Doc, including:
Pastes: Number of pasted text entries.
Edits: The number of changes made to the document.
Time Spent: How much time the writer(s) invested in the document.
Trends: Patterns of activity, such as whether work occurred steadily or in bursts.
By selecting the "Inspect Writing" option in the Brisk Extension, you can unlock a timeline of the document's development. For instance, you might discover:
A document with a single large paste followed by minimal edits.
A document refined over months or even years, with edits spanning different dates and times.
Why This Matters
Understanding the history of a document can provide context and transparency, particularly for educators. For example, if you notice a significant portion of text was pasted in, it doesn’t necessarily mean the student didn’t write it—they might have worked offline or in another file before pasting it into the document. However, this insight allows you to ask meaningful questions about their writing process and provide targeted feedback.
Key Features in Action
Here’s what happens when you use Inspect Writing:
Quick Analysis: The tool reveals pastes, edits, and time data at a glance.
Detailed Timeline: You can view when edits were made over weeks, months, or even years. You can speed up or pause the playback to focus on specific periods.
Flexible Navigation: Jump to different points in the document's timeline to explore activity trends, such as spikes in editing before deadlines.
For example, one document might show a large paste with minimal editing, while another might reveal hundreds of incremental changes over many hours. The difference tells a story about the approach the writer took, whether it was drafting from scratch or polishing existing content.
A Note on Read-Only Documents
One limitation to keep in mind: the Inspect Writing feature cannot be used on read-only documents. If the document isn’t editable, the tool cannot provide the insights described above. Make sure you have editing access to the document you wish to analyze.
Final Thoughts
The Brisk Extension's Inspect Writing feature is a valuable tool for gaining insights into how a Google Doc was written, edited, and developed over time. Whether you’re an educator looking for transparency or simply curious about your own writing habits, this tool can shine a light on the writing process like never before.
To learn more about how to use this feature, visit Brisk's Inspect Writing page. If you have any questions or need further assistance, feel free to reach out!
Empowering Student Feedback: Exploring the New Rating Scale in Google Forms
As educators, we know the importance of meaningful feedback, not just from teacher to student but also from student to teacher. Google Forms has taken a step forward in making this process more engaging and accessible with its latest update: the new rating scale question type. Let’s dive into what this feature offers and how it can empower both educators and students in the classroom.
What’s New in Google Forms?
The rating scale question type is a fresh addition to Google Forms, providing a visually appealing and flexible way to collect feedback. Instead of the traditional multiple-choice or short-answer formats, the rating scale lets students express their thoughts through interactive scales featuring numbers and icons.
Here’s what you can do with it:
Adjustable Scales: Choose from a range of 3 to 10 levels, depending on how granular you want the feedback to be.
Icons to Match the Mood: Students can rate using:
Stars 🌟
Hearts ❤️
Thumbs up 👍
Why Use the Rating Scale?
This new feature is perfect for educators looking to gather quick, honest insights from students. For example:
After a Math Lesson on Fractions: Ask students how confident they feel with the material. Responses like “1 star” could signal a need for review, while “5 stars” might indicate readiness for the next topic.
Social-Emotional Learning (SEL): Use hearts to let students rate how they feel about classroom activities or group work dynamics.
End-of-Unit Feedback: Thumbs up or down can gauge overall satisfaction with a project or topic.
This method is not only simple but also fosters student engagement by making feedback fun and intuitive.
How to Get Started
Open Google Forms and select the question type dropdown menu.
Click on the new Rating option.
Customize the scale (3 to 10 levels) and choose your icon.
Add your question—be creative! For example: “How would you rate your understanding of today’s lesson on fractions?”
Once students respond, their answers will appear in your Google Forms responses, allowing you to quickly identify trends and adapt your teaching accordingly.
Empowering Reflection and Growth
The rating scale isn’t just a tool for feedback—it’s an opportunity for students to reflect on their learning. When we give students the chance to evaluate their understanding, we’re teaching them to take ownership of their progress, setting the stage for self-directed growth.
Have you tried the new rating scale in Google Forms? Let me know how you’re using it to empower feedback and reflection in your classroom. If you have any questions, feel free to reach out. Let’s continue finding simple, effective ways to connect with our students and make learning meaningful.
Use the Brisk Extension to Create an Inquiry Worksheet, DOK Questions, and Resources on Any Topic
Hello everyone!
I'm thrilled to introduce you to an incredible tool that can revolutionize the way you create educational content—the Brisk Extension. Whether you're aiming to develop an inquiry worksheet, generate Depth of Knowledge (DOK) questions, or compile comprehensive resources on any subject, Brisk makes it effortless. Let me guide you through the process using the Revolutionary War as our example topic.
Step 1: Install and Access the Brisk Extension
First things first, ensure you have the Brisk Extension installed in your browser. Navigate to the website or online resource related to your topic of interest—in this case, a website about the Revolutionary War. Click on the Brisk Extension icon to get started.
Step 2: Create an Inquiry Worksheet
Select "Create": Once the extension panel is open, click on the "Create" button.
Choose "Inquiry Worksheet": From the list of options, select "Inquiry Worksheet".
Set the Grade Level: You can specify the grade level to tailor the content appropriately. I'll keep it at 8th grade for this demonstration.
Generate the Worksheet: Click on "Brisk It" and watch the magic happen!
Within moments, Brisk provides a fully structured inquiry worksheet, complete with discussion questions and activities ready for your students. You have the flexibility to adjust the length and detail to suit your specific needs.
Step 3: Generate DOK Questions
Go Back to "Create": Return to the main menu and click on "Create" again.
Select "DOK Questions": Choose the "DOK Questions" option to generate questions across different cognitive levels.
Confirm Grade Level: Keep the grade level at 8th grade or adjust as necessary.
Produce the Questions: Hit "Brisk It" to generate the questions.
In about 20 seconds, you'll have a comprehensive set of DOK questions categorized into:
Recall and Reproduction
Skills and Concepts
Strategic Thinking
Extended Thinking
These questions are designed to enhance critical thinking and deepen students' understanding of the topic.
Step 4: Compile Additional Resources
Select "Create" Once More: Navigate back and click on "Create".
Choose "Resource": This time, select the "Resource" option.
Generate the Content: Allow a few moments for Brisk to compile the information.
Brisk will provide a detailed resource covering all essential aspects of the Revolutionary War, including causes, key events, and significant figures—all derived from the specific website you're using.
Why Use the Brisk Extension?
The Brisk Extension is a game-changer for educators:
Time-Saving: Create high-quality educational materials in seconds.
Customizable: Adjust content to match your teaching style and students' needs.
Versatile: Suitable for any topic and adaptable across different grade levels.
Engaging: Develop resources that promote critical thinking and active learning.
Conclusion
In just a few simple steps, the Brisk Extension empowers you to enhance your teaching resources dramatically. It's an absolute must-have for educators seeking efficiency without compromising on quality.
If you have any questions or need further assistance, please don't hesitate to reach out. Happy teaching!
Increase Engagement with the Brisk Extension: From Tutoring to Exit Tickets and Everything In Between
As teachers, we’re always looking for tools that spark engagement, deepen understanding, and bring lessons to life. Enter the Brisk Extension, a versatile educational tool that can transform how students interact with your lessons. From tutoring tailored to specific content to dynamic debates and brainstorming sessions, Brisk makes it easy to elevate classroom learning.
Here’s a breakdown of how this extension can take your teaching from good to great.
What is the Brisk Extension?
Imagine a digital assistant designed specifically for your lesson needs. With Brisk, you can:
Provide real-time tutoring based on specific information or websites.
Facilitate debates on historical, literary, or even scientific topics.
Engage students in inquiry and brainstorming activities.
Connect lessons to real-world math problems.
(Coming soon!) Use check-for-understanding tools and exit tickets to track student progress.
Whether you teach elementary or high school, Brisk offers something for every grade level and subject area.
How Does It Work?
Boost Student Activity
When you select "Boost Student Activity" in Brisk, you’ll unlock an array of interactive options like:
Tutor Mode: Perfect for individualized support, this feature lets students interact with a chatbot designed around your chosen topic or website.
Debate Mode: Create structured, topic-specific debates where students argue their side, using prompts and evidence provided by the chatbot.
Brainstorming Sessions: Facilitate collaborative discussions and problem-solving activities.
Example: Running a Debate
Let’s say your class is studying the American Revolution. With Brisk, you can:
Select the Debate feature.
Choose a prompt like “Was the American Revolution justified?”
Preview and edit the chatbot’s responses to ensure they align with your objectives.
Share the activity with your students and watch as they engage in thoughtful back-and-forth debates.
You can adjust the complexity of questions and responses to suit any grade level, making it ideal for everything from middle school to AP-level discussions.
Tutoring Made Easy
Need individualized support for students struggling with specific content? Brisk’s Tutor Mode lets students:
Interact with a chatbot based on content you select.
Receive immediate, tailored feedback.
This can be a game-changer for differentiation, especially in classes with diverse learning needs.
Coming Soon: Assess and Reflect
Brisk is rolling out two exciting new features:
Check for Understanding: Quickly gauge comprehension during lessons.
Exit Tickets: Easily collect reflections or key takeaways from students before they leave class.
These features promise to make formative assessment smoother than ever.
Why Brisk?
Brisk isn’t just a tool; it’s a way to foster critical thinking, engagement, and collaboration. By integrating AI-powered interactions, it helps students explore, question, and understand content in meaningful ways. Plus, it’s user-friendly—you can set up activities in minutes and customize them to your exact needs.
Get Started with Brisk
If you’re ready to boost engagement and explore new ways of teaching, give Brisk a try. Whether you’re supporting struggling learners, sparking debates, or connecting math to real-world scenarios, this tool has something for everyone.
Have questions or want to share how you’re using Brisk? Drop a comment below or reach out to me directly—I’d love to hear from you!
The Brisk Extension: Create a Slides Presentation from Any Website and Engage Students with a Tutor
Engaging students in meaningful ways can sometimes feel like a challenge, but the Brisk teaching extension is here to make life a little easier. This innovative tool offers a quick and efficient way to transform any website into a fully functional presentation, complete with options to personalize the content for your class’s unique needs. Let’s break down how this extension can revolutionize your teaching toolkit.
Transform Websites into Presentations
Imagine you’re teaching about the Revolutionary War. With Brisk, you can take a relevant website and select the “Presentation” option. Here’s how it works:
Set Parameters: Choose the grade level (in this example, 9th grade) and the number of slides you need (10 slides were chosen here). You can opt for slides without images if you’re using the free version or upgrade to include images.
Pick a Design: Select a theme for your slides. The “Light” theme is a popular free choice, but paid options unlock more customization.
Automatic Generation: Watch as Brisk generates your slides. You’ll see them populate in real-time, with the ability to stop and restart the process if needed.
Once the slides are created, you’re prompted to:
Rate the generated content.
Translate the presentation into another language.
Add additional slides.
Create a quiz or vocabulary list to supplement learning.
Enhance Content with Built-In Tools
One of the standout features is the ability to adjust the level of detail in your presentation. Whether you want a shorter, more concise version or something detailed and thorough, Brisk provides easy sliders to tailor the content to your liking. This flexibility ensures that your presentation meets the needs of your students, no matter their learning style.
Engage Students with Tutor Mode
Brisk goes beyond slide creation by offering a “Tutor” mode to foster interactive learning. Here’s how it works:
Create a Tutor Activity: With just a click, the tool generates a tutor activity based on the content of your presentation.
Share and Monitor: Share the tutor link directly with students. All student interactions are visible to the teacher, ensuring transparency and accountability.
Interactive Chat: Students can engage in a dialogue with the tutor. Any comments they make are monitored, providing a safe and constructive environment for learning.
For example, a student might type a question or even test the system by inputting something like, “This is dumb.” As the teacher, you’ll see all responses in real time, giving you insight into how students are interacting with the material.
Additional Features
Brisk offers advanced features for those who upgrade to the Educator Pro plan, such as enhanced content and broader customization options. However, the free version already packs a punch with its presentation, quiz, and vocabulary tools. Future updates promise even more engaging activities, like assess and reflect modes.
Why Use Brisk?
The Brisk extension simplifies the process of creating engaging, interactive lessons. By transforming websites into presentations and offering tools like tutor mode, it bridges the gap between content delivery and student interaction. Teachers save time while students benefit from a more dynamic and personalized learning experience.
So why not give it a try? If you have questions or want to explore its features further, don’t hesitate to reach out. Teaching just got a whole lot easier—and a lot more fun!