Friday, August 16, 2024

Mastering Edpuzzle: Adding and Removing Videos from My Content


Edpuzzle is a powerful tool for educators looking to enhance their teaching through interactive video content. In this guide, we will explore how to effectively manage your video content by adding and removing videos from your Edpuzzle account. This process allows you to curate a collection of videos that best fit your teaching needs, ensuring you have quick access to the materials you want to use.

Understanding My Content Section

The "My Content" section is a vital part of your Edpuzzle experience. It serves as a personalized library where you can store and manage your videos. But how do you get videos to show up in this section? Let’s dive into the steps necessary to copy videos into your content.

Finding the Right Videos

The first step in managing your content is locating the videos you want to add. For instance, if you're interested in videos about the water cycle, you would start by searching for this topic.

Searching for water cycle videos in Edpuzzle

Simply type "water cycle" in the search bar. You’ll see a list of available videos related to your search. Browse through the options to find the ones that best suit your needs.

Copying Videos to My Content

Once you have selected the videos you want, the next step is to copy them to your "My Content" section. You can do this by selecting the videos you wish to add.
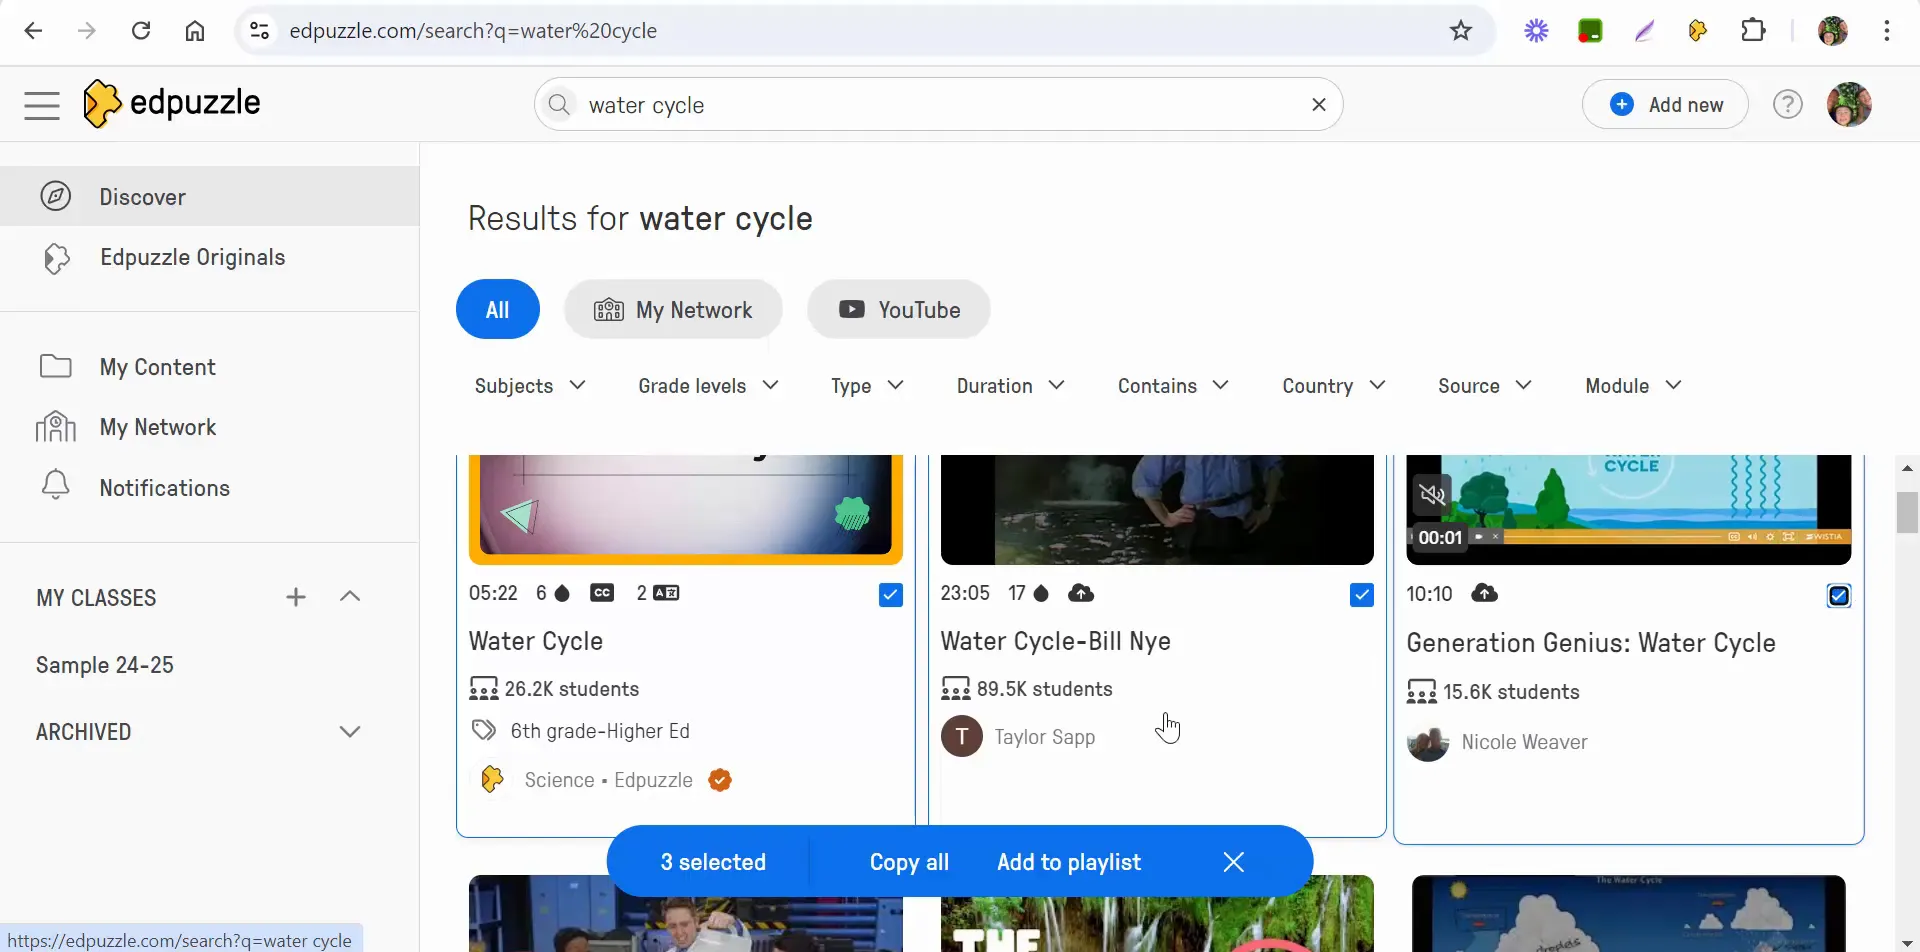
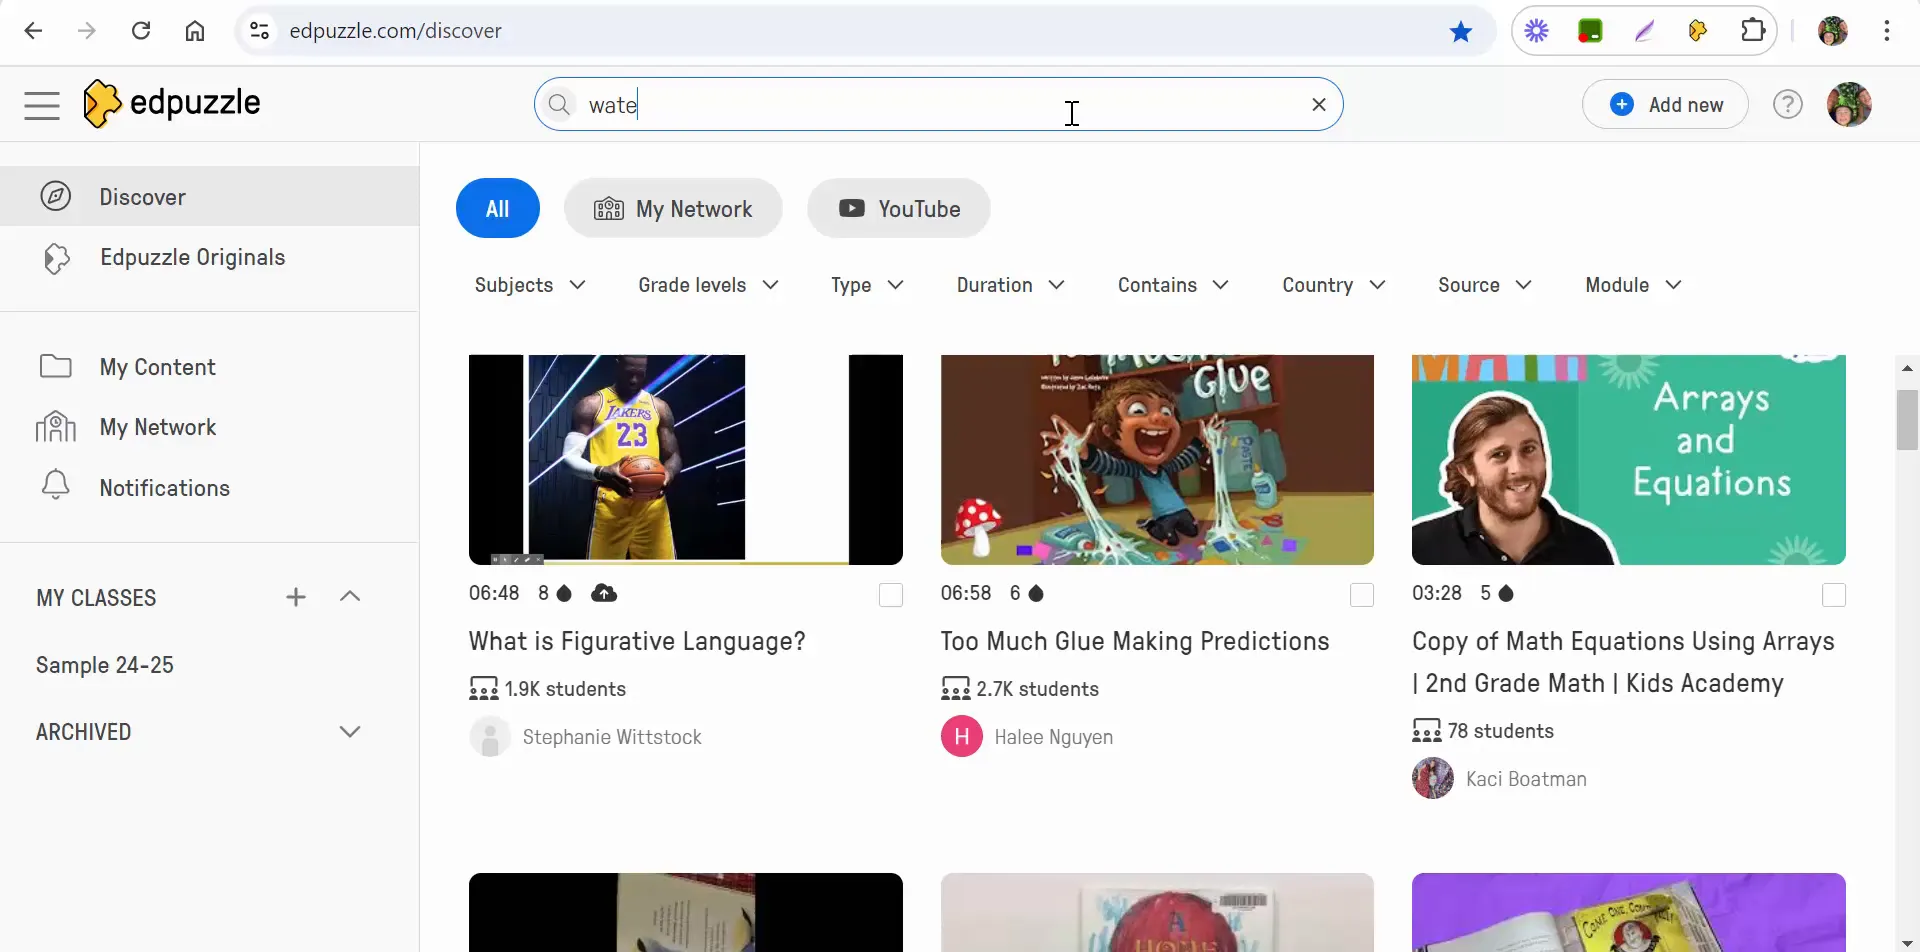
Selecting videos to copy to My Content

To copy multiple videos at once, simply select the "Copy All" option. This action will transfer the selected videos directly to your content library. Alternatively, if you are browsing a specific video, you can also copy it individually by selecting the appropriate option.

Copying an individual video to My Content

Managing Your Content

After adding videos to your content, you may find that you want to manage this library by removing videos that are no longer relevant or cluttering your space.

Removing Videos from My Content

If you decide that a specific video, such as a lengthy 23-minute clip, is too much for your needs, you can easily remove it. Here’s how:
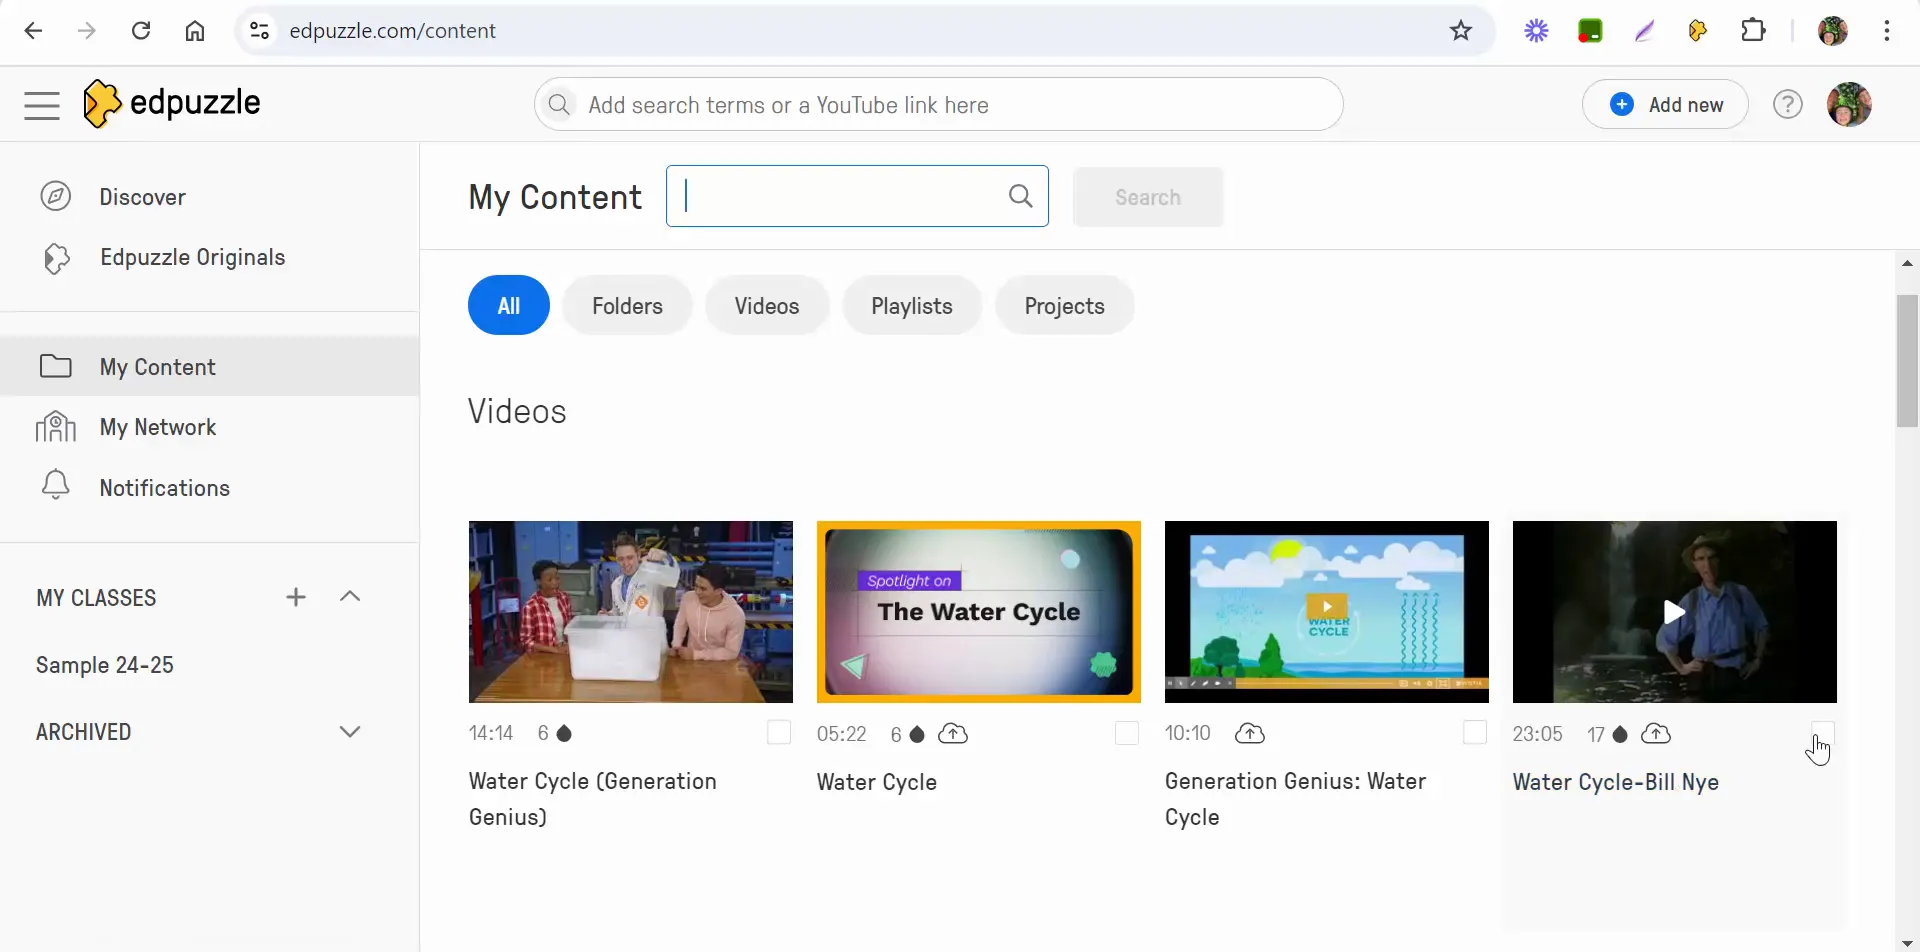
Removing a video from My Content

Simply select the box next to the video you want to delete, and then click on the delete option. A confirmation prompt will appear asking if you are sure you want to delete the video.
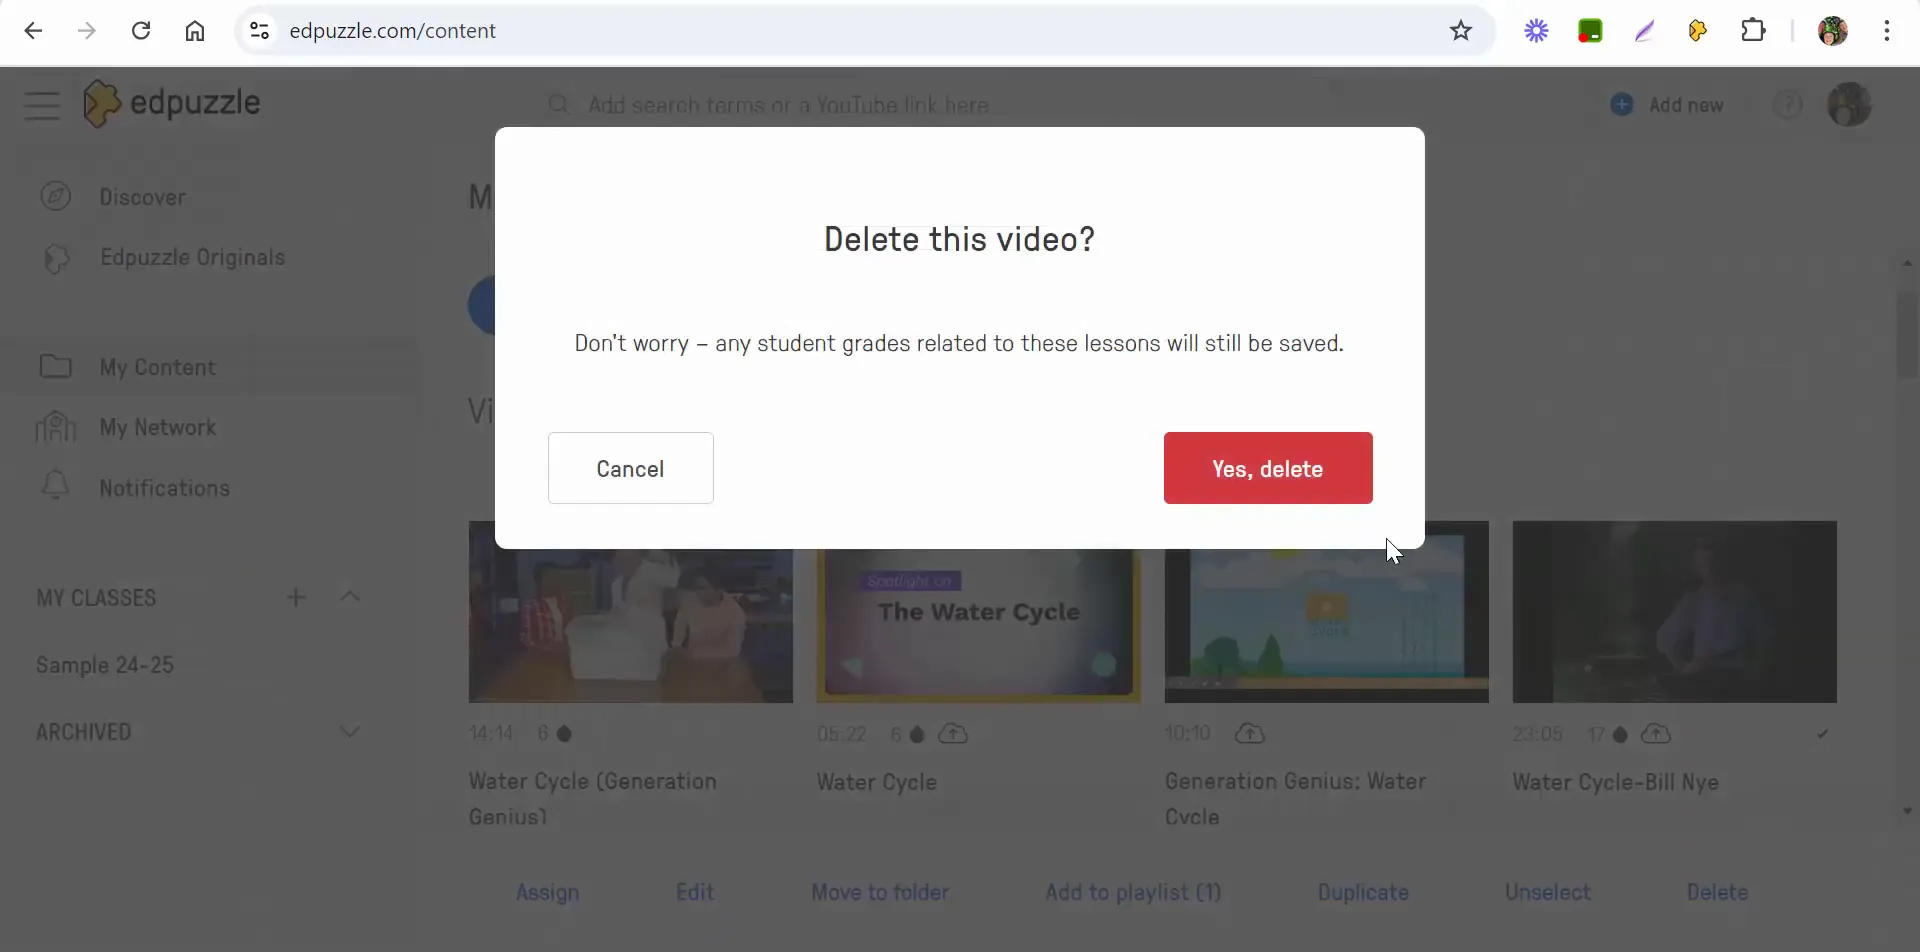
Confirming deletion of a video from My Content

Once you confirm, the video will be removed from your content. However, if you change your mind, you can always go back and add it back to your library.

Conclusion

Managing your video content in Edpuzzle is straightforward. By understanding how to add and remove videos from your “My Content” section, you can create a tailored library that enhances your teaching experience. If you have any questions or need further assistance, don’t hesitate to reach out. Happy teaching!

In the next video, we will explore how to organize your videos into folders and playlists, making it even easier to navigate your content.

Thursday, August 15, 2024

Edpuzzle How to find a video to share that fits the criteria you would like as well as how to edit one to fit your needs.


Edpuzzle has become an essential tool for educators looking to enhance their teaching methods through interactive video content. In this blog, we will explore how to effectively find, edit, and assign videos on Edpuzzle, ensuring that your students receive the best possible learning experience.

Getting Started with Edpuzzle

Before you can assign a video to your class, you need to get familiar with the Edpuzzle interface. After creating your first class, the next step is to find a suitable video to assign. This process involves a few straightforward steps, which we will break down below.

Searching for the Right Video

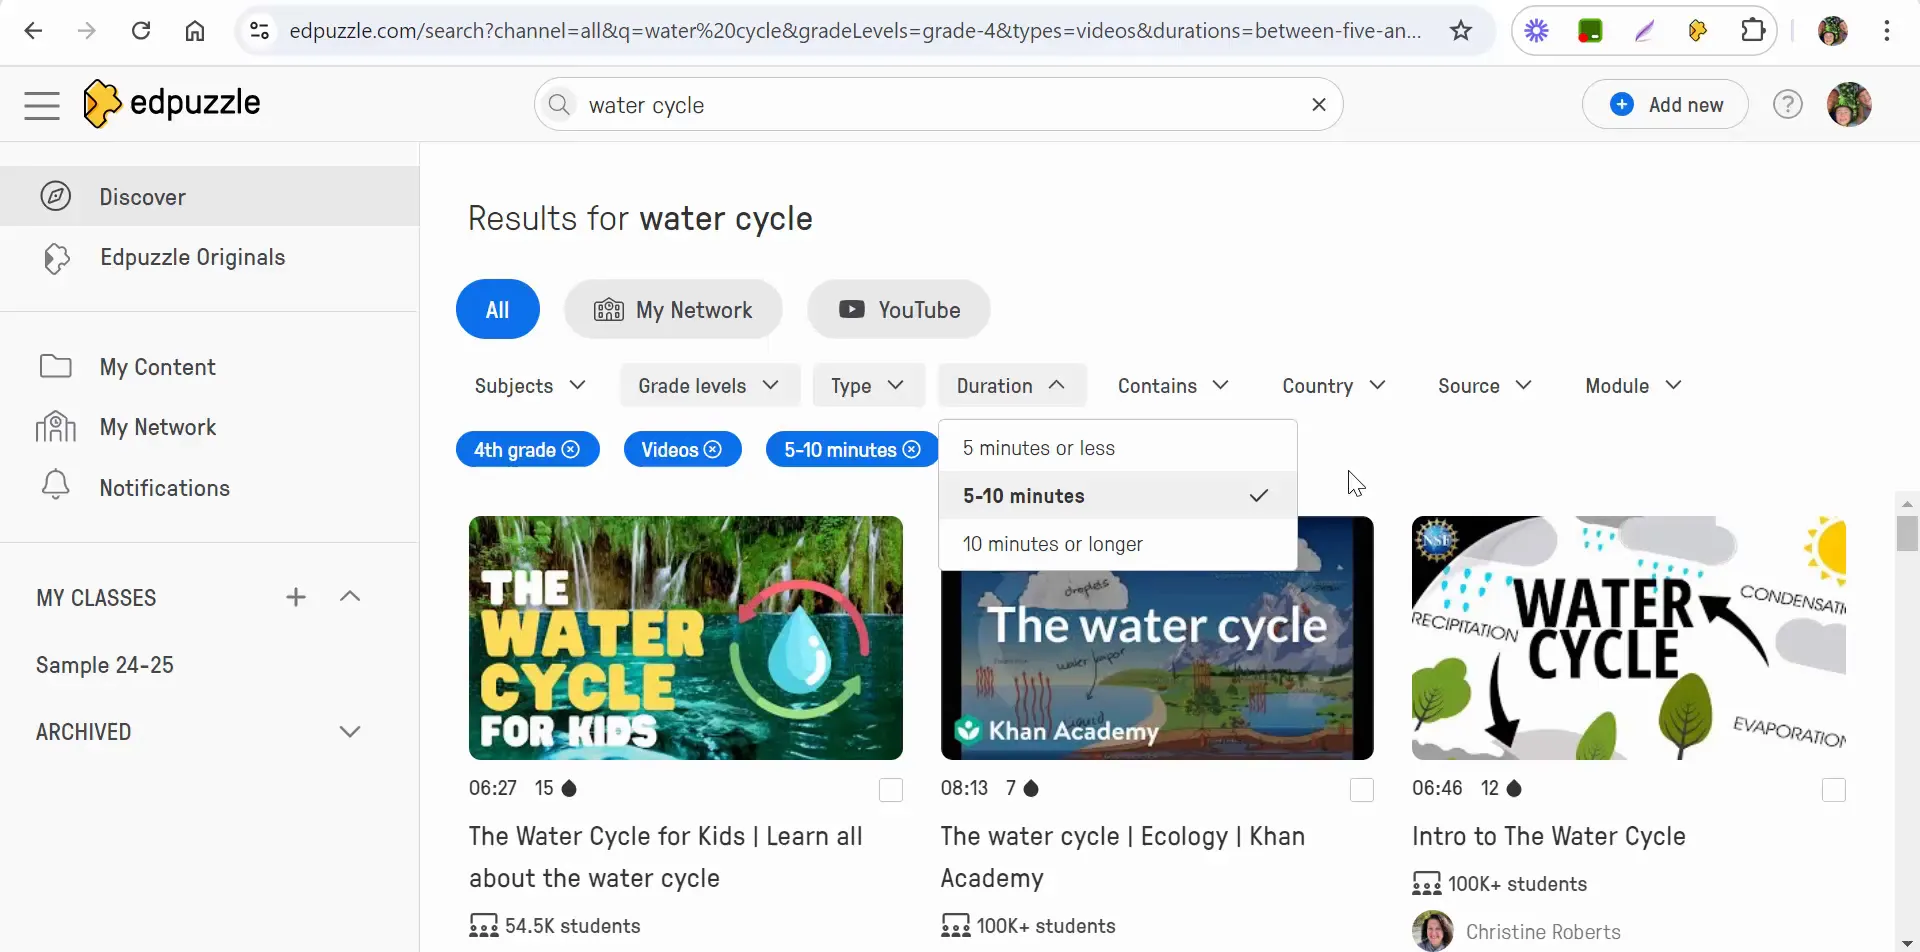
To begin, you will need to search for a video that fits your lesson criteria. For this example, we’ll look for a video on the water cycle.

Searching for a video on the water cycle

When you start typing “water cycle” into the search bar, you will notice that there are no default filters applied initially. To narrow down your results, you can select specific options for subjects and grade levels. For this instance, let’s choose fourth grade.

Narrowing Down Your Search

Edpuzzle allows users to filter search results based on various criteria, such as grade level and video length. You can select options like “5 minutes or less,” but remember that you cannot combine multiple time filters. The platform recommends videos that are roughly six minutes long for optimal engagement.

Filtering search results for video length

Once you have set your preferences, you can begin browsing the available videos. Look for content that matches your educational goals while also keeping your students’ attention.

Editing Your Selected Video

After finding a suitable video, the next step is to edit it to fit your teaching needs. Edpuzzle provides a variety of editing tools that allow you to customize the video before assigning it to your class.

Accessing the Editing Tools

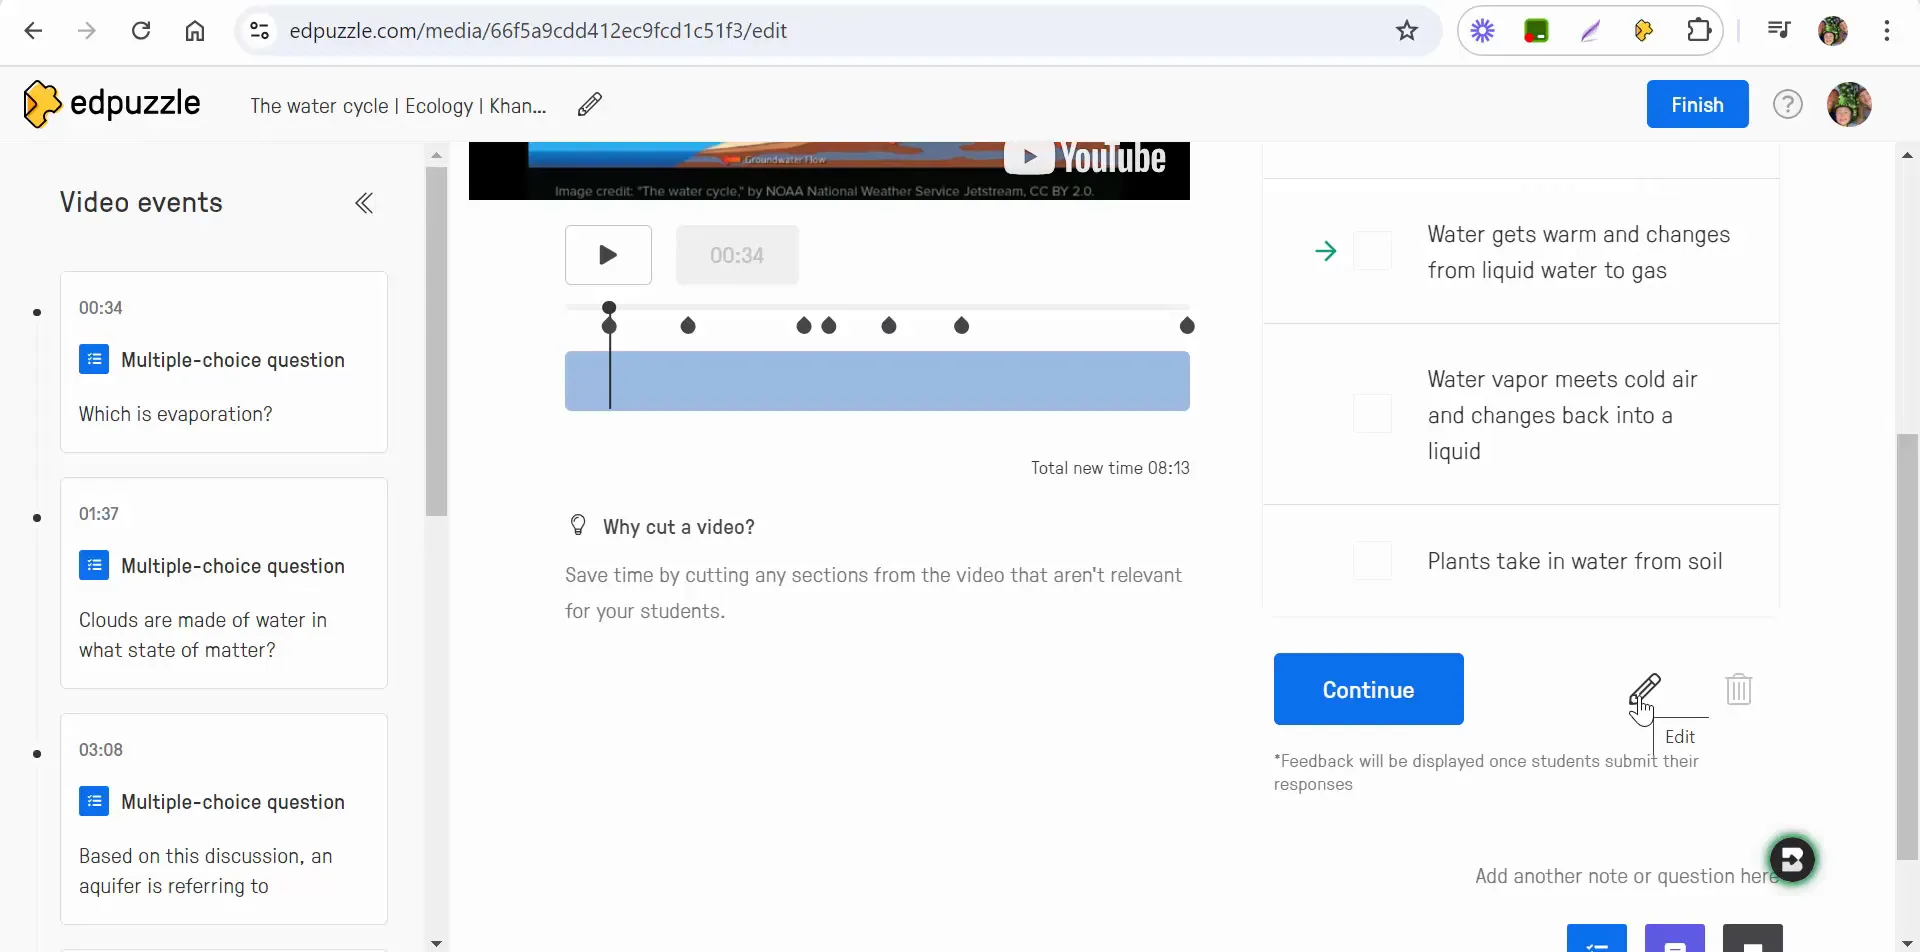
To edit the video, simply select the edit button. This will open the editing interface where you can make changes to the video title, add questions, and include notes.

As you scroll through the video, you will see existing questions and the option to add new ones. You can edit the wording of the questions or create entirely new ones to ensure they align with your lesson objectives.

Creating Questions

Incorporating questions into your video is crucial for maintaining student engagement and assessing understanding. You can choose to add multiple-choice questions or open-ended questions, depending on your preference.

Adding questions to the video

When editing a specific question, you can listen to the video segment to ensure that your question is relevant and timed appropriately. After making any necessary changes, be sure to save your edits.

Assigning the Video to Your Class

Once your video is edited and ready to go, it’s time to assign it to your class. This process is simple and allows you to set parameters for how students will interact with the video.

Assigning the Video

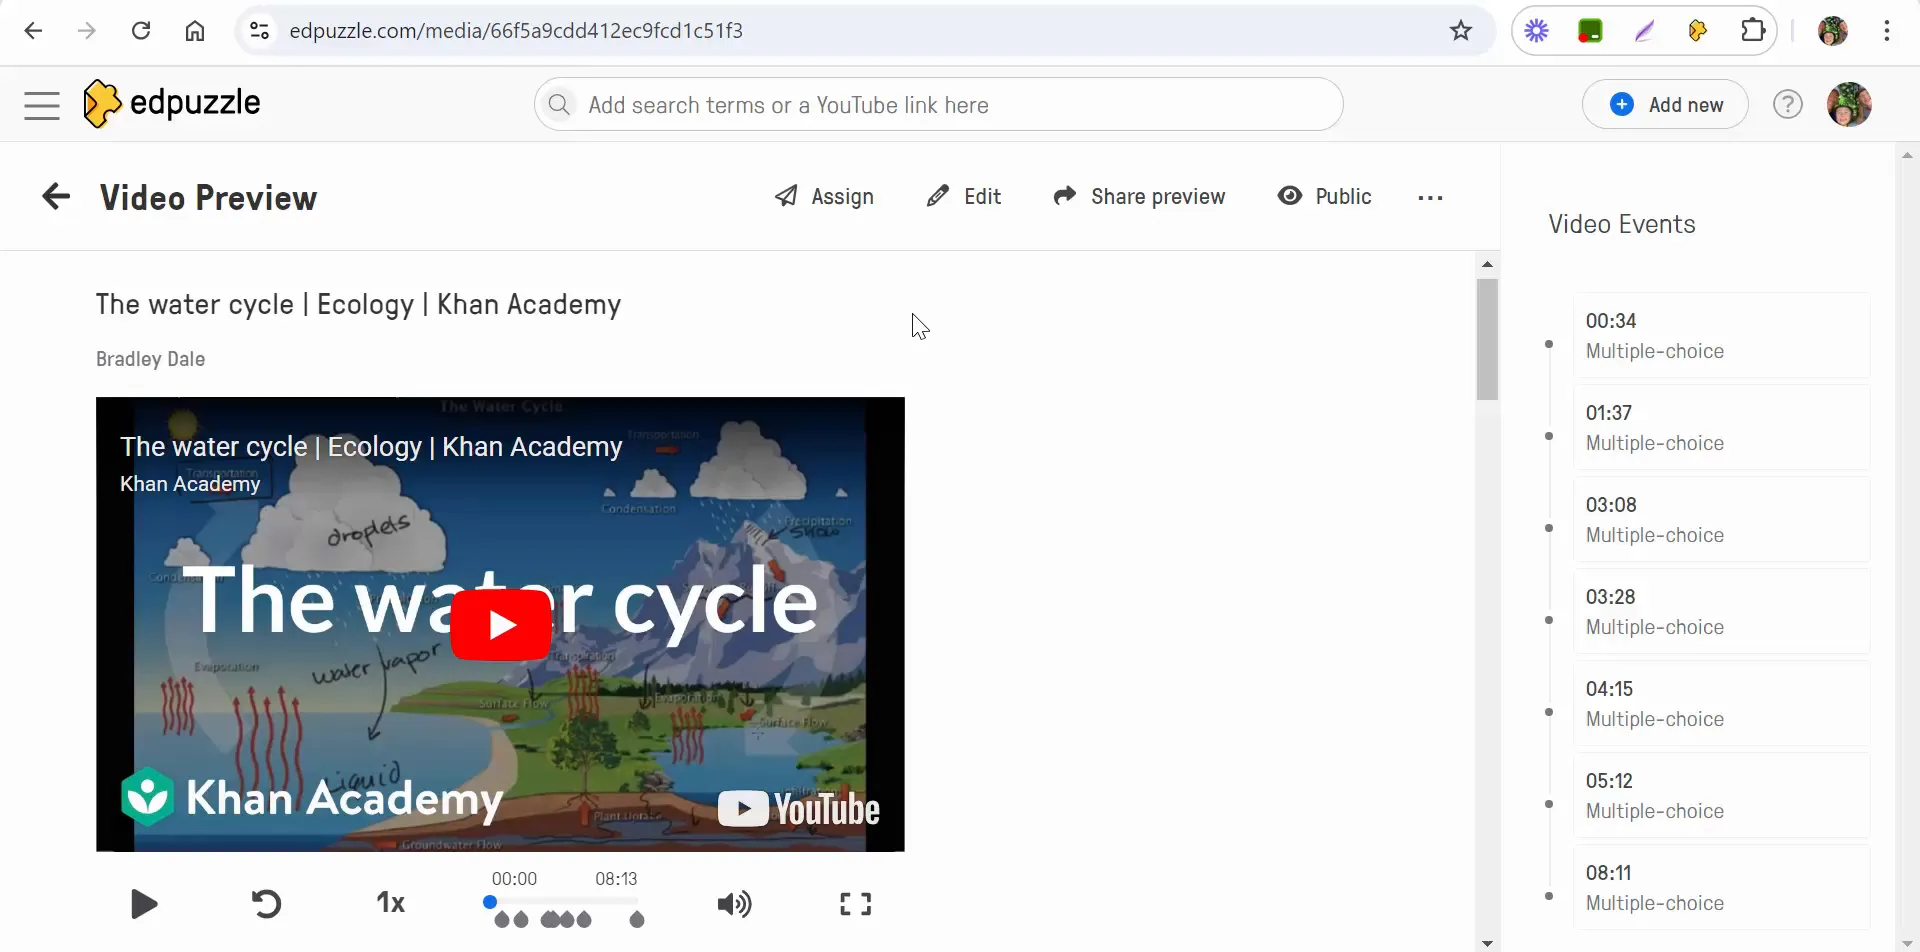
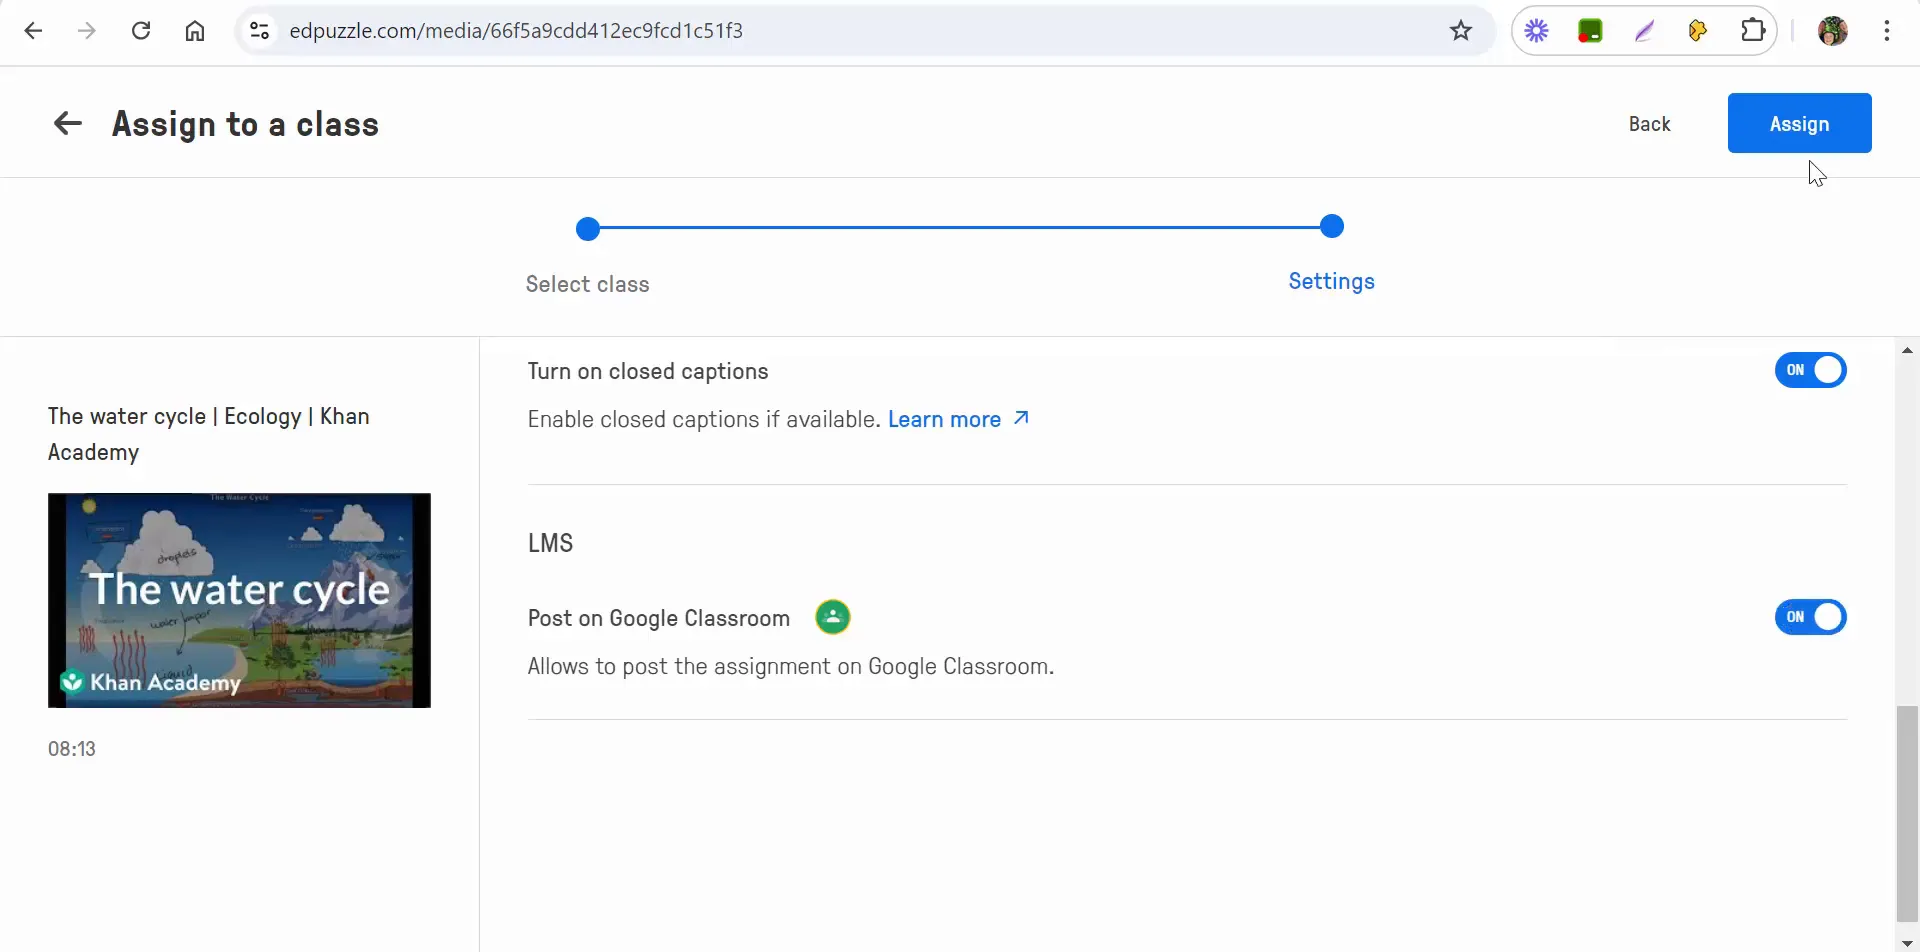
To assign the video, select the “Assign” button and choose the appropriate class. You’ll then be prompted to set a start date and a due date for the assignment. If you prefer, you can leave it as “no due date” for flexibility.

Assigning the video to the class

One important feature to consider is the option to prevent students from skipping ahead in the video. This can be beneficial for ensuring they engage fully with the content.

Setting Assignment Parameters

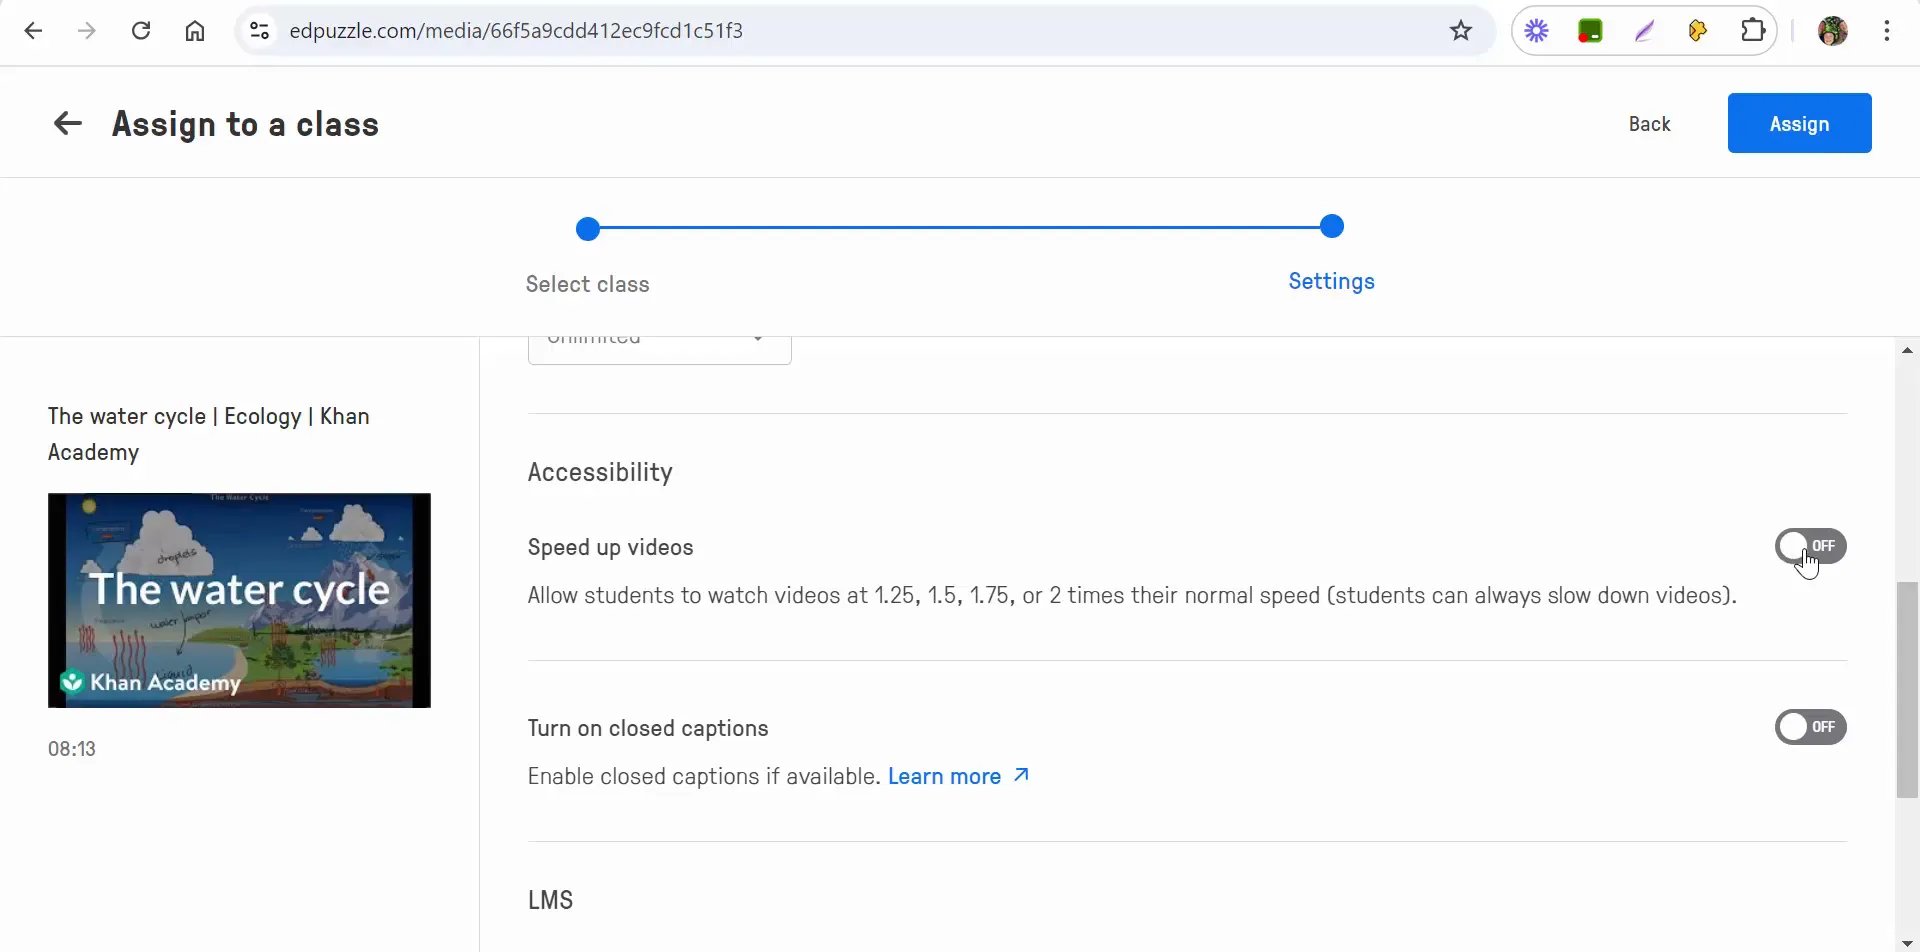
Decide how many times students can attempt the assignment. If it’s a quiz, you might want to limit it to one attempt. Alternatively, if it’s a learning tool, you might allow multiple attempts for mastery.

Setting parameters for the assignment

Additionally, you can enable closed captions if they are available, which can enhance understanding for some students.

Integrating with Google Classroom

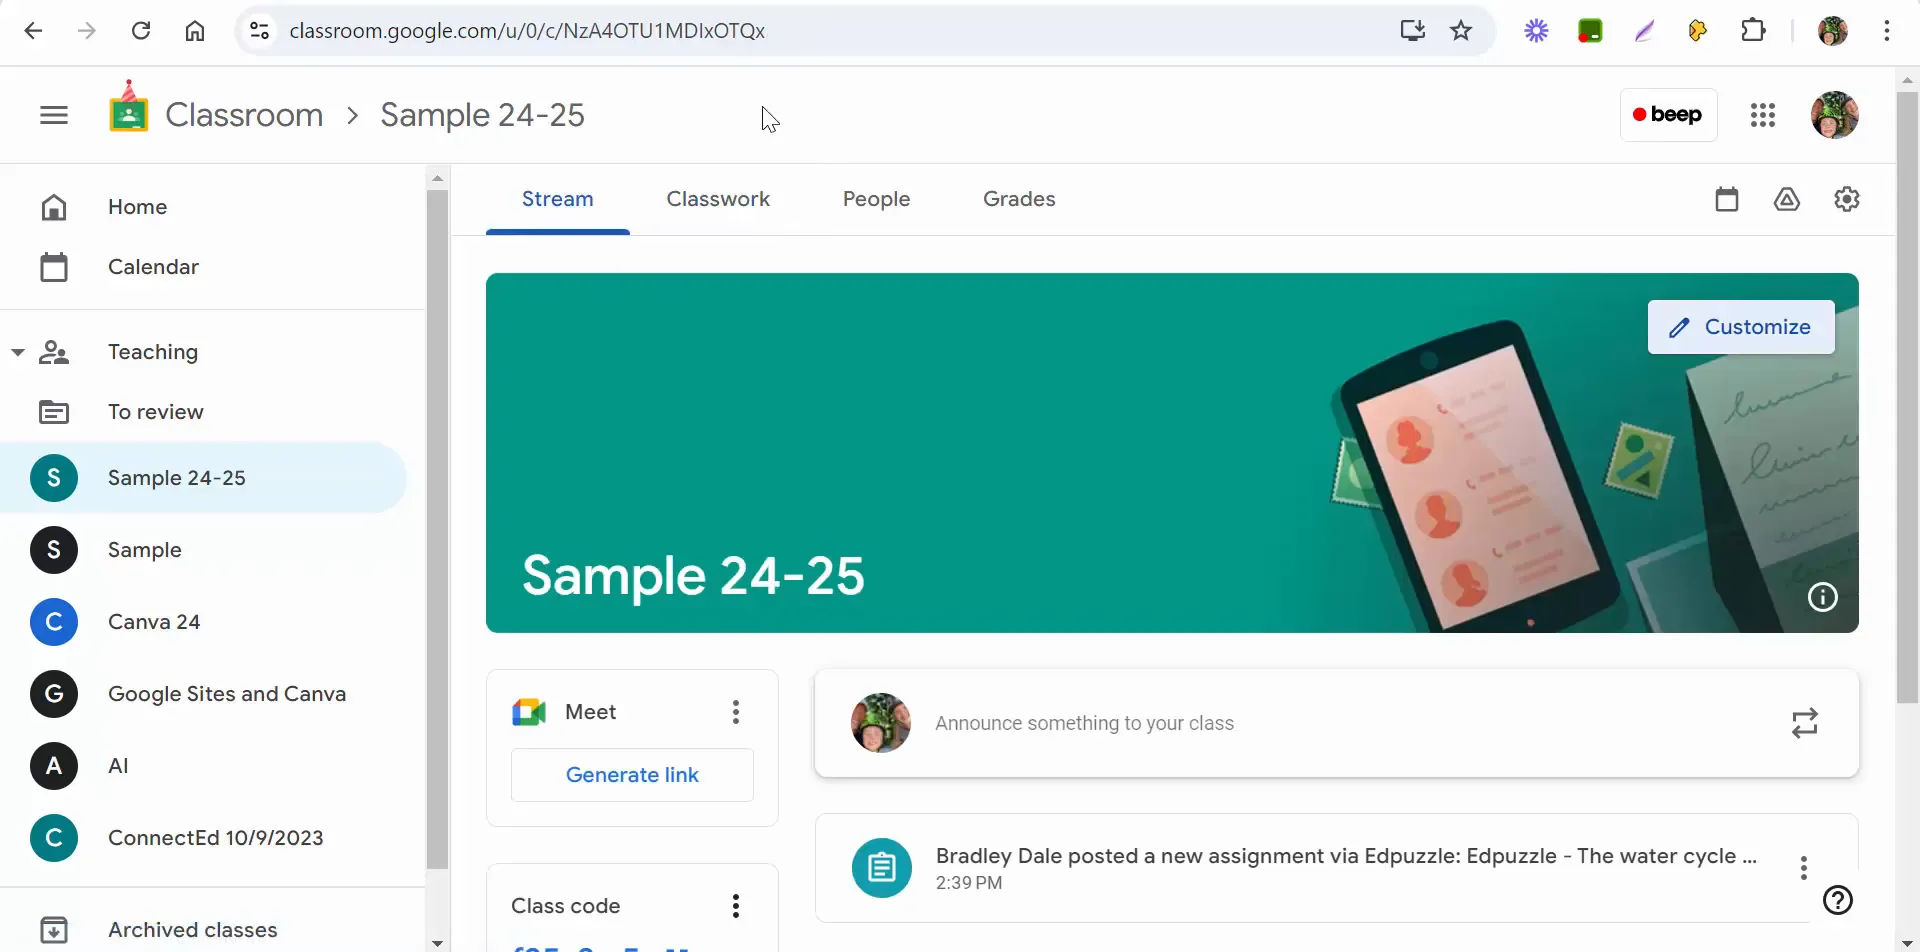
Edpuzzle seamlessly integrates with Google Classroom, making it easy to share assignments with your students. Once you have assigned the video, you can post it directly to Google Classroom.

Posting the assignment in Google Classroom

Students will see the assignment appear in their Google Classroom stream and can access it from their classwork section as well.

Monitoring Student Engagement

After posting the assignment, you can monitor student progress through Edpuzzle's analytics dashboard. This feature allows you to track how many students have watched the video and their performance on the embedded questions.

Monitoring student progress in Edpuzzle

This data is valuable for understanding which concepts students grasped and which ones may need further review.

Conclusion

Using Edpuzzle to find, edit, and assign videos makes it easier to create engaging and interactive lessons for your students. By following the steps outlined in this guide, you can effectively integrate video content into your teaching strategy, enhancing student learning outcomes.

If you have any questions or need assistance, feel free to reach out. Happy teaching!

Wednesday, August 14, 2024

Edpuzzle Don't see any students in your class? Here is one solution + how to remove a student from your class.


Managing Class Members

Once your students are imported, you'll need to manage them effectively. This includes editing student names, resetting passwords, and removing students if necessary. Edpuzzle allows you to perform these actions easily through the class management options.

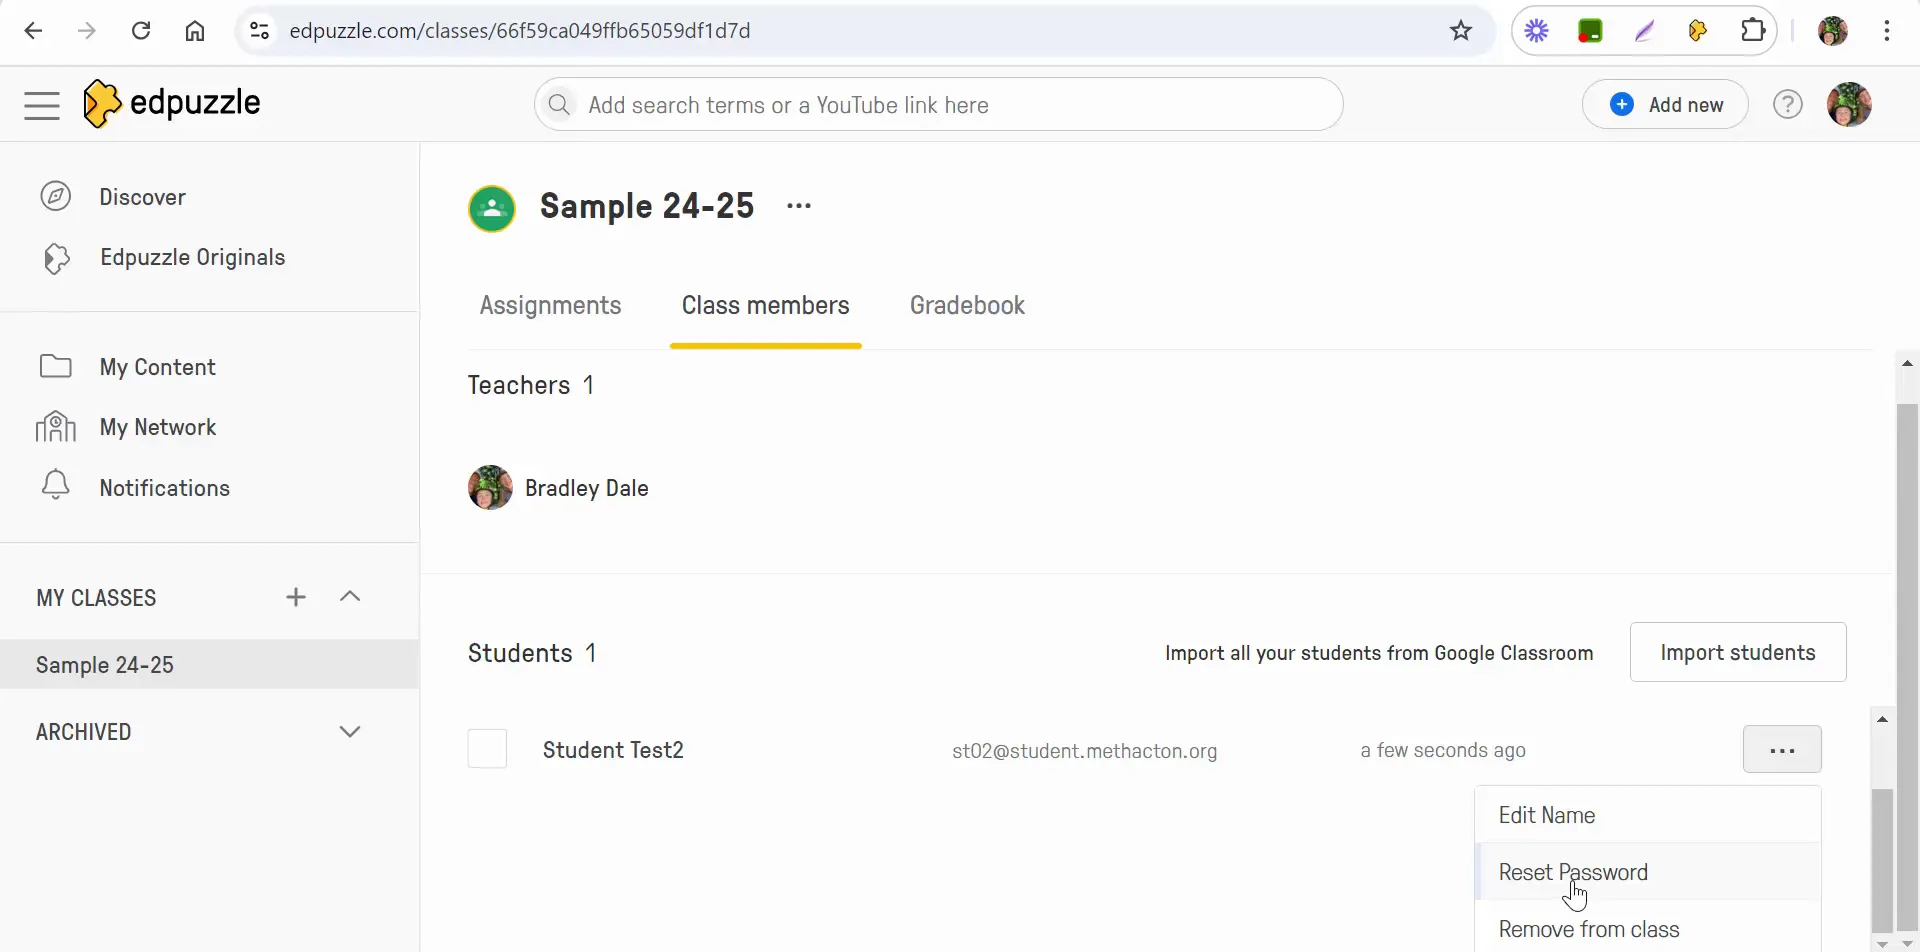
To edit a student's name or reset their password, click on the three dots next to their name in the class members' list. This will open a menu with various options, allowing you to make the necessary changes quickly.

Class members management options in Edpuzzle

Removing Students from Your Class

There may be instances where you need to remove a student from your Edpuzzle class. This could be due to various reasons such as a student dropping the course or needing to reset their account. Fortunately, Edpuzzle makes this process simple.

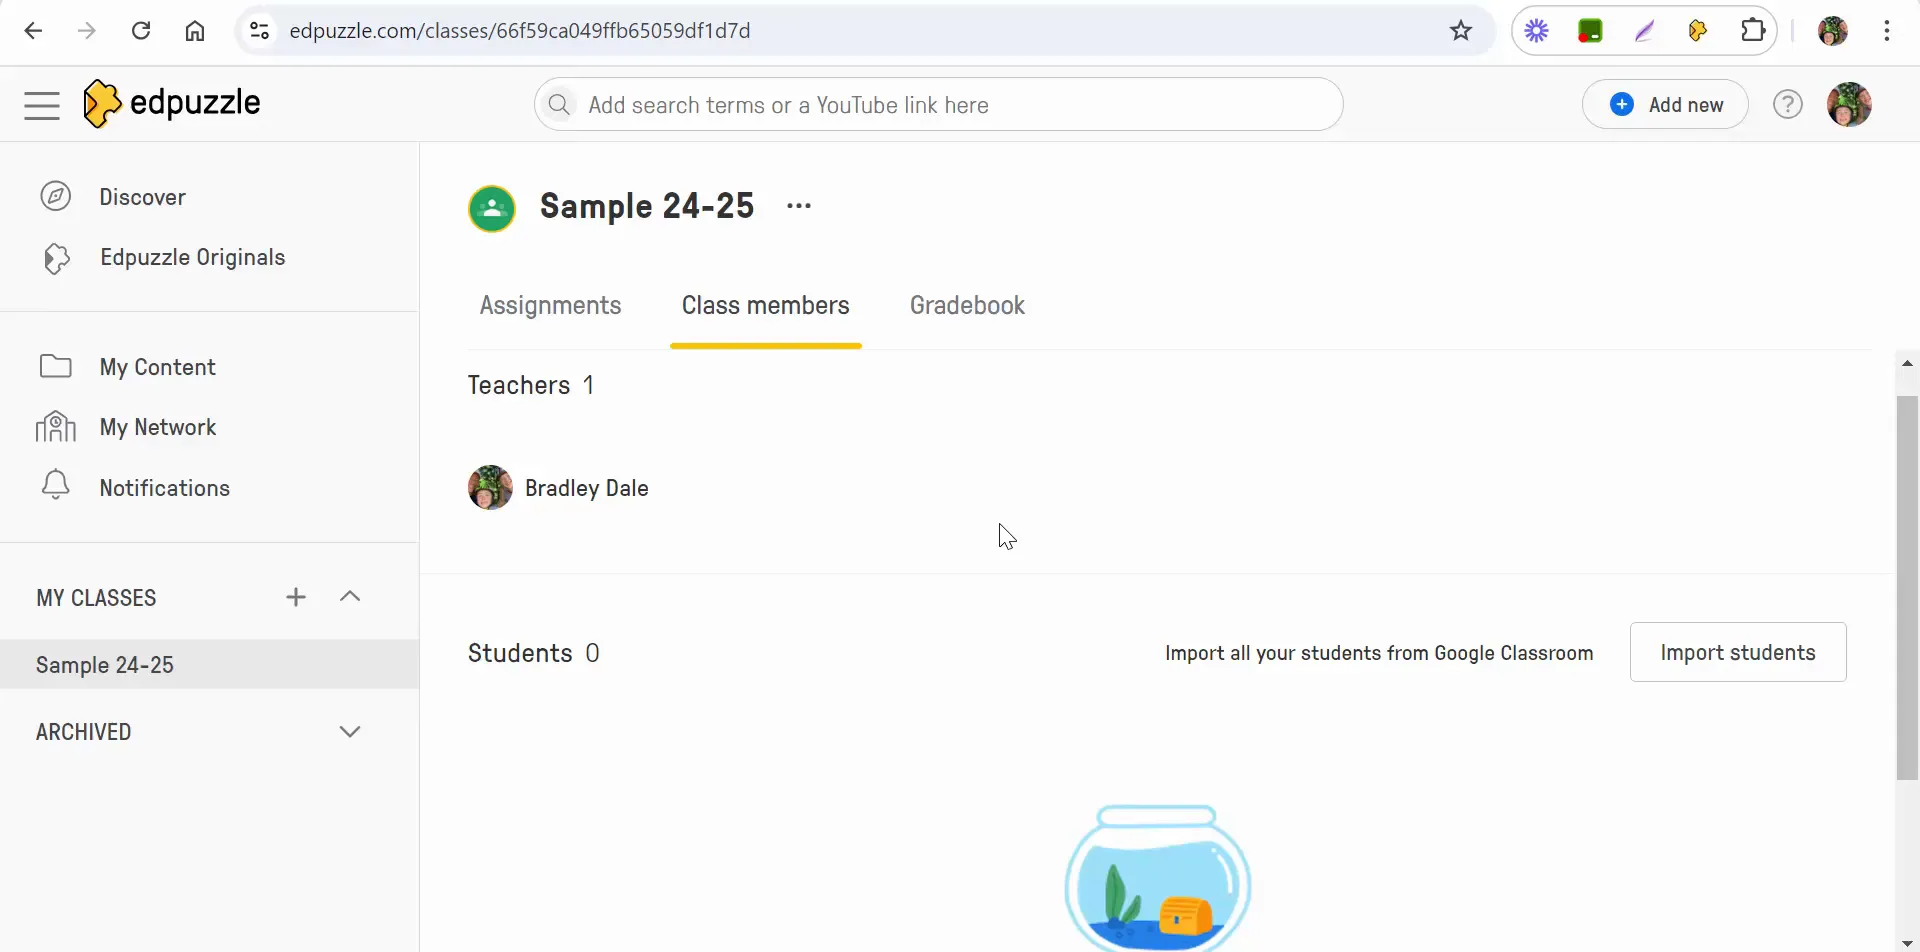
To remove a student, navigate to the class members section, select the three dots next to the student's name, and choose the option to remove them. If you accidentally remove a student, you can easily re-import them back into the class without any hassle.

Removing a student from class in Edpuzzle

Best Practices for Class Management in Edpuzzle

Managing your Edpuzzle class effectively requires a proactive approach. Here are some best practices to keep in mind:

  • Regularly Check Notifications: Make it a habit to check your notifications daily to stay updated on student progress and assignments.
  • Communicate with Students: Keep an open line of communication with your students regarding any changes in class management, such as updates on assignments or changes in class members.
  • Utilize Edpuzzle Resources: Take advantage of the resources and support offered by Edpuzzle to enhance your teaching and troubleshooting skills.
  • Stay Organized: Use the tools provided by Edpuzzle to keep your class organized, ensuring that all students have access to the materials they need.

Troubleshooting Common Issues

Even with the best practices in place, you may encounter some common issues while managing your Edpuzzle class. Here are some troubleshooting tips:

  • Students Not Appearing: If students do not appear in your class after importing, double-check that you followed the import process correctly.
  • Notification Issues: If you aren't receiving notifications, ensure your notification settings are enabled in your account settings.
  • Error in Student Details: If you need to make changes to a student's details, remember you can edit them directly in the class members' section.

Conclusion

Managing your Edpuzzle class effectively is key to enhancing the learning experience for your students. By following the steps outlined in this guide, you can ensure that your class runs smoothly, allowing you to focus on delivering engaging and interactive lessons. Remember, if you have any questions or encounter issues, don't hesitate to reach out for assistance. Happy teaching!

Tuesday, August 13, 2024

Edpuzzle. In Edpuzzle how to set up your first class as well as additional resources and a help center. *


Edpuzzle is a powerful tool that allows educators to create engaging video lessons that enhance student learning. This guide will walk you through the process of setting up your first class and highlight the resources available to help you make the most of Edpuzzle.

Understanding Edpuzzle Resources

Before diving into class setup, it's essential to familiarize yourself with the resources available on Edpuzzle. These include tutorials, webinars, and a help center designed to support educators in their journey.

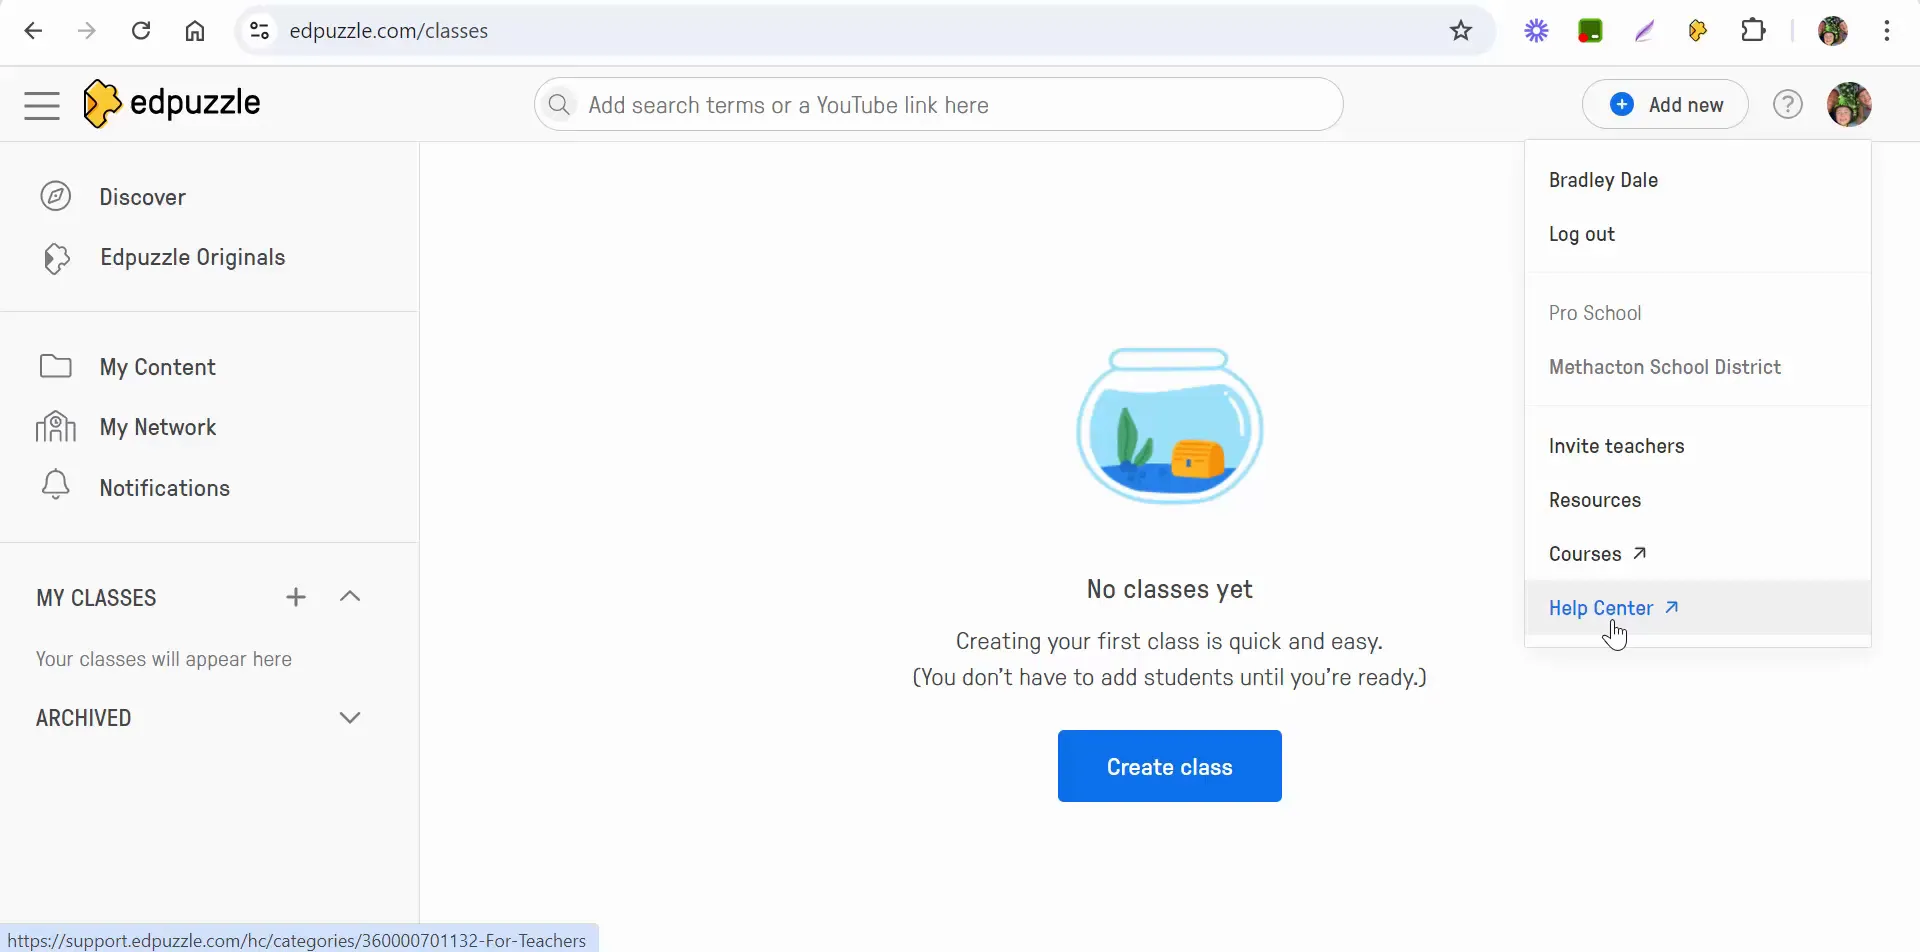
In the upper right corner of the Edpuzzle interface, you'll find an icon that provides access to various resources. By selecting this icon, you can explore different options:

  • Help Center: Type in your queries or browse through a comprehensive list of information available to assist you.
  • Resources: Access videos, tutorials, and teacher courses that cover a wide array of topics related to Edpuzzle.

For instance, if you explore the tutorials, you'll find a collection of ten videos that guide you through getting started with Edpuzzle, including creating an account and navigating the platform.

Edpuzzle resources overview

Setting Up Your First Class

Now that you are familiar with the resources, let’s walk through how to set up your first class in Edpuzzle. If you don’t see the option to create a class immediately, follow these steps:

  • Navigate to the "My Classes" section.
  • Select the plus icon to add a new class.
  • If you're part of a Google School District, you can easily connect your Google Classroom account.

Once you’ve selected the option to create a class, follow these steps:

  1. Sign in with your Google account if prompted.
  2. Select all classes you want to import.
  3. Click "Continue" to connect your class.
  4. Name your class (e.g., "Fourth Grade General") and finalize the import.

Creating a new class in Edpuzzle

Exploring Edpuzzle Features

After setting up your class, it’s time to explore the various features Edpuzzle offers to enhance your teaching experience. Here are some key functionalities to consider:

  • Interactive Video Lessons: Transform passive video watching into an interactive learning experience by embedding questions and comments throughout the video.
  • Analytics and Feedback: Monitor student progress and understanding through detailed analytics, allowing you to provide timely feedback and support where needed.
  • Integration with Google Classroom: Seamlessly connect your Edpuzzle account with Google Classroom for easy assignment distribution and management.

Using Video Resources Effectively

Edpuzzle allows you to utilize videos from various educational platforms, enhancing the resources at your disposal. Here’s how to find and use videos effectively:

  • Search for Pre-Created Content: Use Edpuzzle’s internal search function to find videos that have already been created and may include embedded questions.
  • Integrate Educational Channels: Look for videos from reputable educational channels like Khan Academy, TED Talks, and National Geographic.
  • Custom Video Creation: If you can’t find what you need, consider recording your own video lessons tailored to your students' needs.

Final Thoughts

Setting up your first class on Edpuzzle is straightforward, and the resources available can significantly enhance your teaching experience. By integrating interactive video lessons into your curriculum, you can foster a more engaging and effective learning environment for your students.

If you have any questions or need further assistance, don’t hesitate to reach out through the help center or connect with fellow educators. Happy teaching!

Monday, August 12, 2024

Edpuzzle How to create an account and get started.


In today's digital learning landscape, tools like Edpuzzle are revolutionizing the way educators engage with students. This platform not only allows teachers to create interactive video lessons but also provides a seamless way to track student progress. If you're looking to enhance your teaching methods, this guide will walk you through the setup process and beyond, ensuring you're well-equipped to utilize Edpuzzle effectively.

What is Edpuzzle?

Edpuzzle is an innovative educational tool designed for teachers to create interactive video lessons. By integrating various multimedia resources, teachers can make learning more engaging and effective. With Edpuzzle, you can choose videos from popular platforms, add your own voiceovers, embed questions, and track student performance.

One of the standout features of Edpuzzle is its ability to transform passive viewing into active learning. Students are prompted to answer questions at specific intervals in the video, ensuring they are engaged and comprehending the material. This interactive approach not only increases retention but also allows teachers to gather real-time data on student understanding.

Creating Your Edpuzzle Account

To get started with Edpuzzle, the first step is to create an account. Here’s a step-by-step guide:

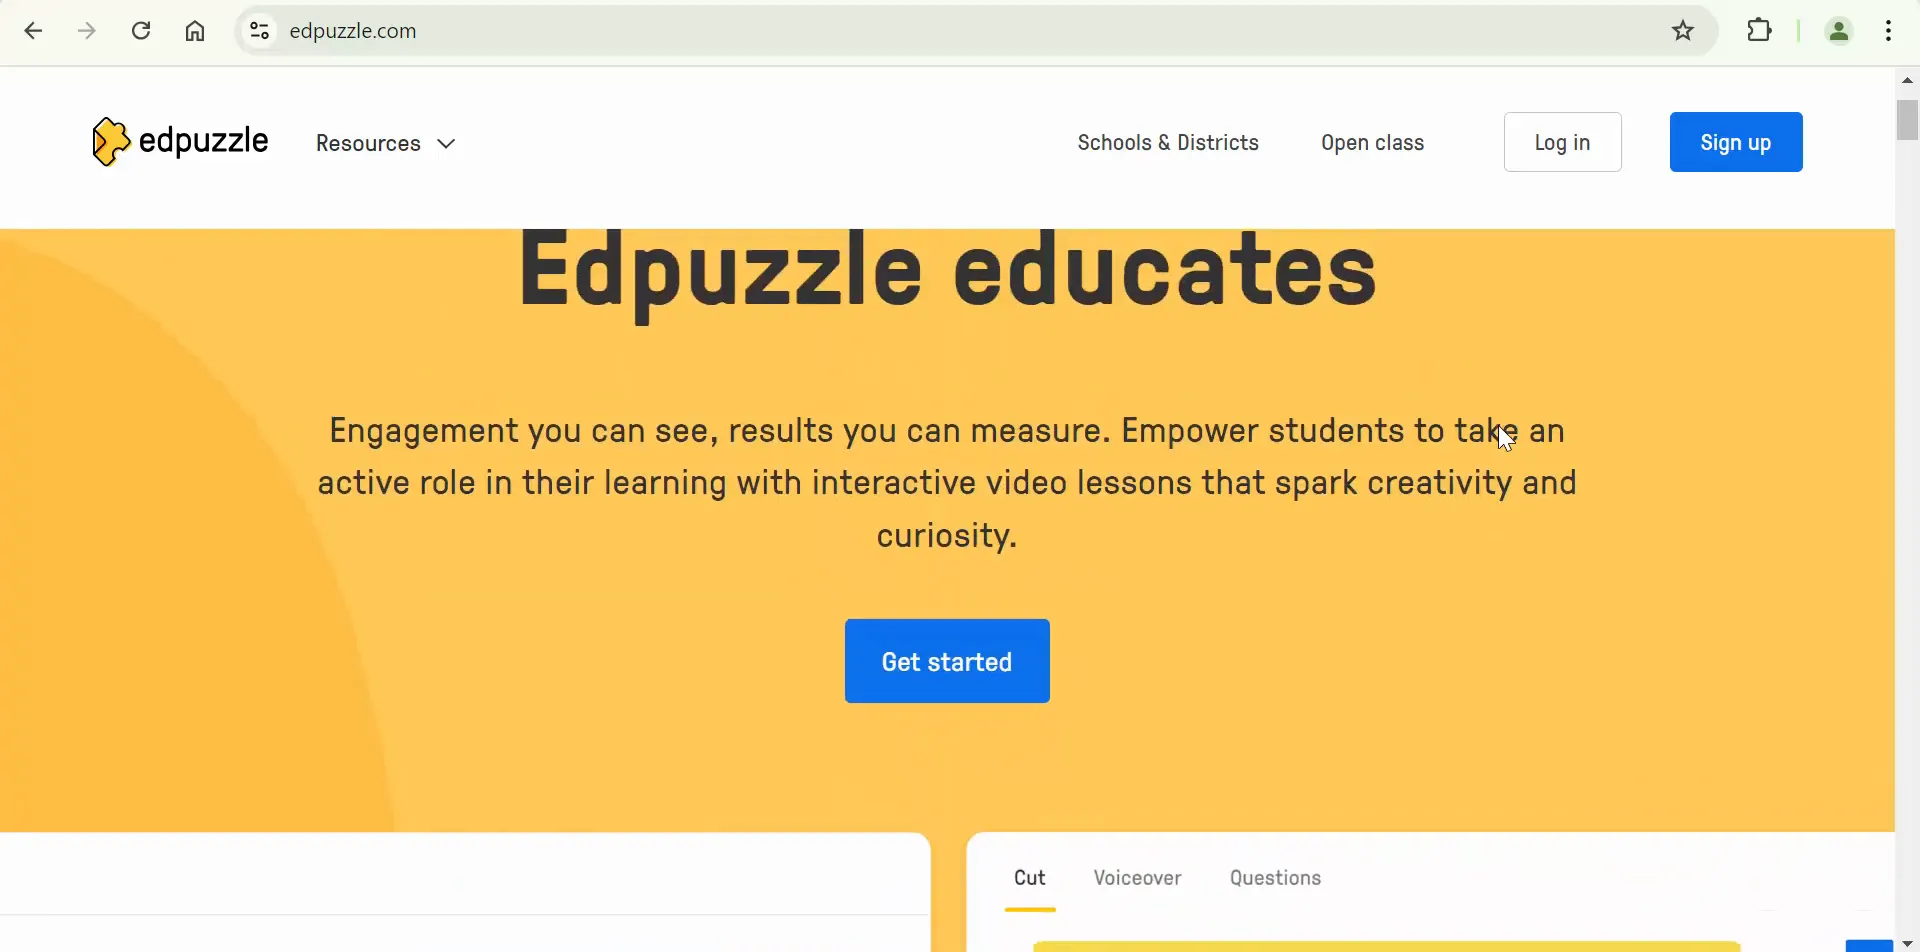
  1. Visit the Edpuzzle Website: Navigate to the Edpuzzle homepage.

  2. Select 'Sign Up': Click on the 'Sign Up' button located at the top right corner.

    Clicking the sign up button on Edpuzzle
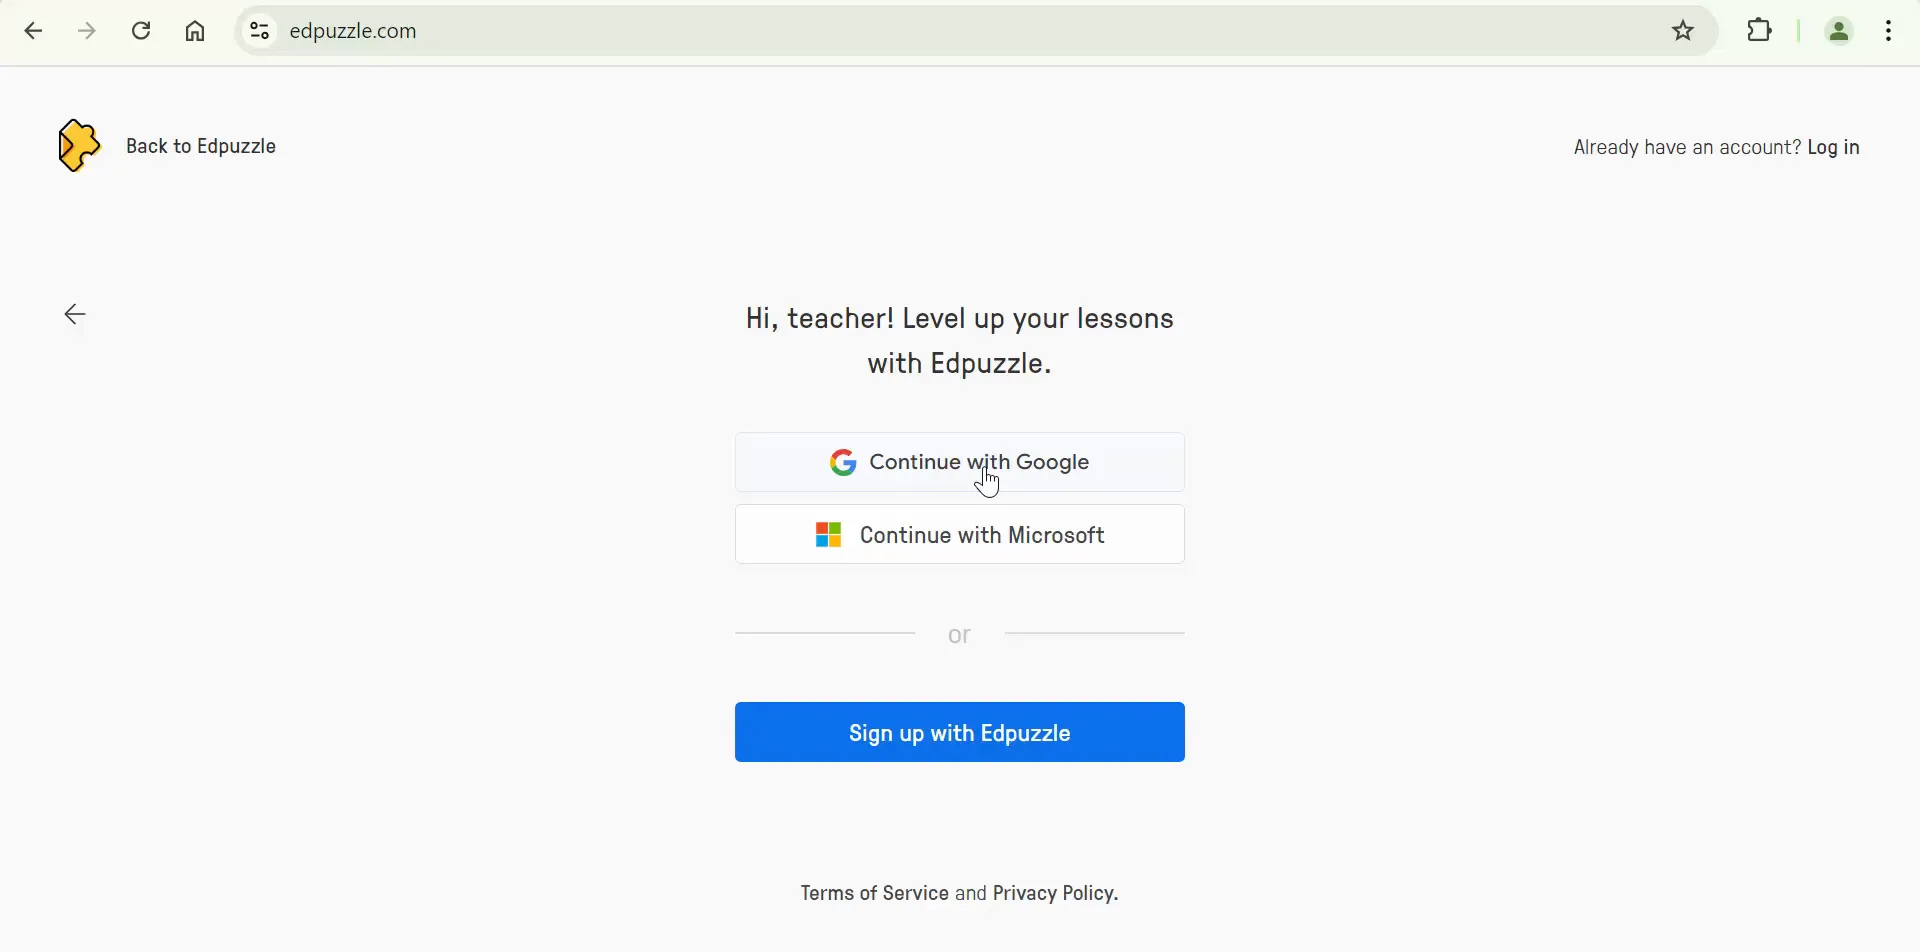
  3. Choose Your Role: Select 'I'm a Teacher' to proceed.

  4. Login Options: If your school uses Google, you can select 'Continue with Google' for a quicker sign-up process. Alternatively, you can create a new account using your email.

    Choosing to sign up with Google
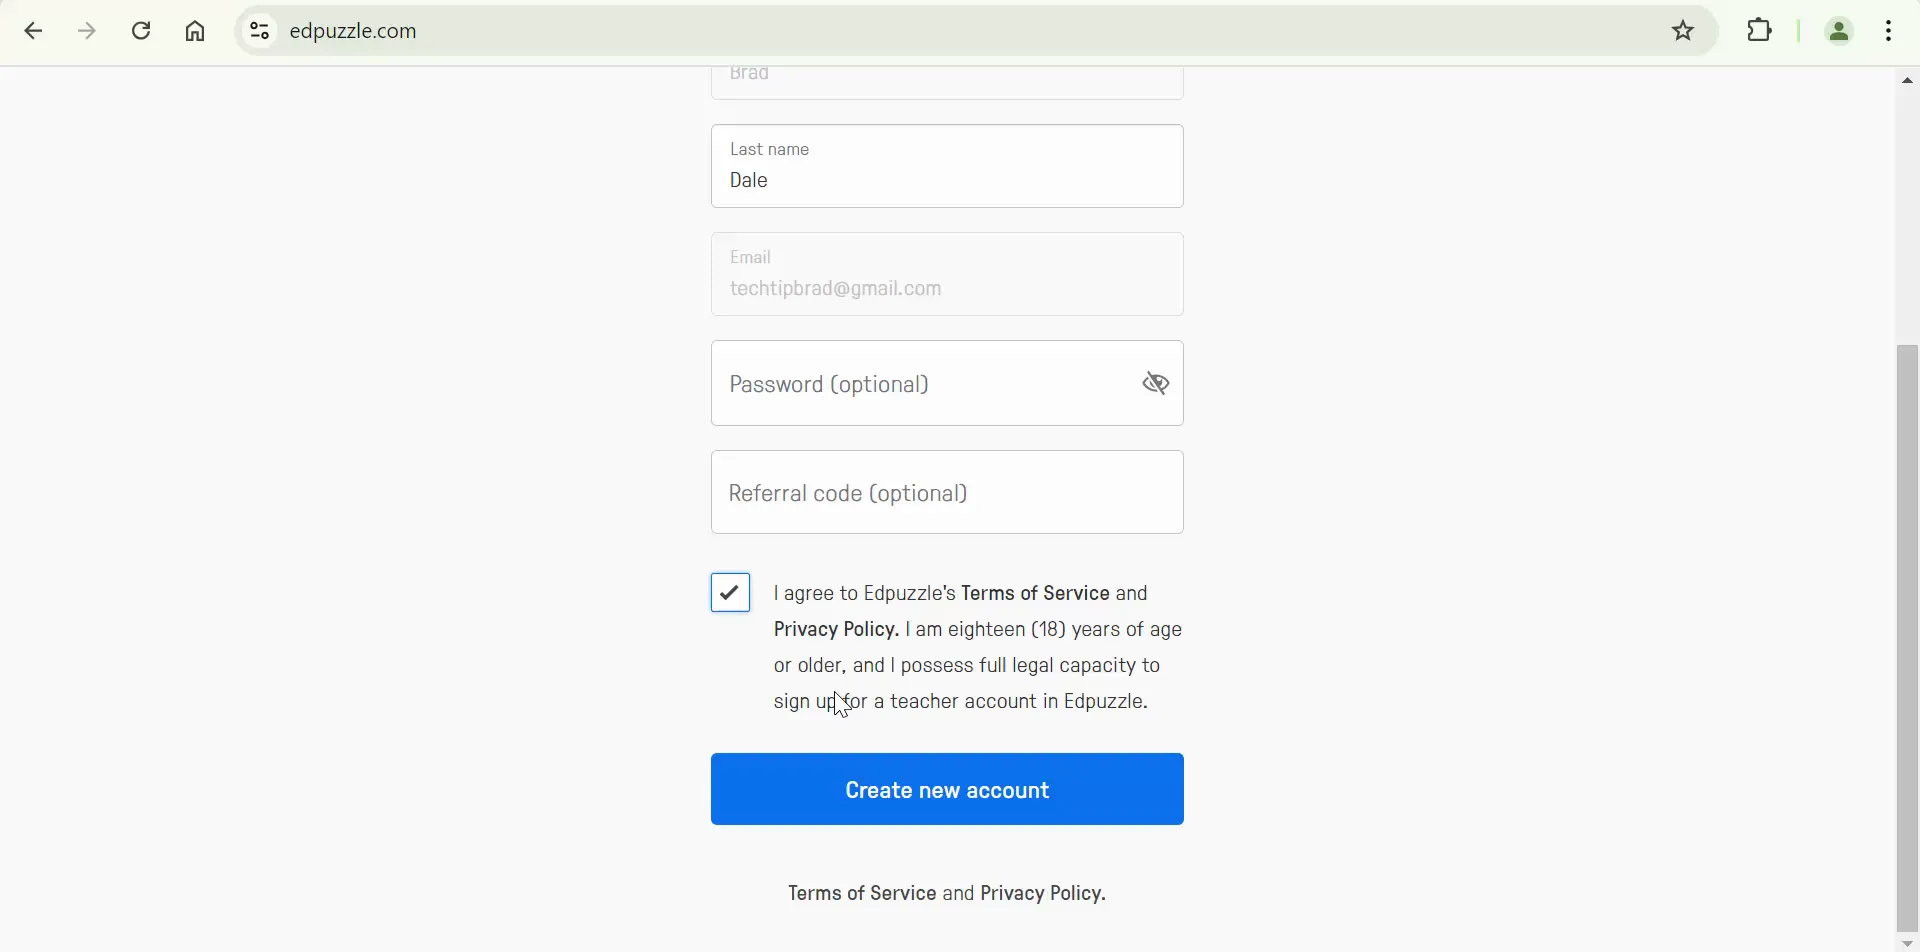
  5. Fill in Your Details: Enter your last name and agree to the terms before creating your account.

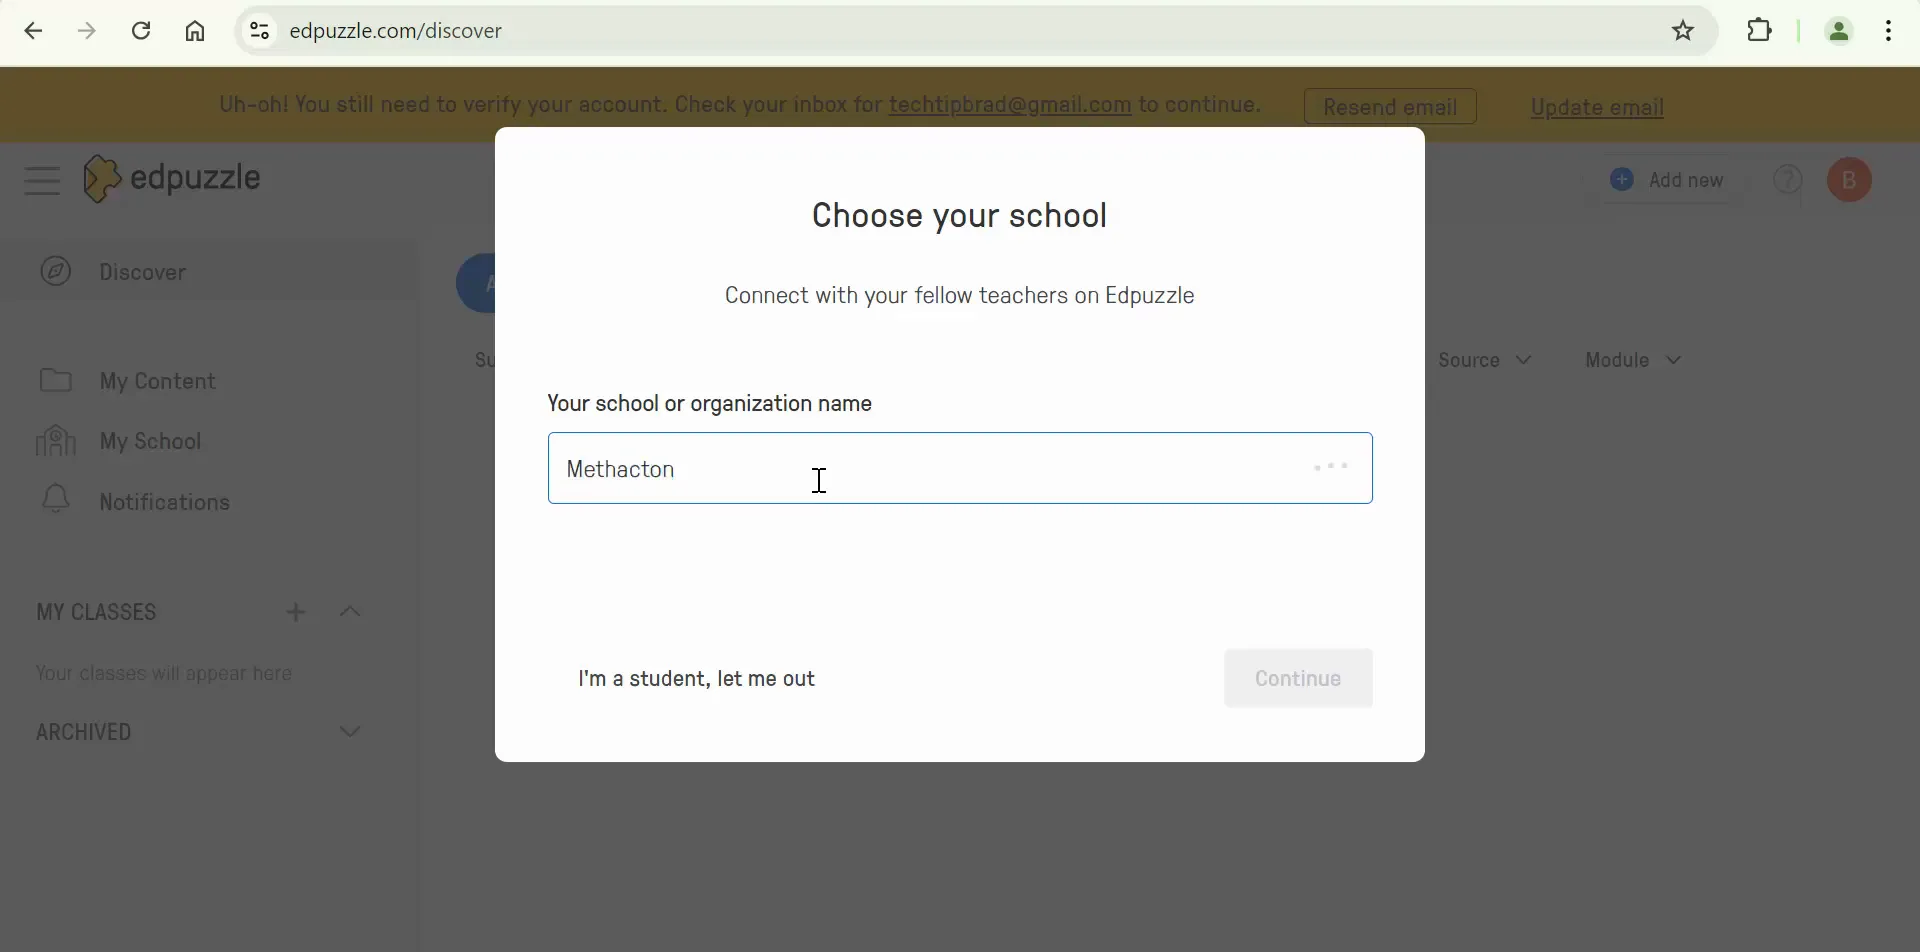
  6. Select Your School: Type in your school’s name and select it from the dropdown list.

    Entering school information
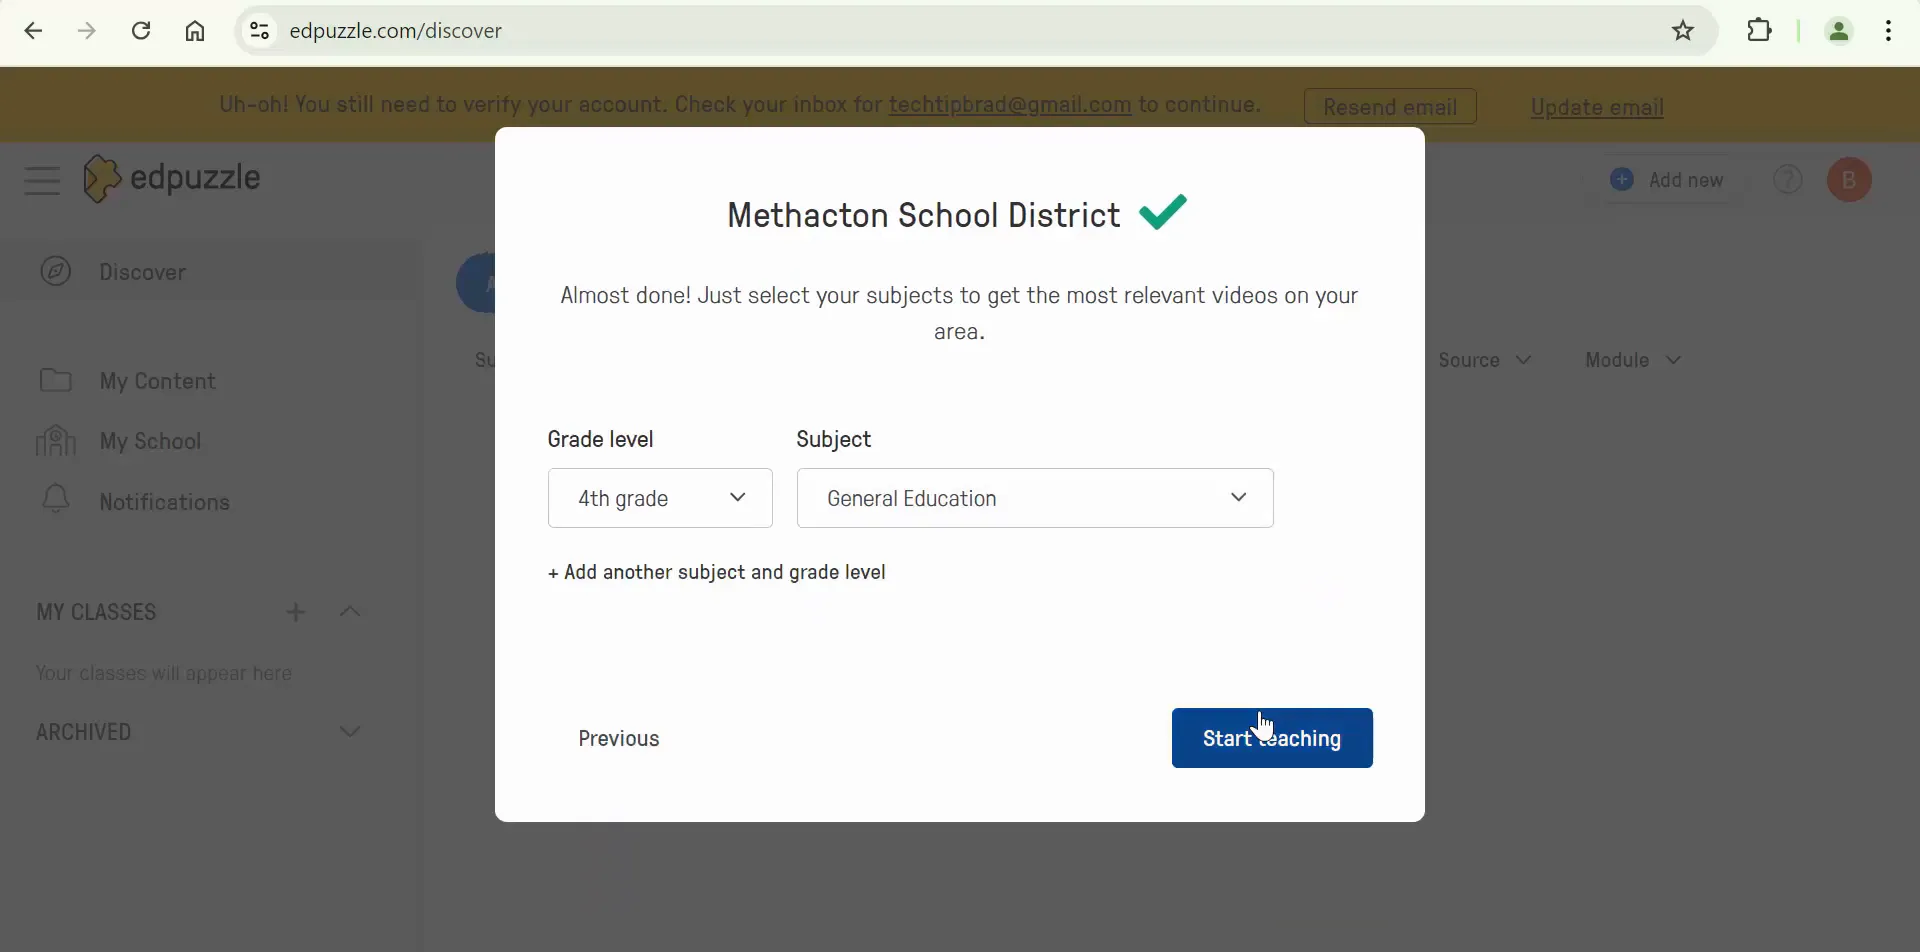
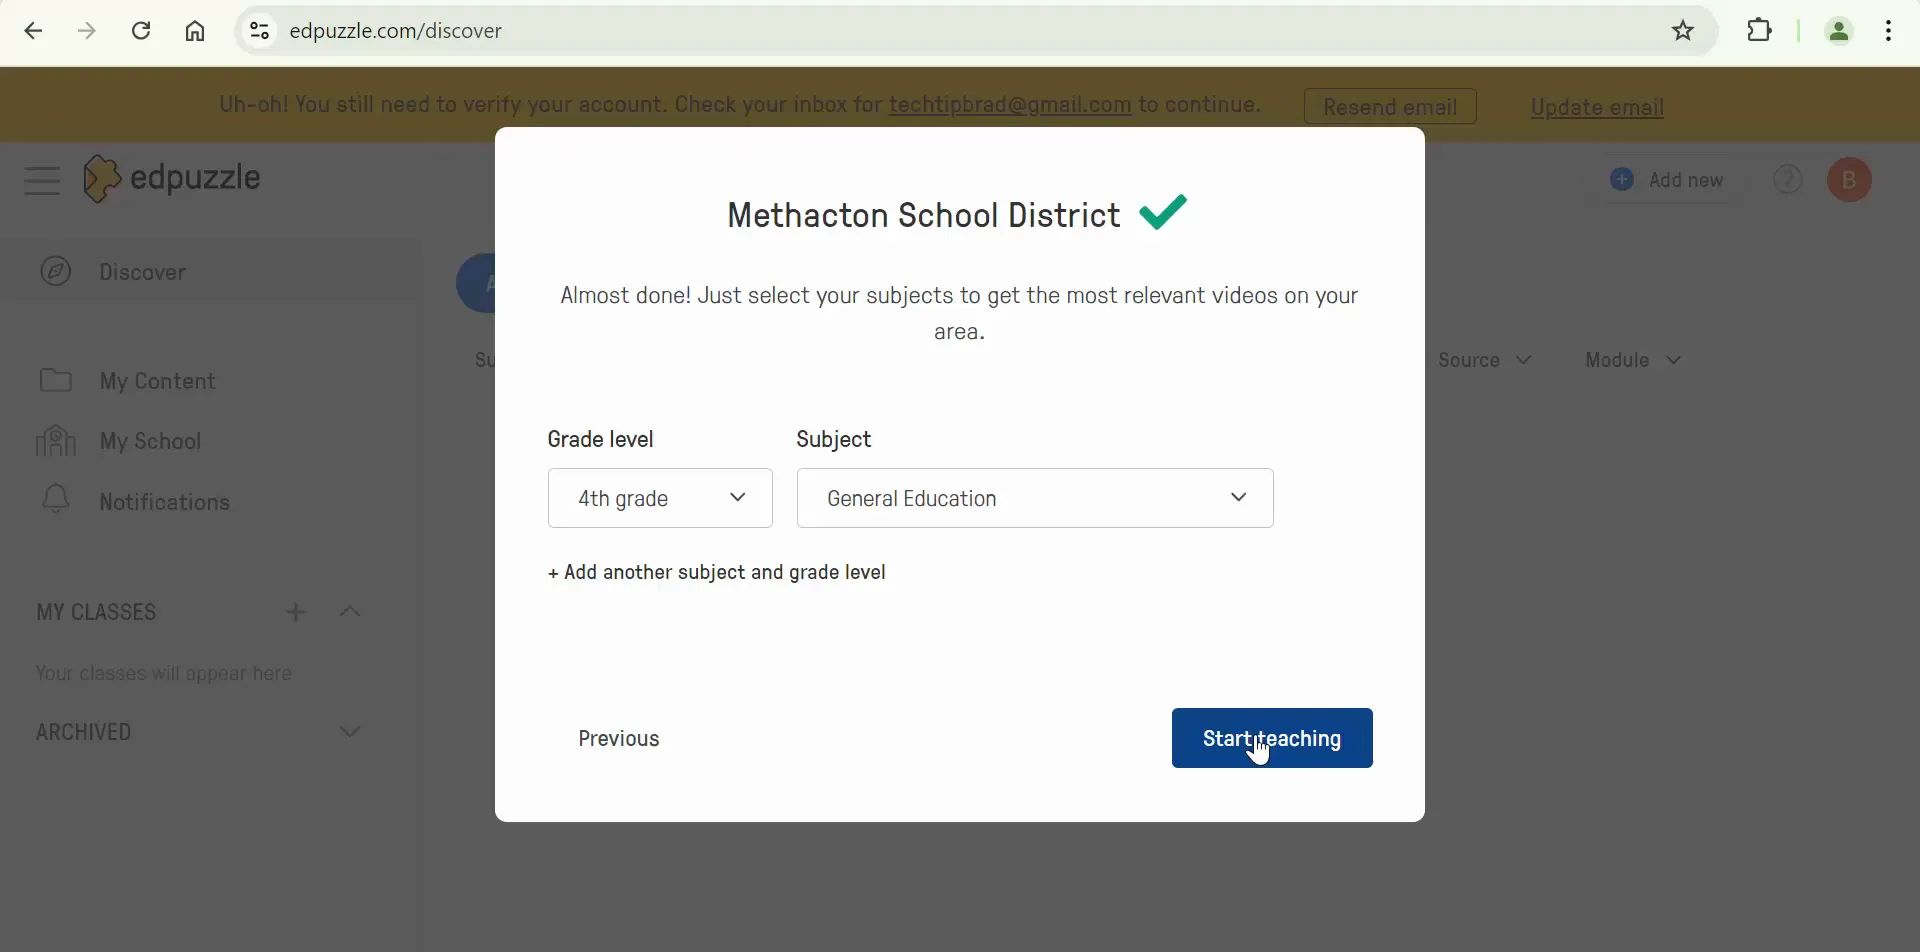
  7. Specify Grade Level and Subject: Indicate your teaching grade level and subject area, then click 'Start Teaching' to finalize your account setup.

    Selecting grade level and subject
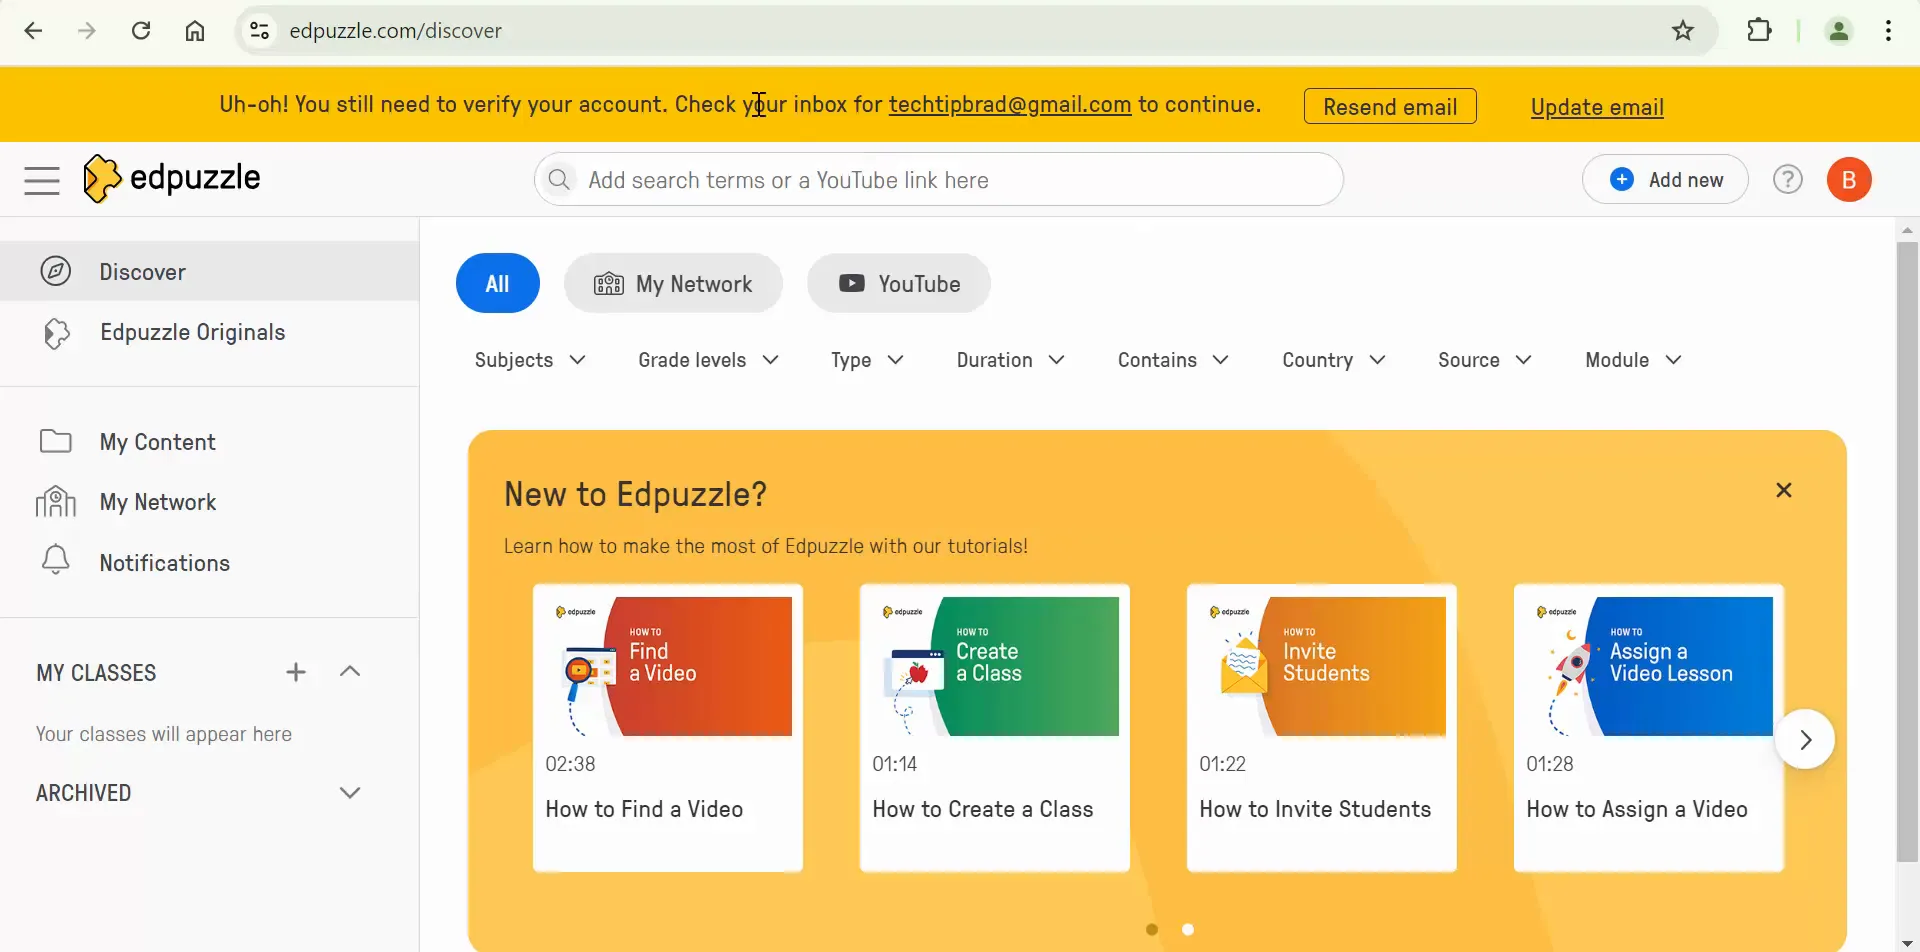
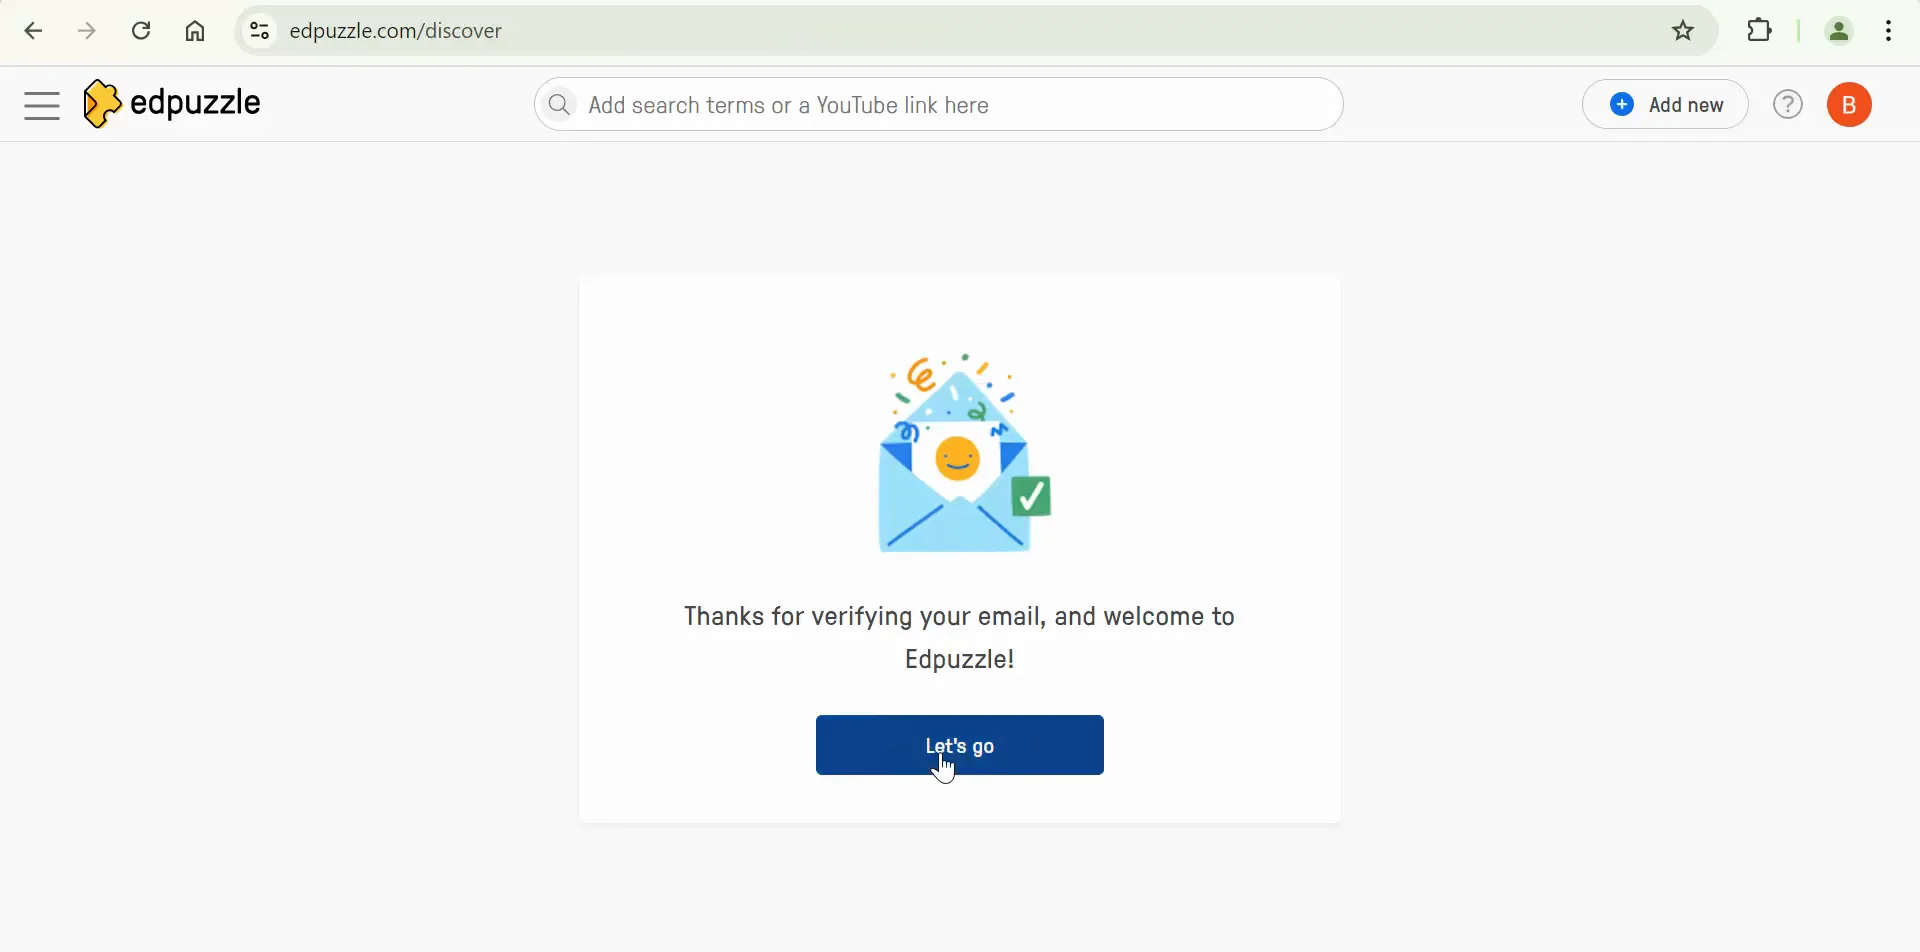
  8. Email Verification: Check your email inbox for a verification link and follow the instructions to verify your account.

    Verifying email address

Exploring Edpuzzle's Features

Once your account is set up, it’s time to dive into the features that make Edpuzzle a powerful tool for educators. Here are some key functionalities:

Video Library

Edpuzzle offers a vast library of educational videos from sources like YouTube, TED Talks, and National Geographic. You can search for videos by subject, grade level, and more, making it easy to find relevant content.

Editing Videos

With Edpuzzle, you can edit videos to suit your teaching needs. You can trim sections, add voiceovers, and incorporate questions at any point in the video. This feature allows you to customize the viewing experience for your students, making it more interactive.

Editing video features in Edpuzzle

Creating Interactive Questions

Adding questions is straightforward. You can choose from multiple-choice, open-ended, or note types, ensuring you have various ways to assess student understanding. This interactivity keeps students engaged and accountable while watching the videos.

Tracking Student Progress

After assigning videos to your students, Edpuzzle provides real-time analytics. You can monitor how many questions each student answered correctly, how often they watched the video, and how long they spent on each segment. This data is invaluable for understanding student comprehension and adjusting instruction accordingly.

Checking student progress on Edpuzzle

Assigning Videos to Your Class

Now that you’re familiar with the features, let’s explore how to assign videos to your students:

  1. Select a Video: Browse through the video library and select a video you want to assign.

  2. Edit the Video: Customize the video by trimming sections and adding questions.

  3. Assign the Video: Click on the 'Assign' button and choose the class or classes you want to send it to. Set a due date and any additional parameters, such as preventing skipping.

    Assigning videos to classes
  4. Share the Assignment Link: After assigning, you can share the link with your students, making it easy for them to access the video lesson.

Tips for Effective Use of Edpuzzle

To maximize the benefits of Edpuzzle, consider the following tips:

  • Start Small: Begin with a few videos and gradually increase as you become more comfortable with the platform.
  • Engage Students: Use the questions strategically to encourage critical thinking and discussion among students.
  • Analyze Data: Regularly check the analytics to assess which areas students are struggling with and adjust your teaching accordingly.
  • Incorporate Feedback: Ask students for feedback on the videos and questions to continuously improve the content you provide.

Conclusion

Edpuzzle is a powerful tool that can significantly enhance your teaching and engage your students in meaningful ways. By following the steps outlined in this guide, you can set up your account, create interactive lessons, and track student progress effectively. Embrace the potential of Edpuzzle and transform your classroom experience!

Ready to get started? Sign up for Edpuzzle today and explore the endless possibilities it offers for interactive learning!

Take care,

Brad

Sunday, August 11, 2024

Watching a video in Google Chrome & would like instant captions as well as the ability to translate?


Watching a video in Google Chrome & would like instant captions as well as the ability to translate?

n today’s digital age, accessibility is a crucial aspect of online content consumption. Whether you are watching educational videos, engaging in virtual meetings, or simply enjoying entertainment, having the option for live captions and translations can significantly enhance the experience. This blog post will explore how to enable live captions and translations in Google Chrome, making it easier for everyone to understand and engage with video content.

Understanding Live Captions
Live captions are a fantastic feature that allows users to see real-time text displayed on the screen while watching videos. This functionality is especially beneficial for individuals who are deaf or hard of hearing, as well as for those who may be in a noisy environment where audio cannot be clearly heard.

How to Enable Live Captions
Enabling live captions in Google Chrome is a straightforward process. Here’s how you can do it:

Open Google Chrome and navigate to the video you wish to watch.
Look for the control icon in the upper right corner of the video player.
Click on the icon, and you will see an option for “Live Caption.”
Toggle the Live Caption option to turn it on.
Once enabled, you will see captions appear at the bottom of the video as it plays. This feature provides an excellent way to follow along with the content without relying solely on audio.

Customizing Caption Settings
Google Chrome also allows users to customize their caption settings to enhance their viewing experience. Here are some options you can explore:

Hide Profanity: You can choose to filter out profane language from the captions.
Adjust Font Size: Change the size of the captions to make them more readable based on your preferences.
Change Caption Background: Adjust the background color behind the captions for better visibility.
These customization options ensure that users can tailor the captions to their specific needs, making content more accessible and enjoyable.

Translating Captions
In addition to live captions, Google Chrome offers the ability to translate captions into different languages. This is an invaluable tool for non-native speakers or those learning a new language. By providing translations, users can engage with content that may not be in their primary language.

How to Enable Translation for Captions
To enable translation for live captions in Google Chrome, follow these steps:

While watching a video, access the control icon again in the upper right corner.
Toggle on the “Live Translate” option.
Select your preferred language from the list provided.
After making these selections, the captions will not only be displayed in real-time but will also be translated into the language you’ve chosen. This feature allows users to enjoy videos in their native language, making content more inclusive.

Benefits of Using Live Captions and Translations
The integration of live captions and translations into Google Chrome offers multiple benefits:

Accessibility: Provides access to video content for those with hearing impairments.
Language Learning: Assists users in learning new languages by providing translations and contextual understanding.
Enhanced Engagement: Keeps viewers engaged with the content, even in distracting environments.
Inclusivity: Makes content available to a wider audience, promoting inclusivity.
Practical Applications
Live captions and translations can be utilized in various scenarios, including:

Educational Settings: Students can benefit greatly from live captions during lectures and online courses, allowing them to follow along more easily.
Meetings and Webinars: In professional settings, live captions ensure that all participants can understand the content being shared, regardless of their hearing ability.
Entertainment: Viewers can enjoy movies, shows, and online videos in their preferred language, enhancing their overall viewing experience.
Conclusion
Enabling live captions and translations in Google Chrome is a simple yet powerful way to enhance accessibility and inclusivity in online content. By following the steps outlined in this post, you can ensure that you and others can enjoy videos with real-time text and translations, making it easier to engage with the material. This feature not only benefits those with hearing impairments but also supports language learners and promotes a more inclusive digital environment.

For further inquiries or assistance regarding live captions and translations, feel free to reach out. Embrace the power of accessibility and make the most of your online viewing experience!

Saturday, August 10, 2024

Search with Google Lens in Chrome Search with Google Lens in Chrome


Google Lens is a groundbreaking feature that enhances the way we interact with images and text on the web. In this blog post, we’ll explore how to effectively use Google Lens within Google Chrome, allowing you to search for images, translate text, and more, all at your fingertips.

Getting Started with Google Lens

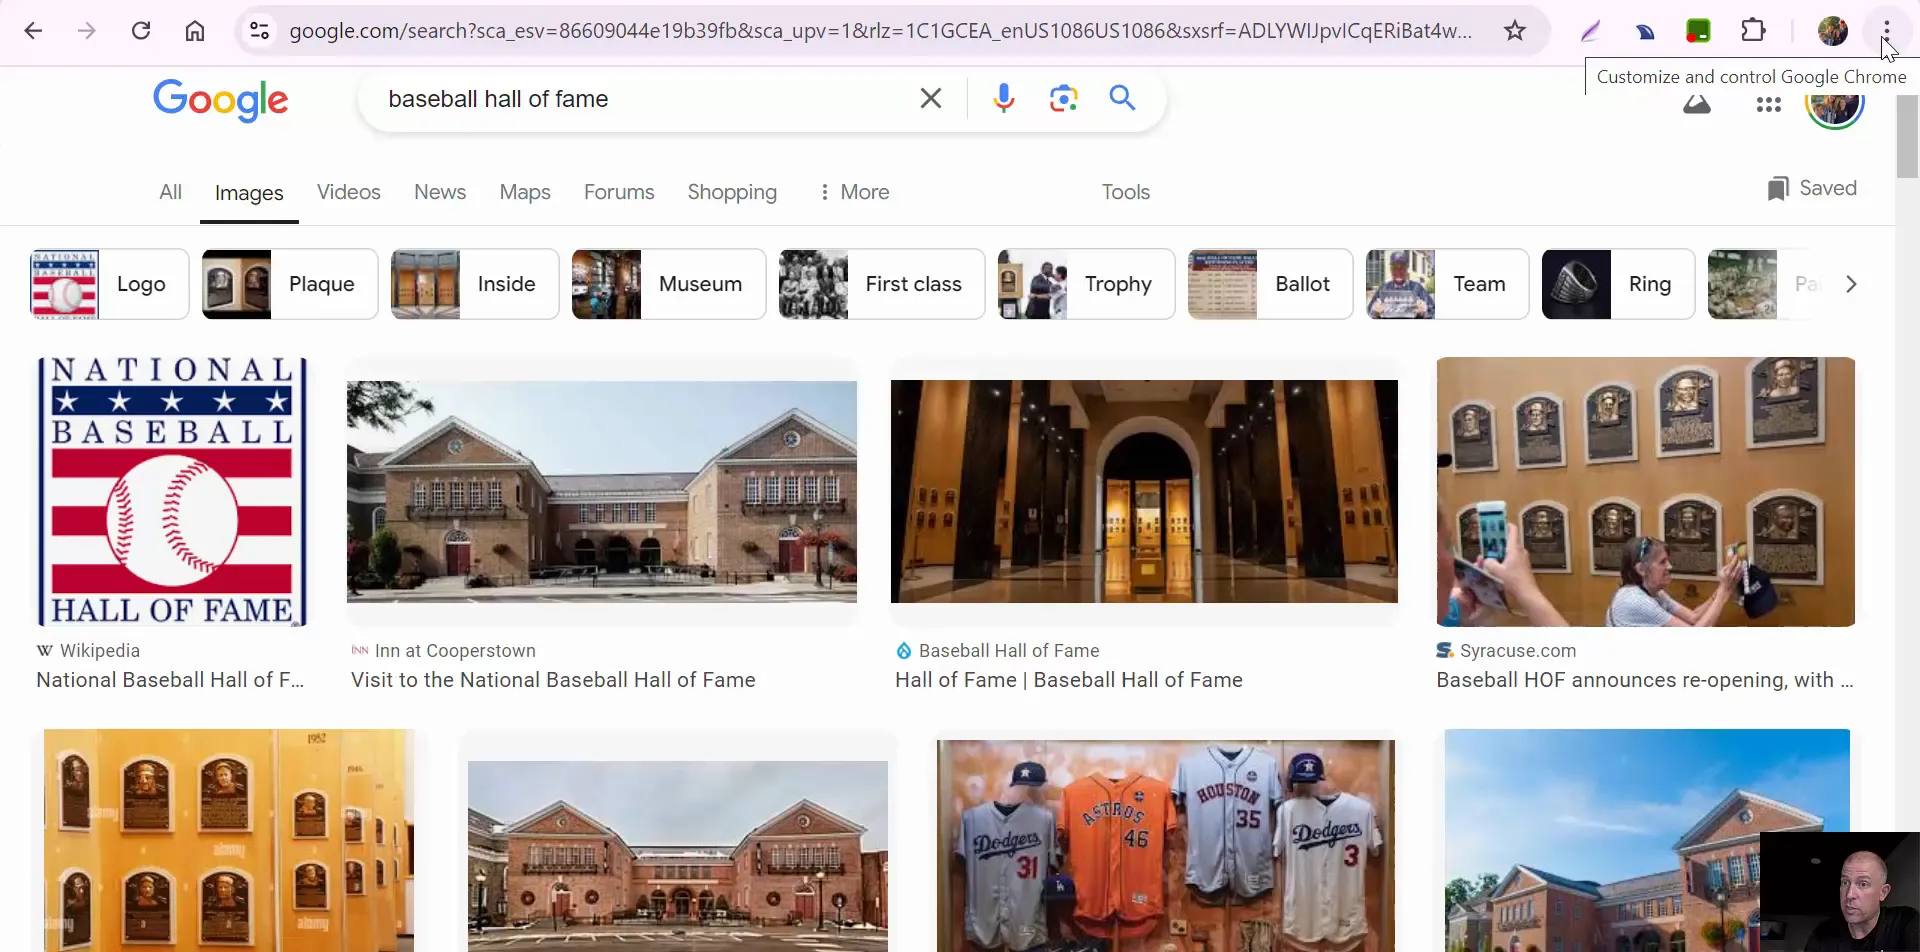
To begin using Google Lens in Chrome, you'll want to familiarize yourself with its location within the browser. It's easily accessible through the customization menu. Here’s how to find it:

  1. Open Google Chrome.
  2. Click on the three vertical dots in the upper right corner to access the menu.
  3. Scroll down to find the option labeled Search with Google Lens.

This feature allows you to select any image you encounter while browsing, making it incredibly versatile.

Accessing Google Lens in Chrome

Searching Images with Google Lens

Once you've located Google Lens, you can start searching for images. For instance, if you're curious about a landmark, follow these simple steps:

  1. Navigate to the image you want to search.
  2. Right-click on the image and select Search with Google Lens.
  3. Wait a moment as Google Lens processes the image.

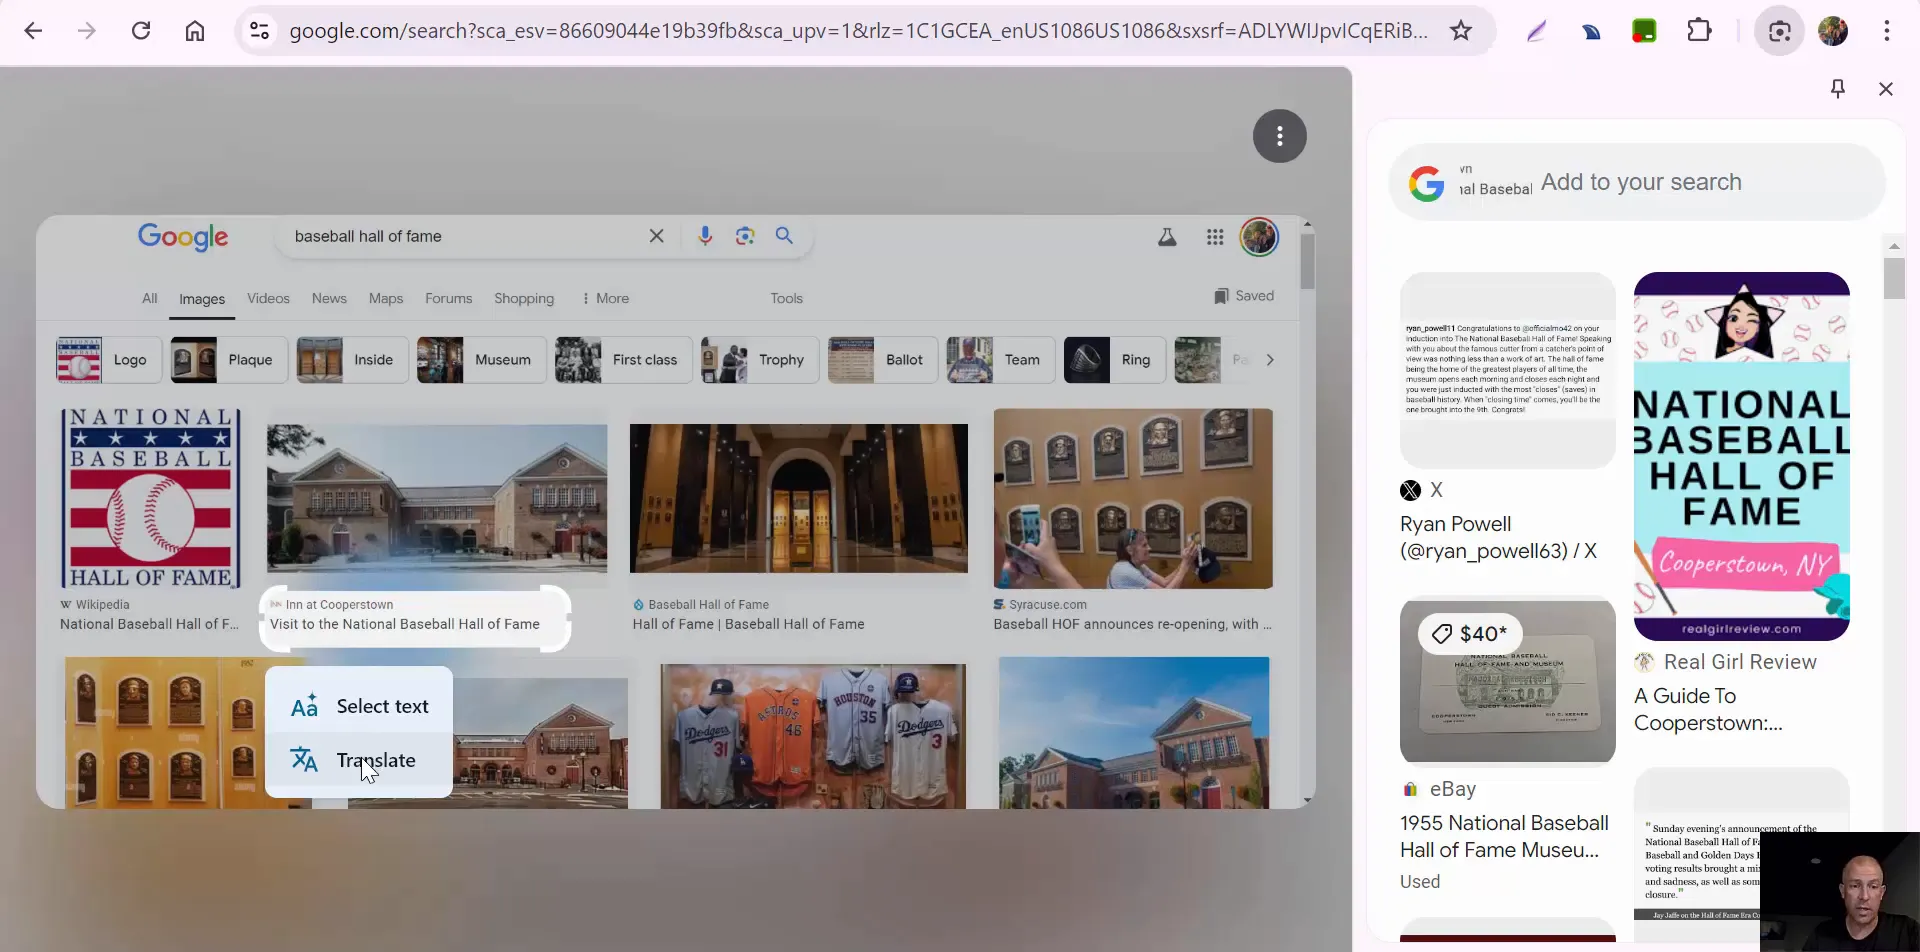
Let’s say you’re exploring the Baseball Hall of Fame. After selecting the image, Google Lens will provide visual matches and additional information. For example, it may identify the image as the National Baseball Hall of Fame.

Searching an image using Google Lens

Adding to Your Search

Google Lens goes beyond simple identification. You can enhance your search results by adding specific queries. After the initial search, you’ll see an option to Add to your search. This allows you to refine your query. For instance, you can ask, “Where is this?” and Google Lens will provide relevant details about the location.

Translating Text with Google Lens

Another fantastic feature of Google Lens is its ability to translate text. This is particularly useful when you're browsing content in a foreign language. Here’s how to translate text using Google Lens:

  1. Highlight the text you want to translate.
  2. Click on the three dots again and select Translate.
  3. Google Lens will use Google Translate to offer the translation instantly.

This feature is incredibly handy for travelers or anyone looking to understand foreign content quickly.

Translating text using Google Lens

Why Use Google Lens?

Google Lens is packed with features that can transform your browsing experience:

  • Visual Recognition: Instantly identify objects, landmarks, plants, and animals.
  • Text Translation: Break language barriers effortlessly with real-time translations.
  • Shopping Assistance: Find products online by simply taking a picture of them.
  • Information Retrieval: Access detailed descriptions and articles related to images.

With just a few clicks, Google Lens can enhance your understanding of the world around you.

Conclusion

Google Lens in Chrome is a powerful tool that enriches your online experience. Whether you're searching for information, translating text, or identifying objects, its capabilities are vast and user-friendly. So the next time you browse, remember to utilize Google Lens to unlock a wealth of information right at your fingertips!

If you have any questions or need assistance, feel free to reach out. Happy browsing!


Friday, August 9, 2024

Want to have a conversation with the Declaration of Independence? Engage with Your Content: AI-Powered Document Chats with MagicSchool.ai's 'Chat with Docs


In today’s digital age, the way we interact with historical documents is evolving. MagicSchool.ai introduces an innovative tool called 'Chat with Docs' that allows both teachers and students to engage in meaningful conversations with documents. This tool is particularly transformative for subjects like history, where understanding context and nuances can be pivotal. In this blog, we’ll explore how this tool works, its benefits, and its potential impact on education.


What is 'Chat with Docs'?

'Chat with Docs' is a feature offered by MagicSchool.ai that enables users to interact with various documents in a conversational manner. This tool is designed for both teachers and students, making it versatile and accessible. By allowing users to upload documents or paste text, it opens up a new avenue for exploration and discussion.


For instance, a teacher can select a document, such as the Declaration of Independence, and instantly generate topics for discussion. This functionality not only enriches the learning experience but also encourages critical thinking and engagement with primary sources.


How Does It Work?

The process of using 'Chat with Docs' is straightforward and user-friendly. Here’s a step-by-step overview:


Select the Document: Teachers can either copy and paste text into the interface or upload a document using the provided paperclip icon.

Generate Topics: Once the document is uploaded, users can generate discussion topics based on its content. For example, with the Declaration of Independence, the tool may present several key areas to explore.

Engage in a Conversation: Users can then select a topic and ask questions or seek clarification, creating an interactive dialogue with the document.

The Power of Conversing with Historical Documents

One of the standout features of 'Chat with Docs' is its ability to foster deeper understanding through conversation. When students can engage directly with a document, they are more likely to grasp its significance and context. For example, when discussing the Declaration of Independence, students can inquire about specific grievances listed, leading to a richer understanding of the historical context.


This interactive approach encourages students to think critically and ask questions, rather than passively consuming information. It transforms the learning experience from rote memorization to active engagement, making history feel more relevant and alive.


Benefits for Teachers and Students

The 'Chat with Docs' feature offers numerous advantages for both educators and learners:


Enhanced Engagement: Students are more likely to participate in discussions when they can interact with the material in a conversational format.

Tailored Learning: The ability to ask specific questions allows students to focus on areas where they need clarification or deeper understanding.

Improved Critical Thinking: Engaging with documents in this manner encourages students to analyze and evaluate information critically.

Accessible Learning: The tool is designed to be user-friendly, making it accessible for students of various ages and skill levels.

Implementing 'Chat with Docs' in the Classroom

Integrating 'Chat with Docs' into the classroom can be a seamless process. Here are some practical tips for teachers:


Introduce the Tool: Start by demonstrating how to use 'Chat with Docs' with a familiar document. This helps students feel comfortable with the technology.

Encourage Exploration: Allow students to choose documents that interest them. This personal investment can lead to more meaningful discussions.

Facilitate Group Discussions: Use the tool as a springboard for group discussions, where students can share their insights and questions with peers.

Assess Understanding: Teachers can use the conversations generated in the tool to assess students’ understanding and engagement with the material.

Conclusion

'Chat with Docs' from MagicSchool.ai is a game changer for education, particularly in subjects like history. By allowing students to engage directly with documents like the Declaration of Independence, it fosters a deeper understanding and appreciation for historical contexts. As educators continue to seek innovative ways to engage students, tools like 'Chat with Docs' will play a crucial role in shaping the future of learning.

For more information about MagicSchool.ai and its features, consider exploring their resources or reaching out to learn more. The future of interactive learning is here, and it’s time to embrace it!

Thursday, August 8, 2024

Generate a decodable text based on the Science of Reading to support early literacy.


Decodable texts are crucial for supporting early literacy and enhancing reading skills among young learners. This blog delves into the science of reading and how decodable texts can be integrated into educational practices. By exploring the principles behind decodable texts, educators can better support their students' journey towards reading proficiency.

The Science of Reading and Decodable Texts

The science of reading is an evidence-based approach that emphasizes explicit instruction in phonics and phonemic awareness. Decodable texts are a vital component of this approach, as they are designed to reinforce the phonetic skills students are learning. These texts use controlled vocabulary that allows early readers to practice decoding words they are familiar with, thereby boosting their confidence and fluency.

What are Decodable Texts?

Decodable texts are stories or passages that contain a high proportion of words that can be sounded out phonetically. These texts are tailored to the phonetic skills that children are learning at each stage of their reading development. By utilizing decodable texts, educators can create a structured reading experience that aligns closely with the phonics instruction provided in the classroom.


The Importance of Patterns in Decodable Texts

One of the key features of decodable texts is the use of patterns. These patterns help students recognize common phonetic structures, which aids in their ability to decode new words. For example, a decodable text may focus on a specific vowel sound or consonant blend, allowing students to practice and reinforce their skills. This repetition of patterns not only aids in word recognition but also enhances overall reading comprehension.


Integrating Decodable Texts into the Curriculum

To effectively incorporate decodable texts into the curriculum, educators should consider the following strategies:


Select Appropriate Texts: Choose decodable texts that align with the phonics skills being taught in the classroom.

Model Reading Strategies: Demonstrate how to decode words and use context clues to understand the text.

Encourage Repeated Reading: Allow students to read the same text multiple times to build fluency and confidence.

Facilitate Discussions: Encourage students to discuss the text, focusing on comprehension and vocabulary.

Assessing Student Progress

Assessment is a crucial aspect of any reading program. For decodable texts, educators can assess student progress through various methods:


Reading Fluency Assessments: Monitor how quickly and accurately students can read decodable texts.

Comprehension Questions: Ask questions about the text to gauge understanding and retention.

Phonics Skills Assessments: Evaluate students' ability to decode words based on the patterns practiced in the texts.

Using Technology to Support Decodable Texts

In today’s digital age, technology can play a significant role in supporting the use of decodable texts. There are various platforms and tools available that can enhance the experience for both educators and students.


Magic School and AI Integration

One such platform is Magic School, which offers tools to generate decodable texts based on the science of reading. By selecting specific patterns and objectives, educators can create customized texts that meet the needs of their students. This level of personalization helps to ensure that students are engaging with material that is both relevant and challenging.

ChatGPT and Other AI Tools

In addition to Magic School, educators can utilize AI tools like ChatGPT to facilitate discussions around decodable texts. These tools can help generate questions or prompts that encourage deeper engagement with the material. By integrating technology, educators can enhance the learning experience and provide additional support for struggling readers.

Conclusion

Decodable texts are an essential resource in the journey toward literacy. By understanding the science of reading and effectively integrating decodable texts into the curriculum, educators can significantly impact their students' reading development. With the support of technology and a focus on phonics instruction, we can help young learners become confident and proficient readers.

For more insights and tools related to early literacy, consider exploring various educational resources and platforms that focus on decodable texts and the science of reading.

Wednesday, August 7, 2024

Ever have a YouTube video play another "related" video just seconds after the last video? Check this setting.


What is Autoplay on YouTube?

Autoplay is a feature that automatically plays another video once the current video ends. This can be particularly useful for binge-watching content or for those who enjoy a continuous stream of related videos. However, it can also lead to unexpected viewing experiences if not managed properly.


When autoplay is enabled, YouTube will suggest a related video that it believes you will enjoy based on your viewing history. This can sometimes lead to a rabbit hole of videos that may not align with your original intent. Understanding how to control this feature can enhance your viewing experience.


How to Manage Autoplay Settings

Many users may find that they accidentally enable autoplay. If you notice that videos keep playing one after another, it may be time to check your settings.


Locate the Autoplay Toggle: The autoplay feature is usually found at the top of the video player, often as a toggle switch.

Turn Off Autoplay: If you prefer to watch one video at a time, simply toggle the autoplay switch to the off position.

Check Preferences: You can also adjust your preferences in the YouTube settings menu for a more customized experience.

Benefits of Using Autoplay

Despite its potential drawbacks, autoplay can offer several advantages. Here are a few reasons why you might consider using it:


Convenience: Autoplay allows for seamless viewing without the need to manually select the next video.

Discovery: It can introduce you to new content that you may not have found otherwise.

Continuous Learning: For educational content, autoplay can help you absorb information in a more structured way.

Drawbacks of Autoplay

While autoplay has its advantages, it also comes with some downsides. Being aware of these can help you make informed viewing choices:


Loss of Control: You may find yourself watching videos that don't interest you simply because they were automatically queued.

Time Consumption: It's easy to lose track of time when videos keep playing, leading to unproductive viewing sessions.

Distraction: Autoplay can distract you from your original intent, especially if you're trying to focus on specific content.

When to Use Autoplay

Autoplay can be beneficial in certain scenarios. Here are some situations where enabling it might enhance your experience:


Binge-Watching: If you're watching a series or a playlist, keeping autoplay on can make it easier to enjoy back-to-back episodes.

Exploring New Content: When you're in the mood to discover new channels or topics, autoplay can suggest relevant videos.

Long-Duration Content: For longer videos, such as documentaries, autoplay can help maintain engagement without interruptions.

When to Turn Off Autoplay

There are also times when turning off autoplay is the better option. Consider disabling it in these situations:


Focused Learning: If you’re watching educational content and want to absorb information thoroughly, it's best to turn it off.

Specific Interests: When looking for specific topics or videos, disabling autoplay can help you stick to your plan.

Time Management: If you find yourself losing track of time, turning off autoplay can help you regain control over your viewing habits.

Conclusion

Understanding YouTube's autoplay feature can significantly enhance your viewing experience. Whether you choose to embrace it or turn it off, being aware of how it works will allow you to make the most of your time on the platform. Remember, the choice is yours—take control of your viewing habits and enjoy YouTube the way you want!

If you have any questions or need further assistance, feel free to reach out. Enjoy your viewing!

Tuesday, August 6, 2024

Create a choice board for a student assignment based on the principles of UDL using MagicSchool AI


Universal Design for Learning (UDL) is an educational framework that aims to optimize teaching and learning for all individuals by providing multiple means of engagement, representation, and action and expression. This approach eliminates barriers to learning and ensures that the educational experience is accessible to every student, regardless of their unique needs. In this blog post, we will explore how to create a choice board for student assignments using MagicSchool AI, highlighting the benefits of UDL principles and offering practical examples.


Understanding Universal Design for Learning (UDL)

UDL is grounded in the idea that every learner is unique and requires different strategies to achieve their educational goals. This flexibility allows teachers to accommodate various learning styles, preferences, and needs. By incorporating UDL principles into lesson planning, educators can create a more inclusive classroom environment.


One of the key aspects of UDL is the elimination of barriers to learning. This can include providing resources in multiple formats, offering choices in how students demonstrate their understanding, and ensuring that all students have access to the materials they need to succeed.


MagicSchool AI: A Tool for UDL Implementation

MagicSchool AI is an innovative tool that helps educators design engaging learning experiences tailored to their students' needs. By using this platform, teachers can easily generate diverse activities that align with specific learning goals, making it an ideal resource for implementing UDL principles in the classroom.


To get started with MagicSchool AI, educators simply input their learning goal and any additional details. The platform then generates a variety of activity options that cater to different learning preferences. For example, a teacher might input a seventh-grade learning goal focused on mitosis, requesting a range of diverse activities.


Creating a Choice Board with MagicSchool AI

A choice board is an excellent way to provide students with options for how they engage with a topic. By allowing students to choose from a variety of activities, teachers can foster a sense of ownership over their learning and encourage creativity.

When using MagicSchool AI to create a choice board, educators can expect to receive a list of activities that might include:


Flip book

Poster explanation

Comic strip

3D model creation

Quiz

Rap or song

Presentation

Application of mitosis in everyday life

This variety ensures that students can select activities that resonate with their interests and strengths. For instance, a student who enjoys art might opt to create a poster using design software like Canva, while another student might prefer to express their understanding through a rap or song.


Engaging Students Through Choice

Providing students with choices in how they learn and demonstrate their understanding can significantly increase engagement. When students are allowed to pursue projects that align with their interests, they are more likely to be motivated and invested in their learning.


For instance, a student interested in music might choose to write and perform a rap about mitosis. With the help of MagicSchool AI's song generator feature available in Magic Student, they can quickly create lyrics that incorporate key concepts and terminology related to the topic. This not only enhances their understanding but also allows them to share their learning with peers in a creative way.

Additional Features of MagicSchool AI

MagicSchool AI offers a range of features that make it a valuable tool for educators. Beyond generating activity ideas, it provides resources for tracking student progress and facilitating collaboration. Teachers can monitor the activities students choose and provide feedback along the way.

Additionally, MagicSchool AI encourages the integration of technology in the classroom. By incorporating digital tools into assignments, educators can help students develop essential skills for the modern world while also catering to diverse learning preferences.

Conclusion

Incorporating Universal Design for Learning principles into lesson planning is essential for creating an inclusive educational environment. MagicSchool AI simplifies this process by allowing educators to generate diverse activity options tailored to specific learning goals. By using a choice board, teachers can empower students to take control of their learning and engage with content in meaningful ways.

As we continue to embrace the principles of UDL, tools like MagicSchool AI will play a crucial role in shaping the future of education. By eliminating barriers and fostering creativity, we can ensure that every student has the opportunity to succeed.

If you have any questions or need assistance with implementing UDL in your classroom, feel free to reach out. Happy teaching!
Monday, August 5, 2024

While watching a YouTube video - you can move where the captions are located!


YouTube has become an essential platform for learning, entertainment, and sharing ideas. One of its great features is the ability to enable closed captions or subtitles, making content accessible to a broader audience. However, the default position of captions may not always be ideal for everyone. This blog will explore how you can easily move the captions around while watching a YouTube video, enhancing your viewing experience.

Understanding Closed Captions

Closed captions are designed to provide a text version of the spoken content in videos. They are especially beneficial for viewers who are deaf or hard of hearing, as well as those who prefer to watch videos in a noisy environment. Captions can also help non-native speakers of a language understand the content better.


While closed captions are incredibly useful, their placement can sometimes obstruct important visuals in the video. This is where the customization feature comes into play, allowing users to reposition captions according to their preferences.


How to Enable Captions on YouTube

Before you can move captions around, you need to enable them. Here’s how:


Step 1: Open a YouTube video.

Step 2: Look for the "CC" icon located at the bottom right of the video player.

Step 3: Click the "CC" icon to enable closed captions.

Once captions are enabled, they will appear at the bottom of the video screen by default. However, you can easily change their position.


Moving Captions While Watching

YouTube allows viewers to reposition captions to enhance their viewing experience. Here’s how to move captions:


Step 1: Begin playing the video with captions enabled.

Step 2: Click and drag the captions to your desired position on the screen.

Step 3: Release the mouse button to set the captions in their new location.

This feature is particularly useful in full-screen mode. Whether you prefer captions at the top or bottom of the screen, you have the freedom to place them wherever they are least obstructive to your viewing experience.


Benefits of Customizing Caption Placement

Customizing caption placement enhances the overall viewing experience in several ways:


Improved visibility: Placing captions away from important visuals ensures that you don’t miss any critical content.

Personal preference: Everyone has different preferences for caption placement. Customization allows you to choose what works best for you.

Accessibility: Making captions more accessible can help viewers focus better on the content.

Conclusion

Moving captions around while watching a YouTube video is a simple yet powerful feature that enhances your viewing experience. By enabling closed captions and adjusting their position, you can enjoy a more comfortable and engaging experience, whether you are watching tutorials, entertainment, or educational content.

If you have any questions or need further assistance regarding caption customization, feel free to reach out. Happy viewing!

Sunday, August 4, 2024

GearSketch! Draw circles and gears will appear. You can then have them interact or have them on their own. Great for engineering or science class!


 GearSketch! Draw circles and gears will appear. You can then have them interact or have them on their own. Great for engineering or science class! 

In the realm of educational technology, tools that enhance learning experiences are invaluable. One such tool is GearSketch, a unique application designed to visualize mechanical concepts through interactive drawing. This blog will delve into the features and functionalities of GearSketch, showcasing its potential in engineering and science classes.


What is GearSketch?
GearSketch is an innovative drawing application that allows users to create circles and generate gears based on those circles. It provides an intuitive interface where students can visualize the mechanics of gears and their interactions. This tool is particularly beneficial for those studying engineering and science, as it bridges the gap between theoretical knowledge and practical application.

How to Use GearSketch
Using GearSketch is straightforward, making it accessible for students of all ages. Here’s a simple guide on how to get started:

Draw Circles: Begin by drawing a circle on the canvas. This circle acts as the foundation for creating gears.
Drag and Position: You can easily drag circles around the workspace to arrange them as needed. This flexibility allows for experimentation with gear placements.
Create Gears: As you draw circles, gears will automatically appear. You can observe how these gears interact based on their positioning.
Modify and Remove: If you wish to change the setup, simply remove any circle or gear by selecting it and deleting it from the canvas.
Visualizing Gear Interactions
One of the most fascinating aspects of GearSketch is its ability to visualize how gears interact with one another. When you position one gear inside another, you can see how they connect and rotate in unison. This dynamic representation helps students grasp complex mechanical principles in a fun and engaging way.

Demonstration Features
GearSketch includes a demo feature that guides users through its functionalities. This is particularly useful for new users who may be unfamiliar with the tool. Watching a demonstration allows students to understand the various capabilities of GearSketch before diving into their projects.

Applications in Education
GearSketch is ideal for various educational settings, especially in engineering and science classes. Here are some ways it can be utilized:

Interactive Learning: Students can learn about gears and mechanical systems in a hands-on manner, making the learning process more engaging.
Project-Based Learning: Instructors can assign projects where students create their own gear systems, fostering creativity and critical thinking.
Visual Aid for Theoretical Concepts: GearSketch helps visualize concepts that are often difficult to understand through text and lectures alone.
Benefits of Using GearSketch
Integrating GearSketch into the classroom offers numerous benefits:

Enhanced Understanding: Students can see how gears work together, reinforcing their understanding of mechanical principles.
Encourages Experimentation: The ability to easily modify designs encourages students to experiment and learn from their mistakes.
Collaboration Opportunities: Students can collaborate on projects, sharing ideas and designs to create more complex gear systems.
Conclusion
GearSketch is a powerful educational tool that enhances the learning experience in engineering and science. By allowing students to visualize and interact with mechanical concepts, it fosters a deeper understanding of how gears function. Whether used in a classroom setting or for individual exploration, GearSketch is a resource that can inspire the next generation of engineers and scientists.

For those interested in educational technology and innovative learning tools, GearSketch is worth exploring. With its user-friendly interface and engaging features, it stands to benefit students and educators alike.

If you have any questions or would like to learn more about GearSketch, feel free to reach out. Happy sketching!

Saturday, August 3, 2024

Printed a two-sided Google Sheet/Doc and the 2nd page is upside down? Here is one solution.


 Printed a two-sided Google Sheet/Doc and the 2nd page is upside down? Here is one solution.

Printing documents from Google Sheets and Docs is usually a straightforward process. However, users may encounter unexpected issues, such as the second page printing upside down. This can be frustrating, especially when you need to present documents professionally. In this blog, we will explore the common problem of upside-down printing and provide a simple solution to fix it.


Understanding the Problem

When printing a document that spans multiple pages, the orientation of the pages is crucial for readability. If the second page prints upside down, it can disrupt the flow and make the document challenging to read. This issue often arises from incorrect print settings, which can be easily adjusted.


Users frequently report this problem when printing double-sided documents. It may seem minor, but it can significantly impact how the document is perceived, especially in a professional setting. Understanding how to control the print settings can save time and prevent potential embarrassment.


Common Causes of Upside Down Printing

Several factors can contribute to the issue of upside-down printing:


Printer Settings: Incorrect configuration in the printer settings can lead to improper page orientation.

Print Layout: The layout chosen for printing, such as double-sided printing, can affect how pages are printed.

Document Formatting: If the document is not formatted correctly, it may result in unexpected printing behavior.

Identifying the cause is the first step towards resolving the issue. Knowing where to look can save you from unnecessary troubleshooting and frustration.


Steps to Fix Upside Down Printing

If you find yourself facing the issue of upside-down printing, follow these steps to resolve it:


1. Access the Print Settings

Before printing your document, you need to access the print settings. This is typically done by clicking on the "File" menu and selecting "Print" or using the shortcut Ctrl + P (Cmd + P on Mac).


2. Check the Print Options

Once you are in the print settings, look for the option that controls how the document is printed. You should see options related to double-sided printing and page orientation.


3. Change the Print Orientation

If you are printing double-sided, find the setting that says "Print on both sides." Change this option to "Flip on short edge." This adjustment will ensure that the second page prints correctly, aligning it with the first page.


4. Preview Your Document

Before finalizing the print job, use the print preview feature to see how your document will appear once printed. This step can help you catch any further issues before wasting paper.


5. Print Your Document

After making the necessary adjustments, go ahead and print your document. With the correct settings in place, the second page should print in the proper orientation.


Additional Tips for Successful Printing

Here are some additional tips to ensure smooth printing of your Google Sheets and Docs:


Always Preview: Make it a habit to preview your documents before printing. This can help you spot issues early.

Check Printer Compatibility: Ensure that your printer is compatible with double-sided printing. Some older models may not support this feature.

Update Printer Drivers: Keeping your printer drivers updated can improve printing performance and resolve bugs.

Use Quality Paper: Using good quality paper can prevent jams and improve print quality.

Conclusion

Dealing with upside-down printing in Google Sheets and Docs can be an annoying experience, but it is a problem that can be easily fixed. By adjusting your print settings to "Flip on short edge," you can ensure that your documents are printed correctly and professionally.


Understanding the common causes and following the outlined steps can help you navigate this issue with ease. If you encounter any further questions or challenges, don’t hesitate to reach out for assistance. Happy printing!

Friday, August 2, 2024

Closed a Tab by mistake? Here are a few ways to get that page back.


How to Recover a Closed Tab: Simple Solutions


We've all experienced the frustration of accidentally closing a tab while browsing the internet. Whether it's a crucial article, a shopping page, or a video tutorial, losing that tab can be annoying. Fortunately, there are several straightforward methods to recover it quickly. In this guide, we'll explore various techniques to help you retrieve your closed tabs efficiently.

Using Keyboard Shortcuts
One of the fastest ways to reopen a closed tab is by using keyboard shortcuts. This method is universal across most web browsers, making it a reliable option.

Control + Shift + T
For Windows and Linux users, the shortcut Control + Shift + T is your best friend. Simply press these keys together, and your last closed tab will reappear instantly. If you need to recover multiple tabs, continue pressing this combination, and each previously closed tab will come back in the order they were closed.

Command + Shift + T
If you are using a Mac, the equivalent shortcut is Command + Shift + T. This works the same way as its Windows counterpart, allowing you to restore your closed tabs with ease.

Using the Right-Click Context Menu
If you prefer using your mouse, the right-click context menu offers another quick way to restore closed tabs. This method is intuitive and easy to execute, especially for those who may not be familiar with keyboard shortcuts.

Right-Click on the Tab Bar
To use this method, simply right-click (or use two fingers on a touchpad) on the tab bar at the top of your browser. A context menu will appear, displaying several options.

Reopen Closed Tab: Click on this option to restore your last closed tab.
Reopen Closed Window: If you've closed an entire window, this option will help you recover it.
Accessing Browser History
In cases where the above methods don't work or if you want to recover a tab that was closed earlier, accessing your browser history is a reliable solution. Most web browsers keep a detailed history of all the pages you've visited.

Finding Your Browser History
To access your browser history, follow these steps:

Chrome: Click on the three dots in the upper-right corner, select History, and then click on History again to see a list of your recently visited pages.
Firefox: Click on the three horizontal lines in the upper-right corner, then select Library, followed by History.
Safari: Click on History in the menu bar, and choose Show All History.
Once you are in your history, you can scroll through the list or use the search bar to find the specific page you want to reopen. Simply click on the link, and it will load in your current tab.

Using Browser Extensions
If you frequently find yourself closing tabs accidentally, consider using browser extensions designed to enhance your tab management experience. These tools can provide additional features for recovering lost tabs.

Popular Tab Recovery Extensions
Session Buddy: A powerful extension for Chrome that allows you to manage and restore your tabs and sessions with ease.
Tab Wrangler: This extension automatically closes inactive tabs and saves them for easy recovery later.
OneTab: A simple extension that converts all your tabs into a list, allowing you to restore them one by one or all at once.
Preventing Future Tab Loss
While it’s great to know how to recover closed tabs, prevention is often the best strategy. Here are some tips to help you avoid losing tabs in the future.

Use Bookmarking
Whenever you come across a page you want to revisit, bookmark it. This way, even if you accidentally close the tab, you can easily find it later. Most browsers allow you to organize bookmarks into folders for better management.

Utilize Tab Groups
Some browsers, like Chrome and Firefox, offer tab grouping features. This allows you to categorize your tabs, making it easier to manage multiple tabs without losing track of important pages.

Conclusion
Accidentally closing a tab can be frustrating, but with the methods outlined above, you can easily recover it and continue your browsing experience. Whether you prefer using keyboard shortcuts, the right-click context menu, or checking your browser history, there’s a solution for everyone.

Taking proactive measures, like bookmarking important pages and utilizing tab management tools, can also help prevent future tab loss. By incorporating these strategies into your browsing routine, you can enhance your productivity and minimize disruptions.

Remember, if you have any questions or need further assistance, don't hesitate to reach out for help. Happy browsing!

Thursday, August 1, 2024

Duplicate Your Google Form Today: It's Easier Than You Think


Google Forms is a powerful tool for creating surveys, quizzes, and other forms of data collection. One of its most useful features is the ability to duplicate forms. This allows you to reuse existing forms without losing the original data. In this blog post, we will guide you through the process of duplicating Google Forms, ensuring you can easily create new versions of your forms while keeping the original intact.

Why Duplicate Google Forms?
Duplicating a Google Form can save you time and effort. Whether you want to reuse a quiz, survey, or any other type of form, having a copy allows you to make necessary adjustments without altering the original. This is especially beneficial when you need to make minor changes for different contexts or audiences.

Additionally, duplicating forms is a great way to maintain a clean and organized Google Drive. By creating copies, you can keep your original forms as templates while working on new versions.

Step-by-Step Guide to Duplicating a Google Form
Follow these steps to duplicate your Google Form effectively:

Step 1: Open Your Google Form
Start by navigating to Google Forms. You can do this through your Google Drive or by visiting the Google Forms website directly. Locate the form you wish to duplicate from your list of forms.

Step 2: Access the Form Settings
Once you have opened the form, look for the three vertical dots in the upper right corner of the screen. This is the “More” option where you can access additional settings for your form.

Step 3: Select “Make a Copy”
From the dropdown menu, click on the “Make a copy” option. This will create an exact duplicate of your form. A pop-up window will appear, prompting you to rename the new form.

Step 4: Rename Your Duplicate Form
In the pop-up window, you can give your new form a unique name to differentiate it from the original. It’s helpful to include details like the date or specific context for the new form. You can also choose the destination folder within your Google Drive where you want to save the duplicate.

Step 5: Choose Sharing Options
If you have collaborators on the original form, you can select the option to share it with the same people. This ensures that your team can access and edit the new form as needed. If you prefer to keep it private, simply uncheck this option.

Step 6: Finalize and Open Your New Form
After renaming and setting your sharing preferences, click “OK.” Your new Google Form will open in a new tab, and you can start editing it as necessary. The responses from the original form will not carry over, giving you a clean slate to work with.

Additional Tips for Managing Google Forms
Here are a few additional tips to help you manage your Google Forms effectively:

Organize Your Drive: Regularly organize your Google Drive by creating folders for different types of forms. This will make it easier to find and manage your forms.
Keep Track of Changes: If you frequently update forms, consider adding a version history to your form titles. This way, you can easily identify the latest version.
Utilize Templates: If you find yourself creating similar forms often, consider creating a template. This allows you to quickly start new forms with the same structure and design.
Test Your Forms: Before sending out a new form, make sure to test it as a respondent. This helps you catch any errors or issues before your audience sees it.
Common Questions About Duplicating Google Forms
Here are some common questions users have when duplicating Google Forms:

1. Will my responses be copied to the new form?
No, when you duplicate a Google Form, the responses do not carry over. The new form will start with no responses, allowing you to collect new data separately.

2. Can I share my duplicate form with others?
Yes, you can share your duplicate form with others, just like you would with any other Google Form. You can control who has access to view or edit the form through the sharing settings.

3. What if I want to duplicate someone else's form?
To duplicate a form created by someone else, you must have editing access to that form. If you don't have permission, you can request access from the form creator.

Conclusion
Duplicating Google Forms is a straightforward process that can greatly enhance your productivity. By following the steps outlined above, you can easily create new versions of your forms while keeping the originals intact. This feature not only saves time but also helps maintain organization within your Google Drive. Start duplicating your forms today and streamline your data collection process!

If you have any questions or need further assistance, feel free to reach out. Happy form creating!