🎤📽️ AI Presentation Generator Instantly Create Exportable Slides from Any Content! 📊✨
Creating presentations can be time-consuming, but what if there was a tool that could generate a complete slide deck in under a minute? Enter MagicSchool.ai’s Presentation Generator, a game-changer for educators looking to streamline lesson planning.
How It Works
This AI-powered tool allows users to input a topic, standard, content, or objective, and it will instantly create a structured presentation—no images, just well-organized slides. The built-in Prompt Assistant even suggests refinements, such as analyzing the impact on society and technology or ensuring key elements like three discussion questions are included.
In a quick demonstration, a PDF on the American Revolution was uploaded, and within 45 seconds, the tool generated 20 slides, covering key points and even including interactive elements.
Exporting & Editing Options
Once generated, presentations can be edited within the tool or exported to Microsoft PowerPoint for further refinement. While exporting directly to Google Slides sometimes encounters issues, the workaround of downloading as a PowerPoint file and then re-uploading to Slides works smoothly.
Why Educators Should Try It
Saves time – No more manually structuring slides.
Customizable – Add objectives, refine prompts, and ensure key elements are included.
Flexible export options – Use PowerPoint or Google Slides.
MagicSchool.ai’s Presentation Generator is a powerful tool that supports lesson planning with efficiency and ease. Give it a try, and let technology do the heavy lifting while you focus on engaging your students!
Create a Flippity Video Game for Review with ChatGPT! 🎮🔥
Keeping students engaged during review activities can be a challenge, but Flippity makes it easy to turn a standard quiz into an exciting, interactive game! In this post, we'll walk through how to set up a Flippity multiple-choice game and introduce a time-saving script that will help you quickly generate questions and answers.
What is Flippity?
Flippity is a free tool that converts Google Sheets into a variety of educational games. The multiple-choice game is one of the most engaging options, allowing students to answer questions in a fast-paced, arcade-style format.
Step-by-Step: Creating a Flippity Multiple-Choice Game
1. Get the Flippity Template
Visit Flippity and select the Instructions tab under the multiple-choice game.
Click Make a Copy to generate your own editable Google Sheet.
2. Quickly Generate Questions with This Script
Instead of manually typing questions and answers, use the following script to generate structured quiz data in seconds. Simply paste this prompt into an AI chat:
Prompt: *"Can you provide me with questions and answers that I can place in a Google Sheet? Please ask me for the topic and how many questions. Structure the data so that:
The question is in Column A
The correct answer is in Column B
An incorrect answer is in Column C
Another incorrect answer is in Column D"*
Example Input: "Fourth Grade Multiplication, 15 questions."
The AI will generate the questions and answers, which you can then copy and paste directly into the Flippity Google Sheet.
3. Copy & Paste into the Flippity Template
Highlight the AI-generated content and press Ctrl + C to copy.
Open your Flippity Google Sheet and paste (Ctrl + V) it into the corresponding columns.
4. Publish Your Game
Click File > Share > Publish to Web.
Select Publish, then copy the provided link and paste it into the designated cell in the Google Sheet.
Your game is now live and ready to play!
How the Game Works
Once launched, students will see falling asteroids with multiple-choice options. Their goal is to select the correct answer before the asteroid reaches the bottom. ✅ Correct answer → Earns 10,000 points ❌ Wrong answer → Loses a life, but keeps points
Customization Options
Adjust the game speed for different skill levels.
Let students create their own games to reinforce learning.
Use the type-in mode for an extra challenge.
Why Use Flippity?
✅ Fast & Easy: No coding needed—just fill in a spreadsheet! ✅ Engaging: Turns review into an interactive challenge. ✅ Student-Created Content: Encourages ownership of learning.
Flippity’s multiple-choice game is a fun and effective way to make review sessions more dynamic. Try it out, and let the learning (and gaming) begin!
Have questions? Reach out—I’d love to hear how you’re using Flippity in your classroom! 🚀
🌈🎨 Flippity's Color by Number A Fun and Engaging Way to Review! 📝💡
Looking for a creative and engaging way to review content with students? Flippity’s Color by Number feature is a fantastic option that transforms traditional review questions into an interactive, self-checking activity. This tool takes a simple question-and-answer format and turns it into a visually engaging learning experience.
Getting Started with Flippity Color by Number
Flippity provides a variety of free, Google Sheets-based templates that allow educators to create interactive learning activities with ease. The Color by Number tool allows students to reveal an image piece by piece as they answer questions correctly.
To get started:
Select Your Image – Flippity provides default images, like a smiley face, but you can switch it to something more engaging. For example, you can replace it with a dog, baseball, or any other available option by pasting the image URL into cell C2 of the template.
Make a Copy of the Template – Click on "Make a Copy" to generate your own editable version of the Color by Number template.
Enter Your Questions and Answers – Input your questions and corresponding answers into the template. This step is crucial, as the accuracy and clarity of the questions will directly affect how well students engage with the activity.
Generate and Publish Your Activity – Select File > Share > Publish to the Web, and copy the published link.
Get Your Activity Link – Paste the link into Flippity, and your interactive Color by Number activity is ready to go!
Why This Prompt is Essential
To create a well-structured and engaging Color by Number activity, using the right format for questions and answers is crucial. The following prompt ensures that the data is structured correctly in a Google Sheet and is ready for easy pasting into the Flippity template:
Can you provide me with questions and answers that I can place in a Google Sheet? Please ask me for the topic and how many questions. Structure the data so that:
The question is in Column A
The correct answer is in Column B
An incorrect answer is in Column C
Another incorrect answer is in Column D
A third incorrect answer is in Column E Please make sure to:
Place the final output in a code block
Ensure there is no text wrapping
Keep all text in regular format without extra formatting
Do not respond to me saying question 1, question 2, etc.
Using this prompt guarantees that the question-and-answer structure aligns perfectly with Flippity’s template, preventing formatting issues and making setup seamless. It also ensures that each question includes multiple-choice answer options, which can help students reinforce their learning by considering both correct and incorrect responses.
How It Works for Students
Students answer each question, and if their response is correct, a section of the image is revealed in color. Incorrect answers may distort the image, encouraging students to reflect on their responses and try again. This immediate feedback loop makes it a great formative assessment tool.
Why Use Flippity Color by Number?
Self-Paced & Engaging – Students can work at their own speed while receiving instant feedback.
Versatile Across Subjects – This tool can be used for math, science, history, language arts, and even foreign language practice.
Easy to Set Up – With just a Google Sheet and a few clicks, you have an interactive review ready to go.
Final Thoughts
Flippity’s Color by Number is a fantastic way to bring a game-like experience to review sessions. Whether used for independent practice, small group activities, or whole-class engagement, it makes learning both effective and fun. Try it out using the structured prompt above, and let me know how it works for your classroom!
🎯 Effortless Jeopardy-Style Review Game Creation with ChatGPT 🎮✨ Generate Engaging Trivia for Any Topic in Minutes! 🚀
Gamifying learning is a great way to keep students engaged, and setting up a Jeopardy-style quiz game has never been easier! This guide walks through how to use Google Sheets, Flippity, and ChatGPT to quickly generate and format quiz questions. Whether preparing for a test or just adding fun to lessons, this method saves time while ensuring an interactive experience.
Step 1: Generating Questions with ChatGPT
Instead of manually creating every question, ChatGPT can do the heavy lifting with the right prompt. The following structured prompt ensures the generated questions fit perfectly into the Flippity Quiz Show template:
Flippity Game Setup Prompt - **** please be sure to copy this prompt ****
Instructions: Before generating the setup, ask for the topic of the game.
Categories and Format:
The game should include six main categories in a single row at the top.
Each question should appear directly below its respective category in the first available row.
Each answer should be placed directly below its corresponding question in the same column.
Questions and answers should alternate within each category column.
Final Category:
The seventh category should be titled "Final" (not "Final Jeopardy").
This category should contain only one question and one answer related to the topic.
The Final question should be the most challenging one related to the topic.
The answer should be placed directly below the question, following the same alternating format as other categories.
Formatting Requirements: ✅ Do not include labels such as "Question 1" or "Answer 1." ✅ The output should contain only:
One row with the six category titles + "Final"
Alternating questions and answers below each category
One Final question and answer in the "Final" category ✅ Structured for direct pasting into a Google Sheet:
No extra line breaks
No additional spaces
No misalignment due to text wrapping ✅ The entire setup must be enclosed inside a code block for easy copying and pasting.
Using this prompt ensures a fully formatted, game-ready quiz setup without any manual adjustments.
Step 2: Setting Up the Flippity Quiz Show Template
Now that the quiz content is ready, it needs to be placed into the Flippity Quiz Show template:
Visit Flippity.net and select Flippity Quiz Show
Click on Instructions, then Make a Copy of the provided template
Step 3: Adding Questions to Google Sheets
Open the copied Flippity template
Click on cell B2
Paste the ChatGPT-generated content (Ctrl + V or Command + V on Mac)
All questions and answers should now be properly structured within the template!
Step 4: Publishing and Sharing the Game
To make the game live and accessible:
Click File → Share → Publish to the web
Select Publish, then Copy the generated link
Paste this link into Row 3 of the Flippity template
Now, the game is fully functional!
Step 5: Playing the Quiz Show
With everything set up, the quiz show is ready to be played. The interface allows for:
Up to four teams to participate
Customizable settings, such as hiding the timer or shuffling questions
Clicking on any question to reveal the answer
Final Category play, where students tackle the toughest question
Why Use This Method?
This Flippity + ChatGPT workflow makes it incredibly easy to create an interactive quiz game in minutes. Using a structured approach ensures that all formatting is correct, eliminating the need for manual adjustments. Whether used for test reviews, subject-specific challenges, or engaging classroom activities, this setup saves time while maximizing engagement.
Try it out and bring some game-show excitement into the classroom!
📺✨ Want a summary of a YouTube video?🎥🔍 🚀 Try Summarize Tech for quick insights! 📝⚡
Ever found yourself needing a quick summary of a long YouTube video? Whether it's a lecture, a government meeting, or a live event, watching the entire video might not always be the most efficient option. That's where Summarize.Tech comes in!
How It Works
Using Summarize.Tech is incredibly simple:
Copy the URL of the YouTube video you want summarized.
Paste it into Summarize.Tech.
Click Submit and wait for the magic to happen.
Within seconds—sometimes up to 30 seconds for longer videos—the tool generates a concise summary, giving you a quick overview of the video's key points.
Why Use It?
Saves Time – Get the main ideas without watching the entire video.
Great for Research – Quickly scan through multiple videos for relevant information.
Easy to Use – No complicated setup, just paste and go.
If you often find yourself needing quick takeaways from YouTube videos, Summarize.Tech is a handy tool to keep bookmarked. Give it a try and streamline your video-watching experience!
🌟 Google's Hidden Gem 🌟 🖱️✨ One-click printing 🖨️, sharing 📤, translating 🌍, and so much more! 🚀🔧
Ever wished you could copy a link, create a QR code, or print a webpage with just one click? Google Chrome has a hidden feature that lets you do exactly that! With a few simple steps, you can customize your Chrome toolbar to make your browsing experience more efficient.
How to Enable Chrome’s Shortcut Toolbar
Open a new tab in Chrome.
Click Customize Chrome in the bottom right corner.
Scroll down until you see the Toolbar section.
Toggle on the options you want to enable, such as Forward, Incognito Mode, and other tools.
Once enabled, these icons will appear directly on your browser, making them accessible with a single click.
Key Features to Speed Up Your Workflow
Now that your shortcut toolbar is active, you can take advantage of these handy tools:
Copy Link – Quickly copy any webpage URL to share or save.
Create a QR Code – Generate a QR code for any webpage, perfect for sharing with others.
Translate with Google Lens – Instantly translate an entire webpage into another language.
Print with One Click – Instead of using Ctrl + P, simply click the print icon to get a hard copy immediately.
Reading Mode – Remove distractions and focus on the text of an article.
Send to Your Devices – Seamlessly transfer a webpage from your computer to your phone or tablet.
In the video, Brad demonstrates these features by visiting ESPN. He copies a link, generates a QR code, translates a page, and prints content—all in just a few clicks. If you frequently perform these actions, enabling this shortcut toolbar can save you valuable time.
Final Thoughts
Chrome’s hidden shortcuts allow you to streamline common tasks and improve your workflow. Whether you’re a teacher sharing resources, a student organizing research, or just someone who loves efficiency, these features are worth exploring.
Want a quick walkthrough? Check out the full video here: Watch on YouTube.
Have any questions? Feel free to reach out. Happy browsing!
🗣️ Speak, Don't Type! How to Use Dictation in Outlook on the Web to Write Emails ✉️🎤
Certainly! Here's a blog post based on your video transcript:
How to Send an Email Using Your Voice in Outlook on the Web
Ever find yourself wanting to send an email but not in the mood to type it all out? Good news—Outlook on the web has a built-in dictation tool that lets you compose emails using just your voice! Here’s how you can do it.
Step 1: Start a New Email
First, open Outlook on the web and click New Mail. Enter the recipient’s email address, add a subject, and move to the body of the email where you'll dictate your message.
Step 2: Find the Dictation Tool
At the top of the email editor, you'll see several tabs like Home, View, and Help. Click on Message, and look for the microphone icon—this is the dictation tool.
Step 3: Grant Microphone Permissions
If you’re using dictation for the first time, Outlook will prompt you to allow microphone access. Click Allow to proceed. Once set up, you're ready to start speaking!
Step 4: Start Dictating
Click the microphone icon and begin speaking. Outlook will convert your words into text in real time. If you make a mistake, you can either edit manually or click the microphone again to make corrections.
For example, if you need to add punctuation, you can say:
"Hello everyone period" → Outlook will insert "Hello everyone."
If something is missed, you can click back in the email, place the cursor where needed, and continue dictating.
Step 5: Send Your Email
Once your email looks good, simply hit Send—just like any other email.
Why Use Voice Dictation?
Using voice dictation can be a huge time-saver, especially if you:
✅ Prefer speaking over typing
✅ Want to compose emails hands-free
✅ Need accessibility-friendly tools
Outlook's dictation feature is a simple yet powerful tool to improve workflow efficiency. Try it out, and let me know if you have any questions!
📺 How to Watch & Share YouTube Videos 🎥 Ad-Free 🚫🛑 (Easy & Legal!)
Hi everyone! If you’ve ever wanted to share a YouTube video but were worried about ads popping up at the wrong moment, you’re not alone. Whether you're an educator, presenter, or just someone looking for a cleaner viewing experience, there are two simple tricks you can use to share YouTube videos without distractions.
1. The Popup Trick
This method allows you to open a YouTube video in full screen with no ads or related content. Here’s how:
Find the YouTube video link. It will look something like this: https://www.youtube.com/watch?v=abcdefg
In the URL, after the word watch, insert _popup. Your link should now look like this: https://www.youtube.com/watch_popup?v=abcdefg
Hit Enter, and the video will open in full-screen mode with no ads!
2. The Embed Mode Trick
Another quick way to create an ad-free experience is by using YouTube’s embed format.
Take your video link: https://www.youtube.com/watch?v=abcdefg
Remove everything after youtube.com/ until you get to the video ID (the part after v=).
Replace it with embed/, so your final URL looks like this: https://www.youtube.com/embed/abcdefg
Open this link in a new tab, and just like that—no ads!
Test It in an Incognito Window
To make sure your modified links work properly, try pasting them into an incognito window. You’ll see that both methods open the video cleanly without advertisements, making them perfect for classroom use or professional presentations.
These quick tricks help keep your videos distraction-free, making them easier to share with students, colleagues, or anyone else who needs a seamless viewing experience.
📄❌ "Unknown Error"? Fix That Scanned PDF with PDF Candy! 🍬✅
Hi everyone, this is Brad!
Have you ever tried uploading a scanned PDF to ChatGPT, hoping to analyze or discuss its contents, only to be met with a frustrating "Unknown Error" message? You’re not alone! This common issue occurs when AI tools struggle to recognize scanned documents as actual text. Fortunately, there’s a simple workaround using PDF Candy.
Why Does This Happen?
When you scan a document and save it as a PDF, the file often consists of images of text rather than actual selectable text. AI tools like ChatGPT rely on readable text to process the document, so if it’s just an image, it won’t work properly.
How to Fix It Using PDF Candy
To resolve this issue, we’ll use PDF Candy to convert the scanned PDF into readable text. Here’s how:
Go to PDF Candy – Visit PDF Candy and select the OCR PDF tool.
Upload Your Scanned PDF – Click Add File and select your document.
Start the OCR Process – Scroll down and ensure OCR (Optical Character Recognition) is selected. This tool extracts text from scanned documents.
Wait for Processing – Give it a moment. Processing times vary depending on the document size.
Download the Converted PDF – Once finished, download the new PDF, which now contains selectable and readable text.
Re-upload to ChatGPT – Go back to ChatGPT, click the Upload button, and select your newly converted PDF.
Success!
Your document should now be readable by ChatGPT, allowing you to engage with its content as intended.
Final Thoughts
If you ever run into this Unknown Error again, just remember this quick fix with PDF Candy. It’s a fast and easy way to make sure your scanned PDFs are AI-friendly.
Hope this helps! If you have any questions, feel free to reach out.
Boosting Student Activity with the Brisk Extension
Engaging students with online resources can sometimes be a challenge, but the Brisk extension provides a powerful way to boost student activity and interaction with digital content. Whether you’re working with a historical article on the Revolutionary War or any other subject, Brisk helps transform passive reading into an active learning experience.
Why Use Brisk for Student Engagement?
Brisk isn’t just about simplifying texts or pulling key vocabulary—it offers interactive features that encourage students to actively engage with content. The Boost Student Activity tool allows educators to generate structured learning tasks, create interactive prompts, and even monitor student participation in real-time.
How to Set Up Brisk for Student Activity
Choose Your Content – Select a webpage or article relevant to your lesson. If you want students to have a printed copy, use Ctrl + P to save it as a PDF and print.
Activate the Brisk Extension – Click the Brisk icon and select Boost Student Activity from the menu.
Customize the Activity – Choose from available options like Tutor Mode and set the reading level (e.g., 6th grade).
Generate and Share – Once Brisk creates the activity, you can preview, edit, and share the link or QR code with your students.
What Students See
The article appears alongside learning objectives to guide their reading.
A chat feature allows interaction, but messages are visible to the teacher.
Students engage by answering key questions, such as identifying major historical events.
Real-Time Monitoring & Teacher Controls
One of Brisk’s standout features is the Monitor Activity function. Teachers can:
✅ View student responses in real-time.
✅ Pause individual students if needed.
✅ Disable chat for specific students.
✅ Download an activity report (CSV format) for easy assessment.
Why This Matters
Using Brisk ensures students aren’t just skimming an article—they're engaging with the material, applying critical thinking, and staying accountable for their learning. Plus, with built-in monitoring, teachers can provide instant feedback and adjust instruction accordingly.
Final Thoughts
Brisk’s Boost Student Activity feature is a game-changer for tech-enhanced learning. Whether you're using it for history, science, or literature, it helps bridge the gap between reading and interactive learning. Try it out, and if you have any questions, let’s connect!
🎙️📚 Be the Storyteller! Narrating with Vooks' Storyteller Mode 🎥✨
In a world where digital storytelling continues to evolve, Vooks offers an exciting feature called Storyteller Mode that allows educators and parents to bring stories to life in their own voices. If you love reading aloud and want to create a personalized narration of a book, this feature is a game-changer.
Getting Started with Storyteller Mode
With Vooks Storyteller Mode, you can record yourself reading a book page by page or all at once. Here’s how it works:
Select a Book – Choose from a variety of illustrated stories.
Start Recording – You’ll have options to record each page individually or the entire book at once.
Review and Submit – Playback your narration, make any changes, and finalize your recording.
Share with Others – Once completed, you can share your narrated story with up to 50 people at a time via email, making it easy to distribute to students, parents, or fellow educators.
Why Storyteller Mode is a Great Tool
Engagement – Students can hear a familiar voice narrating the story, which can help with comprehension and engagement.
Personalized Learning – Teachers can create custom read-alouds for their classrooms, reinforcing literacy skills in an interactive way.
Final Thoughts
Vooks' Storyteller Mode brings a fresh approach to digital storytelling, making it easier than ever to create engaging, personalized read-aloud experiences. Whether you're an educator looking to enhance literacy instruction or a parent wanting to share a bedtime story in your own voice, this feature provides a simple yet effective way to make reading more interactive.
Have you tried Vooks Storyteller Mode? Let me know how you use it in your classroom or at home!
📊🔥 Visualize Numbers as 🎭🎯 Emojis in Google Sheets! 🚀📈
When it comes to engaging students in math and data visualization, sometimes a little creativity goes a long way. In a recent video, Brad demonstrates a fun way to make numbers more interactive by incorporating emojis into a spreadsheet. This approach not only makes data more visually appealing but also helps students develop a stronger connection to numerical concepts.
Setting Up the Spreadsheet
The core idea behind this technique is to sum up task values while dynamically displaying emojis that correspond with those values. Here's a quick breakdown of how it works:
Summing Tasks – The spreadsheet is set up with names and task values. Using a simple SUM function, students can input numbers, and the total updates automatically.
Adding Emojis with Formulas – Instead of just showing numbers, emojis are introduced using a custom function. This makes the output more engaging.
The formula format follows:
=RT("emoji", CellReference)
In this example, Sherlock Holmes is represented with a magnifying glass emoji, and Gandalf gets a wizard emoji.
The Magic of Wrapping and Formatting
To ensure the emojis display correctly, the text wrapping feature is enabled. This allows the emojis to expand with the values, making the spreadsheet both functional and visually appealing.
By applying this approach, students not only practice math skills but also engage with a more interactive and personalized learning experience. Whether it's using magnifying glasses for problem-solving or wizards for powerful calculations, adding emojis brings a fresh perspective to working with data.
Why This Matters
Visualizing numbers with symbols and images has long been a powerful teaching strategy. By integrating emojis into spreadsheets, students can:
Enhance Comprehension – Associating numbers with images helps in better recall and understanding.
Boost Engagement – A simple sum function might be dull, but when linked with recognizable characters and symbols, it becomes an interactive learning experience.
Encourage Exploration – Students can experiment with different emojis, connecting math with creativity.
Try It Out!
If you're looking for a simple yet effective way to make spreadsheets more exciting, give this method a try. Whether you're working with young learners or just want to spice up data entry, emojis can be a game-changer.
Have any questions or ideas on how to expand this?
In today’s digital world, finding high-quality, ad-free reading experiences for students can be a challenge. Enter Vooks, a kid-safe streaming platform that transforms books into animated stories, making literacy engaging and accessible. Whether you're leading a whole-class read-aloud, supporting small-group instruction, or curating a digital library of animated books, Vooks offers a dynamic way to bring stories to life.
Getting Started with Vooks
Signing up for Vooks is a simple process. Educators can log in with their credentials and create a profile, but it’s important to note that a single account is for teacher use only—students would need their own accounts to access the platform independently. Once set up, you can personalize your library by selecting areas of interest and applying content filters as needed.
Exploring the Digital Library
The homepage provides an easy-to-navigate interface where you can browse featured books, new releases, and collections curated by themes or age groups. Each title includes a run time, allowing you to plan accordingly for read-aloud sessions. If a book catches your interest, you can mark it as a favorite or add it to a custom playlist—a handy feature for organizing books by unit, theme, or reading level.
Interactive Features for Educators
One of the standout aspects of Vooks is its built-in activity guides. Many books include downloadable PDFs with activities, discussion prompts, and extension ideas, making it easy to integrate literacy skills into lessons. Whether it’s a bedtime story, an SEL-focused book like I Am Not Scared, or a curriculum-aligned title, these resources support deeper engagement with the text.
Customizing the Experience
For educators looking to personalize the storytelling experience, an upcoming feature in Vooks allows you to record your own narration, replacing the default voiceover. This is an excellent way to add a familiar voice, model fluency, and provide a more personalized reading experience for your students.
Why Use Vooks in the Classroom?
Vooks is an excellent tool for: ✅ Engaging reluctant readers with visually appealing, narrated stories. ✅ Supporting listening comprehension through high-quality audio and animation. ✅ Providing a screen-time alternative that emphasizes literacy. ✅ Enhancing classroom routines, whether through morning read-alouds, literacy centers, or wind-down activities.
Final Thoughts
If you're looking for a safe, ad-free, and engaging way to bring books to life, Vooks is worth exploring. Whether you're introducing a new story, reinforcing comprehension, or simply making reading more interactive, this platform provides valuable tools for educators.
Want to see Vooks in action? Try it out and start building your own digital story collection today!
Hey everyone, this is Brad! Maybe you, a student, or someone you know needs text read aloud. Well, here’s one way to do it—using https://voicegenerator.io/!
How It Works
Paste Your Text – Simply drop in the text you want to be read aloud. You can expand the input box to see everything clearly.
Choose a Voice – The default Microsoft David voice might sound a bit robotic, but you can switch to other options, like Google US English, which tends to sound more natural.
Adjust Settings – Modify the pitch and speed to better match your preference.
Listen and Download – Play back the audio, tweak as needed, and download it for later use.
Here’s a quick example: The robotic voice? Not great. The Google voice? Much better! Once satisfied, just download and use the file as needed.
Give it a try and let me know if you have any questions. Thanks for reading, and take care!
Magic School AI for Writing Feedback A Teacher and Student Perspective
Today, we’re diving into Magic School and how you can use it for writing feedback. If you want more information, just type "Magic School" into my blog search, and you'll find plenty of resources. And as always, if you have any questions, let me know!
Setting Up Writing Feedback in Magic School
Launch a Room
Start by selecting Launch to Students and then Launch New Room.
Name it something simple like Writing Feedback.
Add the Writing Feedback Tool
You can add multiple resources, but for this example, we’re just using one.
Scroll down and select Add for writing feedback.
Customize the Experience
Keep or change the voice settings.
Paste in the writing prompt. (I grabbed an example from Chat.)
Upload a rubric—either one you created or generated through AI.
What Students See
Once set up, students will:
View the assignment and submit their responses.
Receive AI-generated feedback on areas of strength and growth.
Have the option to listen to the feedback, slow it down, or speed it up.
Engage in a back-and-forth conversation to refine their writing.
Encourage students to use a Google Doc first, then copy and paste their work into Magic School. If the feedback feels overwhelming, remind them they can ask the AI to simplify it.
Teacher View
On your end, you’ll:
See students' submissions and their interactions with the feedback tool.
Monitor flagged words (like “stealing”) to ensure appropriate use.
Track progress and provide additional guidance as needed.
Sharing the Room
You can invite students via:
Join URL
Google Classroom
Join Code
Once they join, they acknowledge the prompt, submit their writing, and receive feedback—all within a structured, interactive environment.
This is a fantastic way to empower students in the writing process while keeping feedback meaningful and personalized. Let me know if you have any questions. Thanks for reading!
Turn your QR code into catchy artworks with Qrtoon.com
Today, we're diving into how to take your QR code and add a little artwork to it. In the past, we've used Canva to create a customized QR code, and I’ll include a link in this post if you’re interested in trying that method.
For this approach, make sure you have an image already downloaded. Start by selecting Try Web App, enter your link, and hit Next. Then, choose the photo you’d like to incorporate. In my case, I used a picture of my son enjoying the snow the other day.
Let it process, and if you’re not happy with the first version, no worries—just regenerate it. You can keep generating until you find the one that works best. For my son, the second version wasn’t his favorite, but the third one was just right.
Once you’ve got the QR code you like, you can right-click to download it or use the built-in Download button. Open it up, scan it, and see how it looks!
If you have any questions, feel free to reach out. Thanks for reading, and take care!
Hey there, it's Brad here! Today, we're diving into an exciting tool for teaching time - the Clock Demonstrator by ICT Games. If you've ever struggled to explain the intricacies of clock reading to your students, this tool is a game-changer. Let's explore how it can transform your lessons into a fun and interactive experience.
Getting Started with the Clock Demonstrator
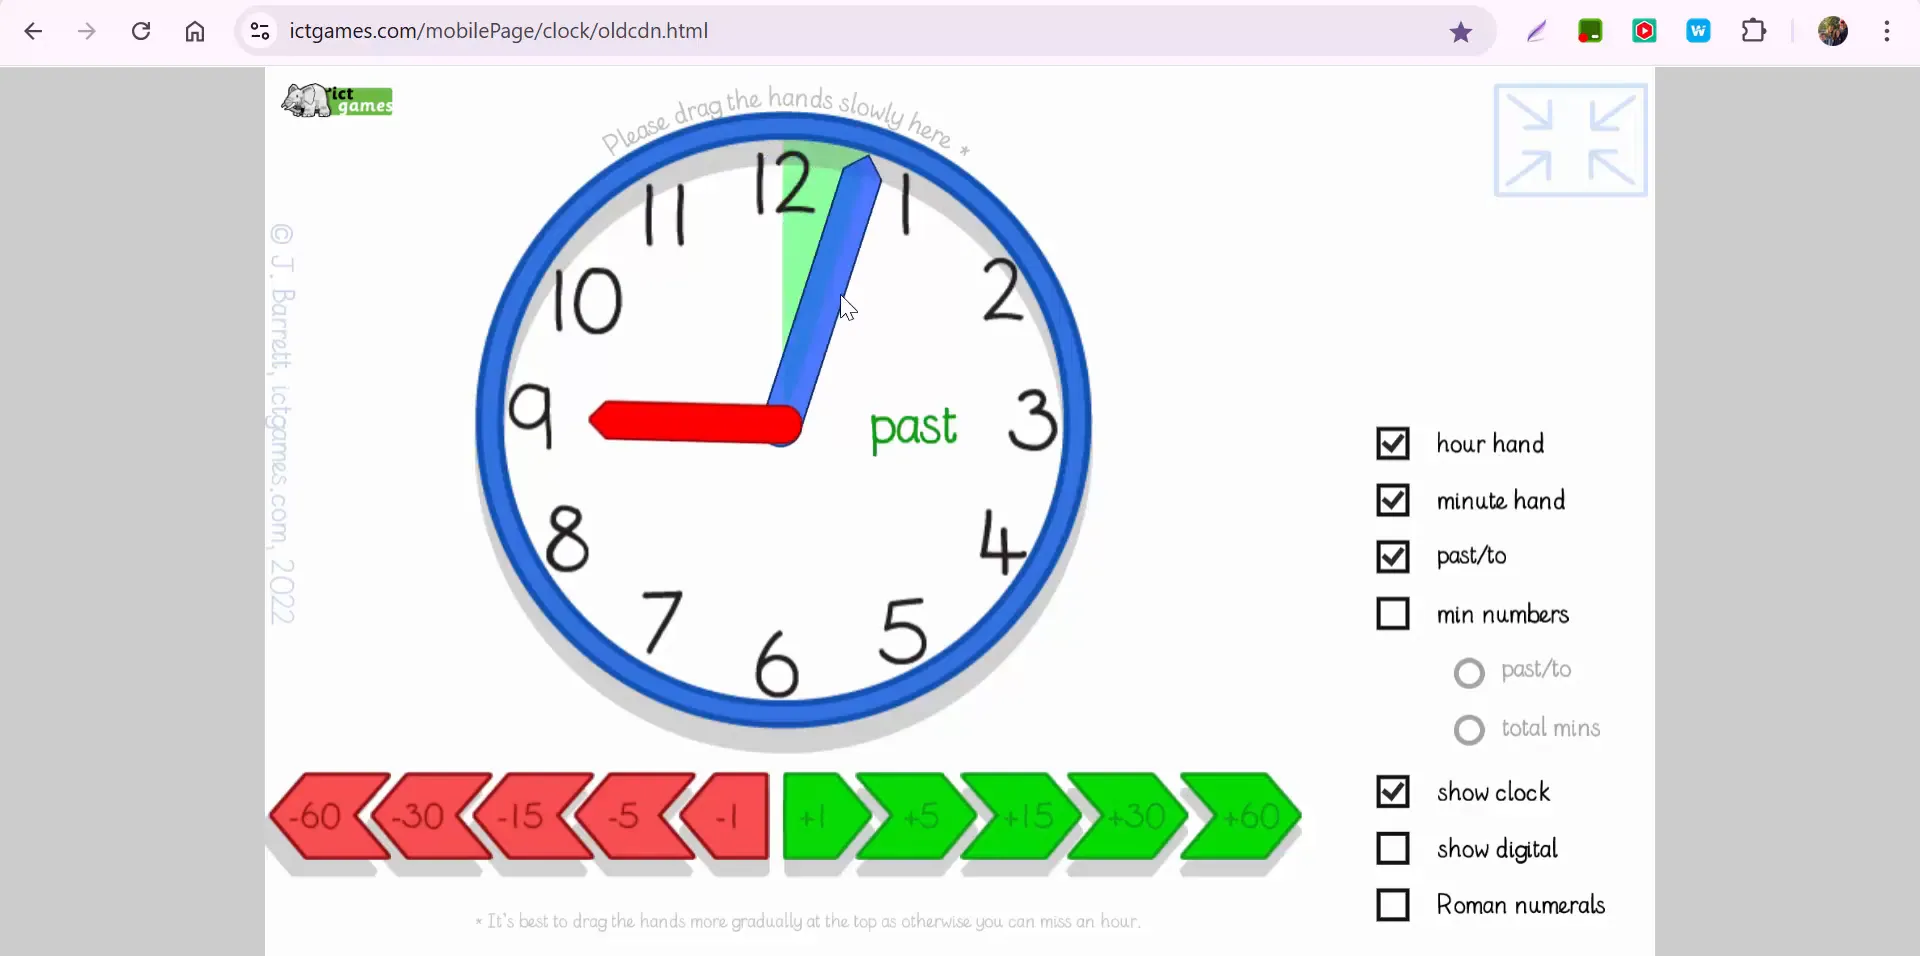
First things first, let's get familiar with the interface. As you open the Clock Demonstrator, you'll notice it provides clear visuals of the hour and minute hands. The design is clean, minimizing distractions, so students can focus on learning how to tell time effectively.
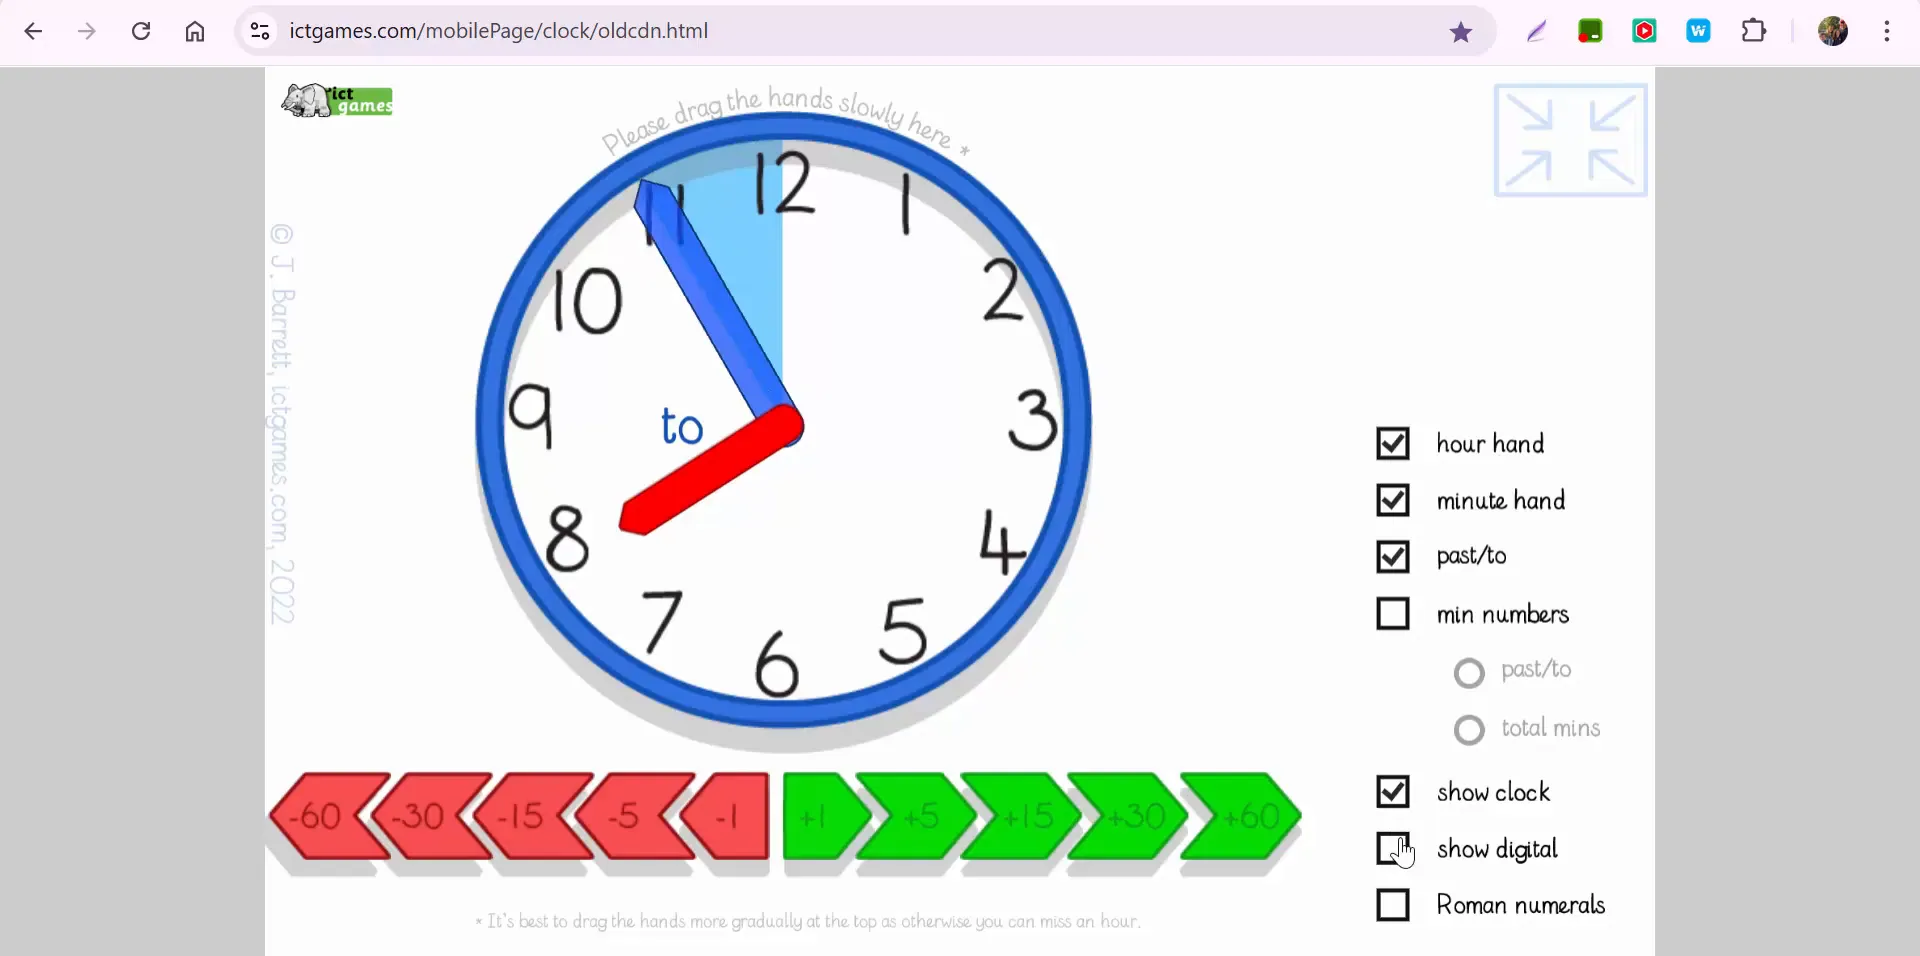
One of the standout features is the ability to enable 'past' and 'to' options, which helps students understand the concept of time transitions. This feature is particularly useful when explaining how time is measured as it progresses through each hour.
Interactive Features for Enhanced Learning
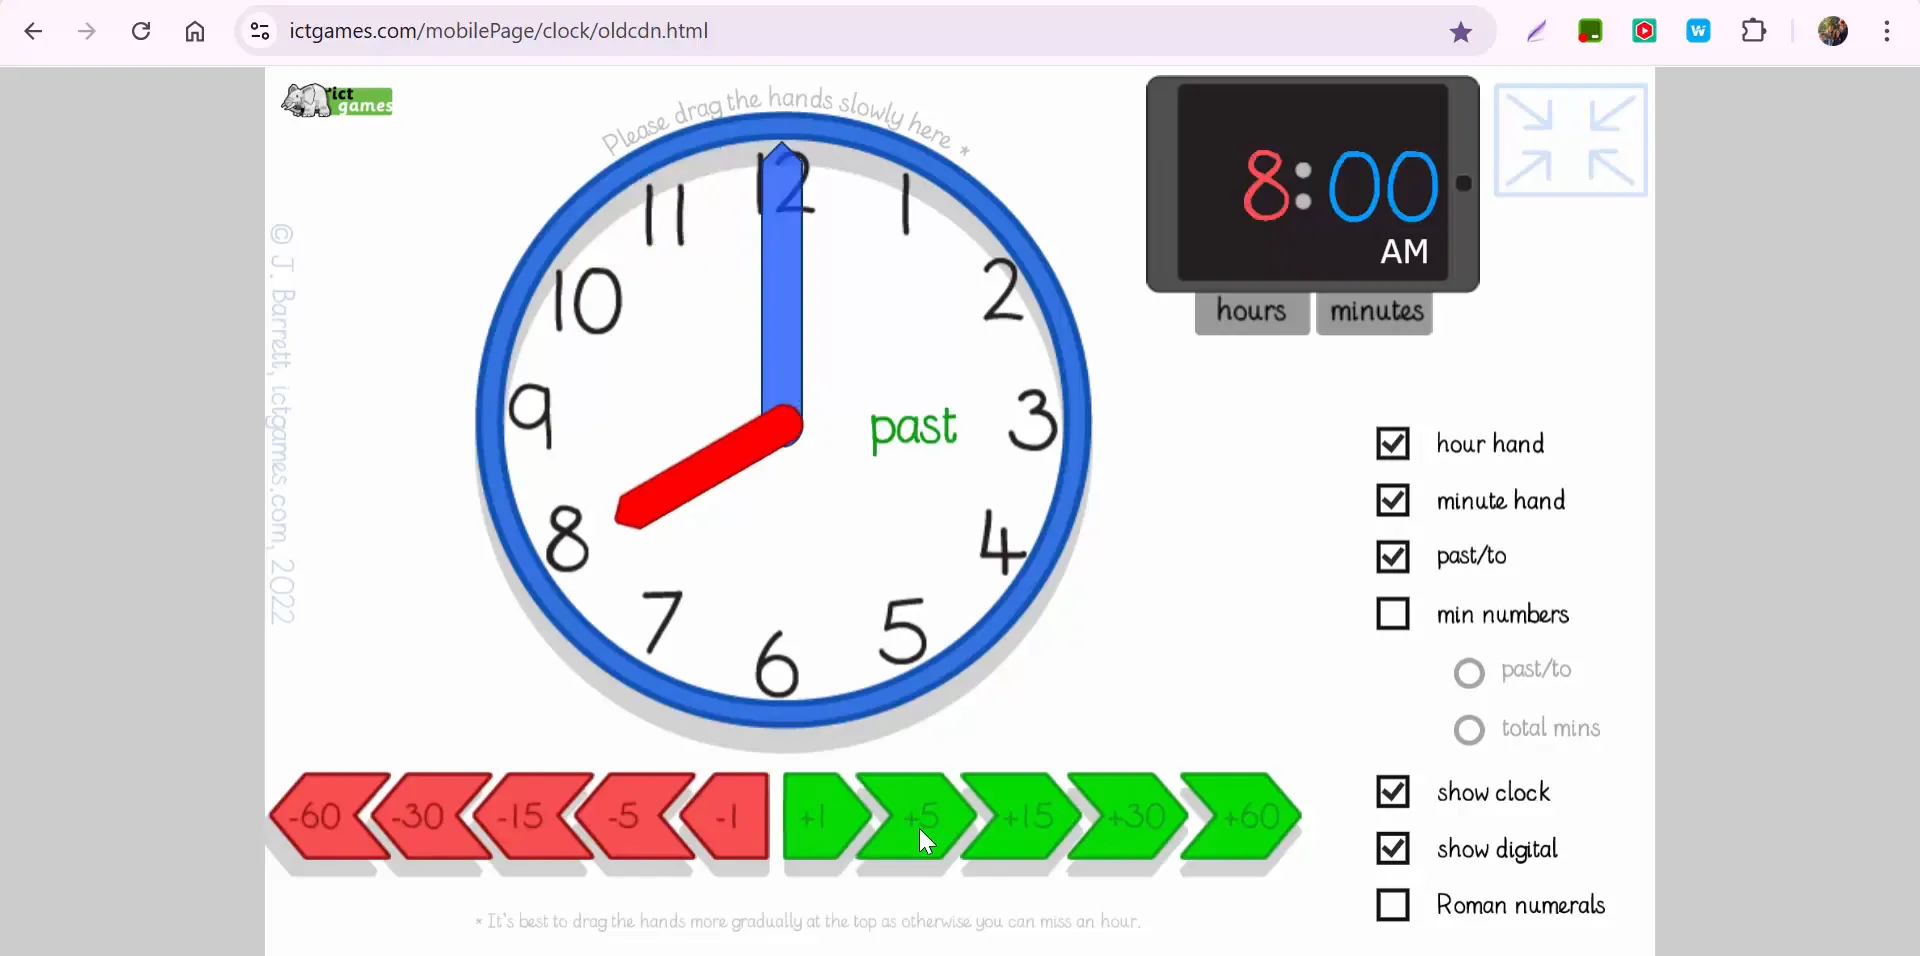
The Clock Demonstrator isn't just about showing the time; it's interactive and adaptable to your teaching needs. You can toggle between different settings to enhance the learning experience. For instance, you can show or hide the digital clock display, depending on whether you want to focus on analog time reading.
There's a nifty feature that allows you to add or subtract five-minute increments, making it easier for students to grasp the concept of time intervals without manually dragging the clock hands. This can be a huge time-saver and makes the learning process more intuitive.
Customizing Your Clock Demonstration
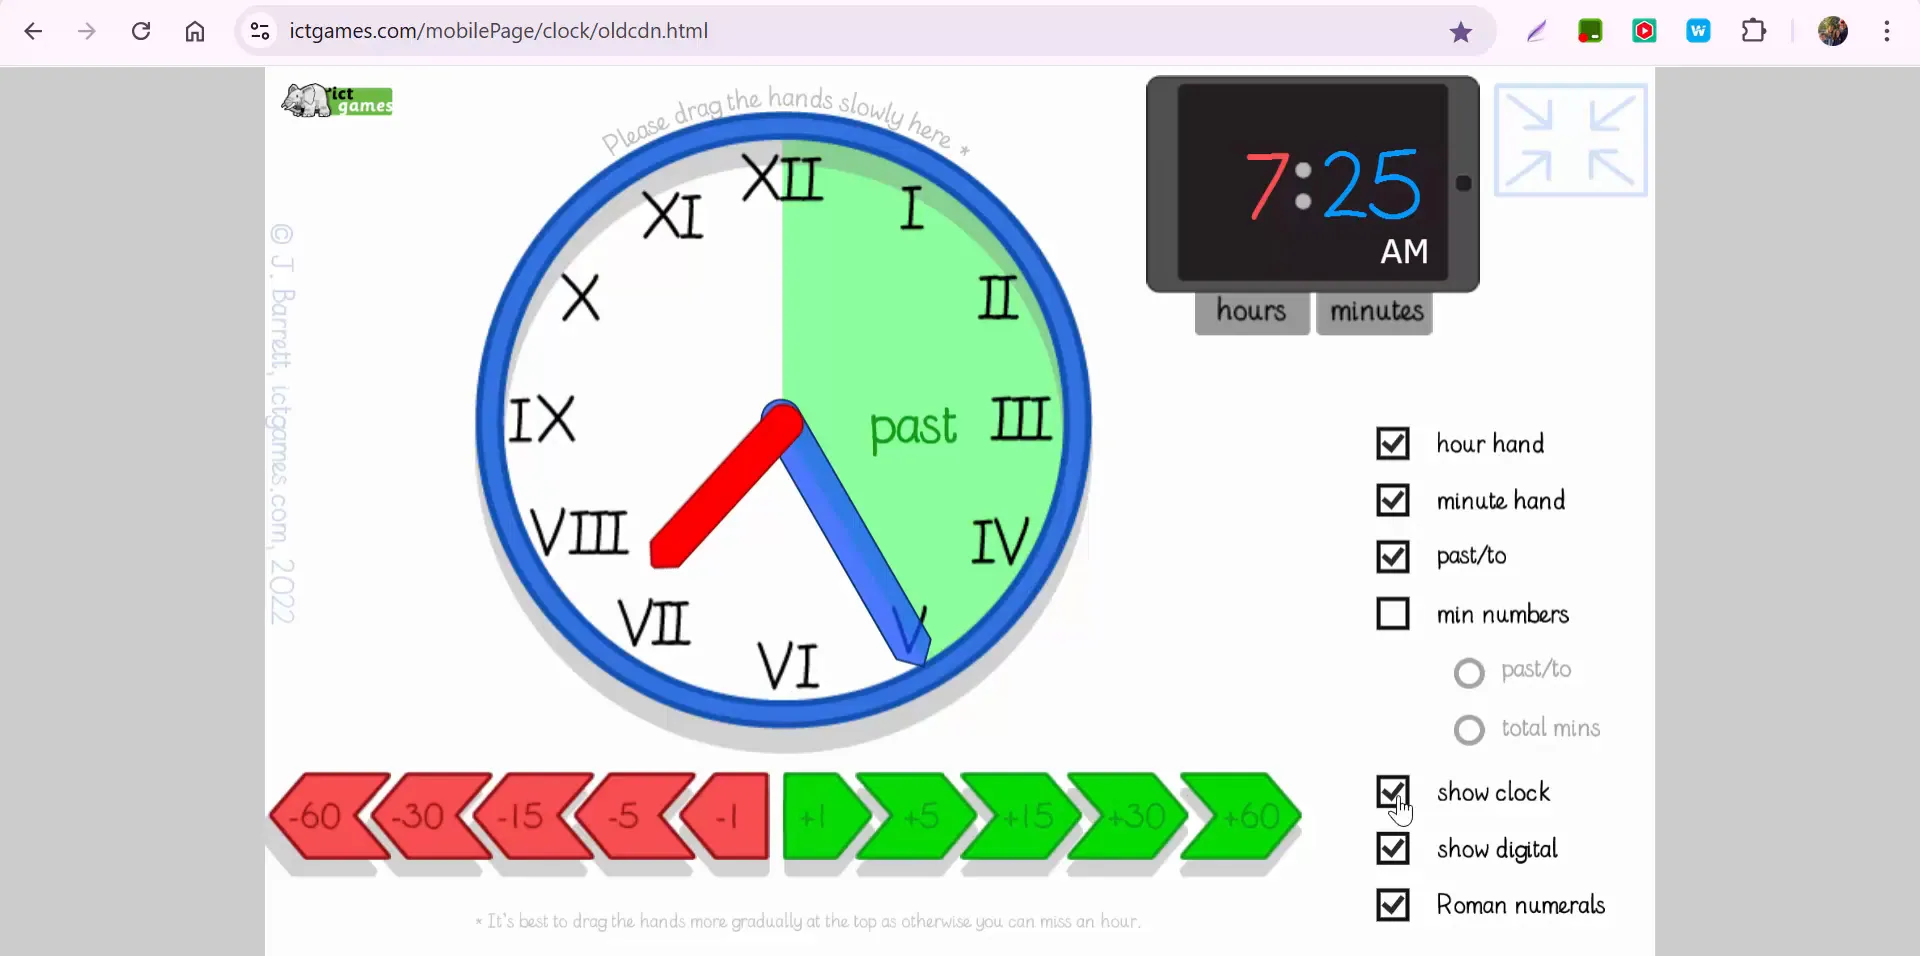
Customization is key in any educational tool, and the Clock Demonstrator delivers on this front. You have the option to display Roman numerals, which can be a great way to introduce historical timekeeping methods. If you prefer to stick with modern numerals, you can easily switch back.
For those who want to get into the nitty-gritty of time, there's an option to display total minutes. This feature is particularly helpful in teaching students how to calculate time differences and understand elapsed time in a practical context.
Solving Common Time-Telling Challenges
We all know that teaching time can come with its own set of challenges. One common issue is reading the clock when the hands are in the 'nines,' where visibility can be tricky. The Clock Demonstrator addresses this by allowing you to zoom in, ensuring students can clearly see the clock hands and understand the time accurately.
Additionally, the tool provides a seamless transition between past and future times, helping students visualize how time moves forward and how to calculate what comes next. It's a simple yet effective way to illustrate the flow of time.
Why the Clock Demonstrator is a Must-Have Tool
This tool is more than just a digital clock; it's a comprehensive teaching aid that enhances time-telling lessons. Whether you're teaching young learners or students who need a bit more practice, the Clock Demonstrator is versatile enough to meet various educational needs.
It's an excellent resource for remote teaching as well, allowing you to demonstrate concepts in a virtual classroom setting. With its user-friendly interface and interactive features, it's perfect for keeping students engaged and making learning fun.
Conclusion: Making Time-Telling a Breeze
In conclusion, the Clock Demonstrator by ICT Games is a fantastic tool for educators looking to simplify the process of teaching time. Its interactive features, customizable settings, and clear visuals make it an invaluable resource in any classroom.
If you have any questions or need further assistance, feel free to reach out. Thanks for tuning in, and happy teaching!
Time Matters: A Fun and Easy Clock Demonstrator
Today, I want to share a fantastic tool for teaching time in the classroom: the Clock Demonstrator from ICT Games. This tool is simple, effective, and packed with features that make learning about clocks fun and interactive for students.
Features That Shine
When you first open the Clock Demonstrator, you’ll notice its clean design and focus on key learning objectives. To make the experience even better, you can enlarge the display, removing any distractions and allowing students to clearly see both the hour hand and the minute hand.
What Makes It Great?
Past and To Enabled:
Students can easily see how times like "10 past" or "5 to" are represented on the clock. The dynamic visuals help solidify their understanding of these concepts.
One thing to note: around the nines, it can be tricky to see "to," but the feature is still a fantastic addition.
Interactive Controls:
Add or subtract 5 minutes with just a click—no need to drag the hands manually!
Want to jump back or forward by 30 minutes? You can do that too. Perfect for practicing elapsed time scenarios.
Digital and Roman Options:
Display the time digitally alongside the analog clock or hide it to challenge your students.
If you’re diving into history or a lesson on Roman numerals, you can even display those on the clock.
Total Minutes:
For a deeper understanding of how minutes accumulate, toggle the "Total Minutes" option. It’s a great way to connect the concept of hours and minutes.
Precision Control:
The demonstrator allows you to explore time differences and manipulate the clock with pinpoint accuracy, making it an excellent tool for discussions and demonstrations.
Why Use the Clock Demonstrator?
This digital clock is an amazing resource for helping students grasp the concept of time. Whether you’re focusing on telling time, elapsed time, or even Roman numerals, this tool has you covered. Plus, the interactive features ensure students stay engaged and excited about learning.
If you have questions about using this tool or want to share how it’s working in your classroom, feel free to reach out. Let’s make learning time a breeze!
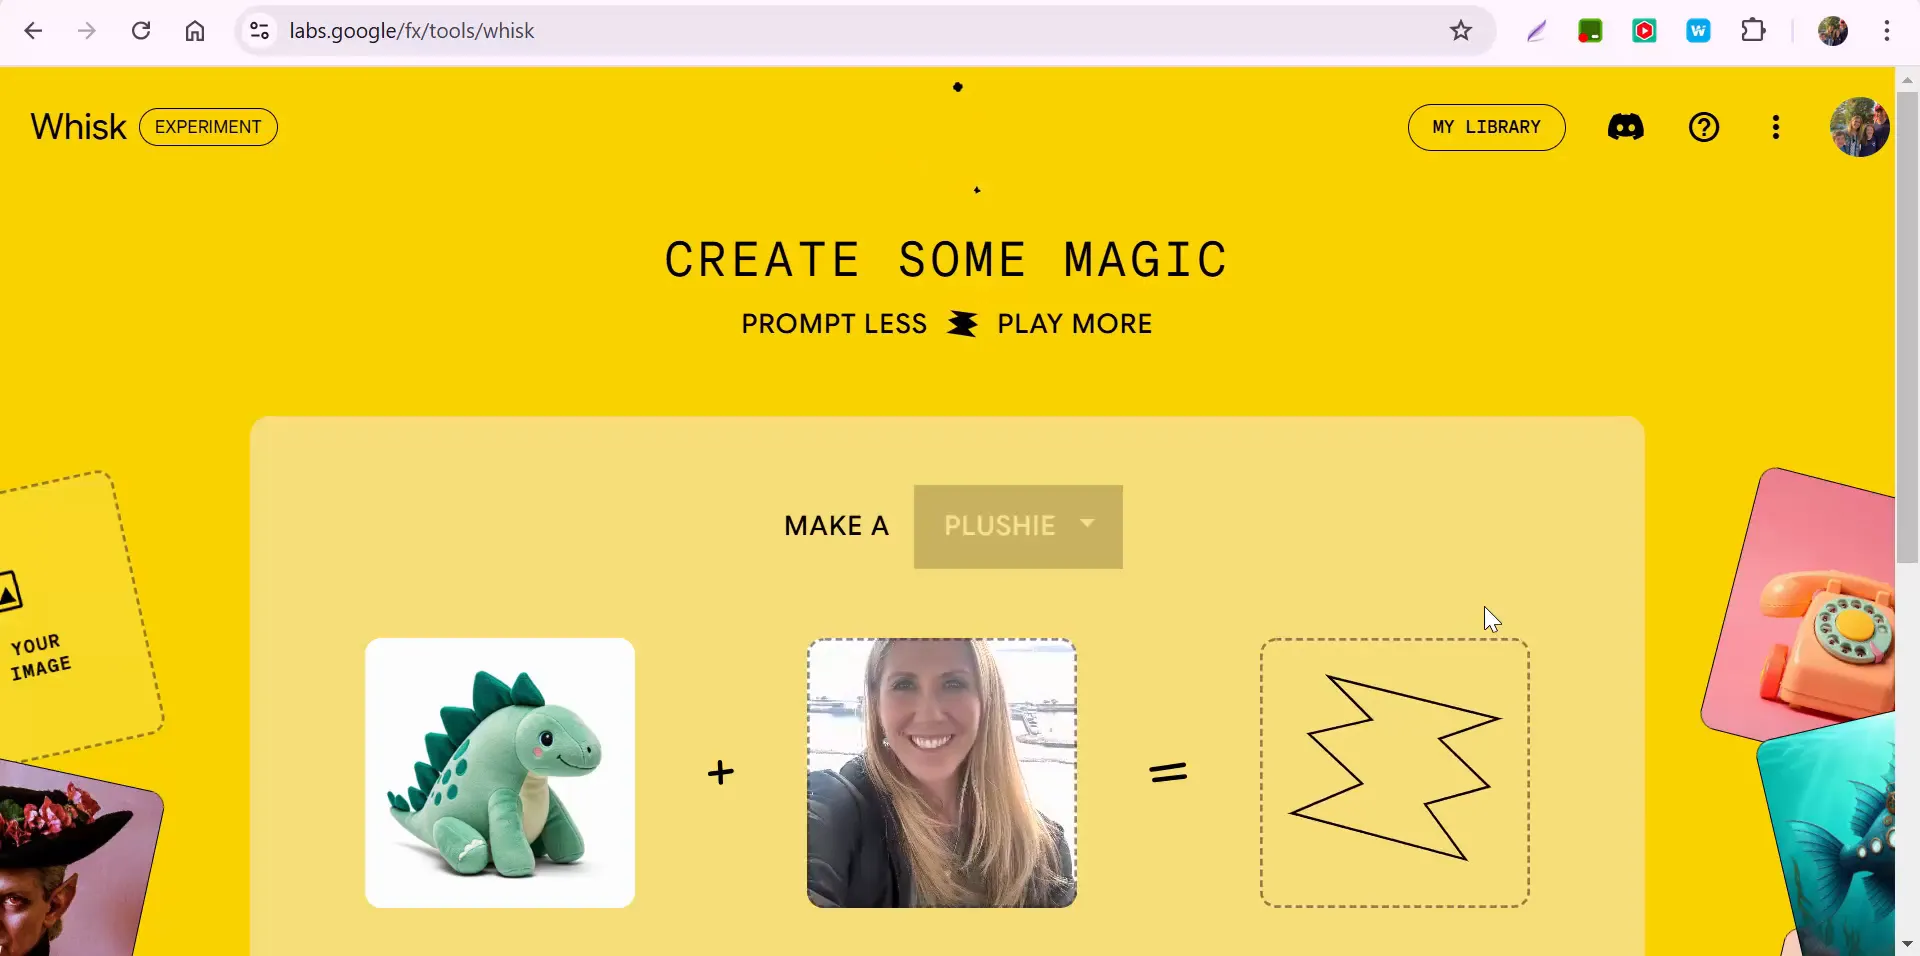
Welcome to the world of Google Labs, where innovation meets creativity! Today, we’re diving into an exciting experimental tool called Whisk. This platform encourages users to “prompt less and play more,” allowing for a unique blend of fun and creativity. If you’re curious about how to navigate this tool, share your creations, or learn more about its functionalities, you’re in the right place! Let’s jump right in and explore what Whisk has to offer.
What is Whisk?
Whisk is an experimental tool developed by Google Labs that allows users to create unique images based on existing photos. The idea is simple: you can use your photos as prompts to generate new, imaginative visuals. This tool is designed to inspire creativity, enabling you to express your ideas in a visually appealing way.
Getting Started with Whisk
To get started, head over to the Whisk platform. Once you’re there, you’ll notice a selection of options to choose from. The current presets include:
Sticker
Enamel Pin
Plushie
Let’s focus on creating a plushie. This option adds a playful touch to your creations, making it a popular choice among users.
Creating Your First Plushie
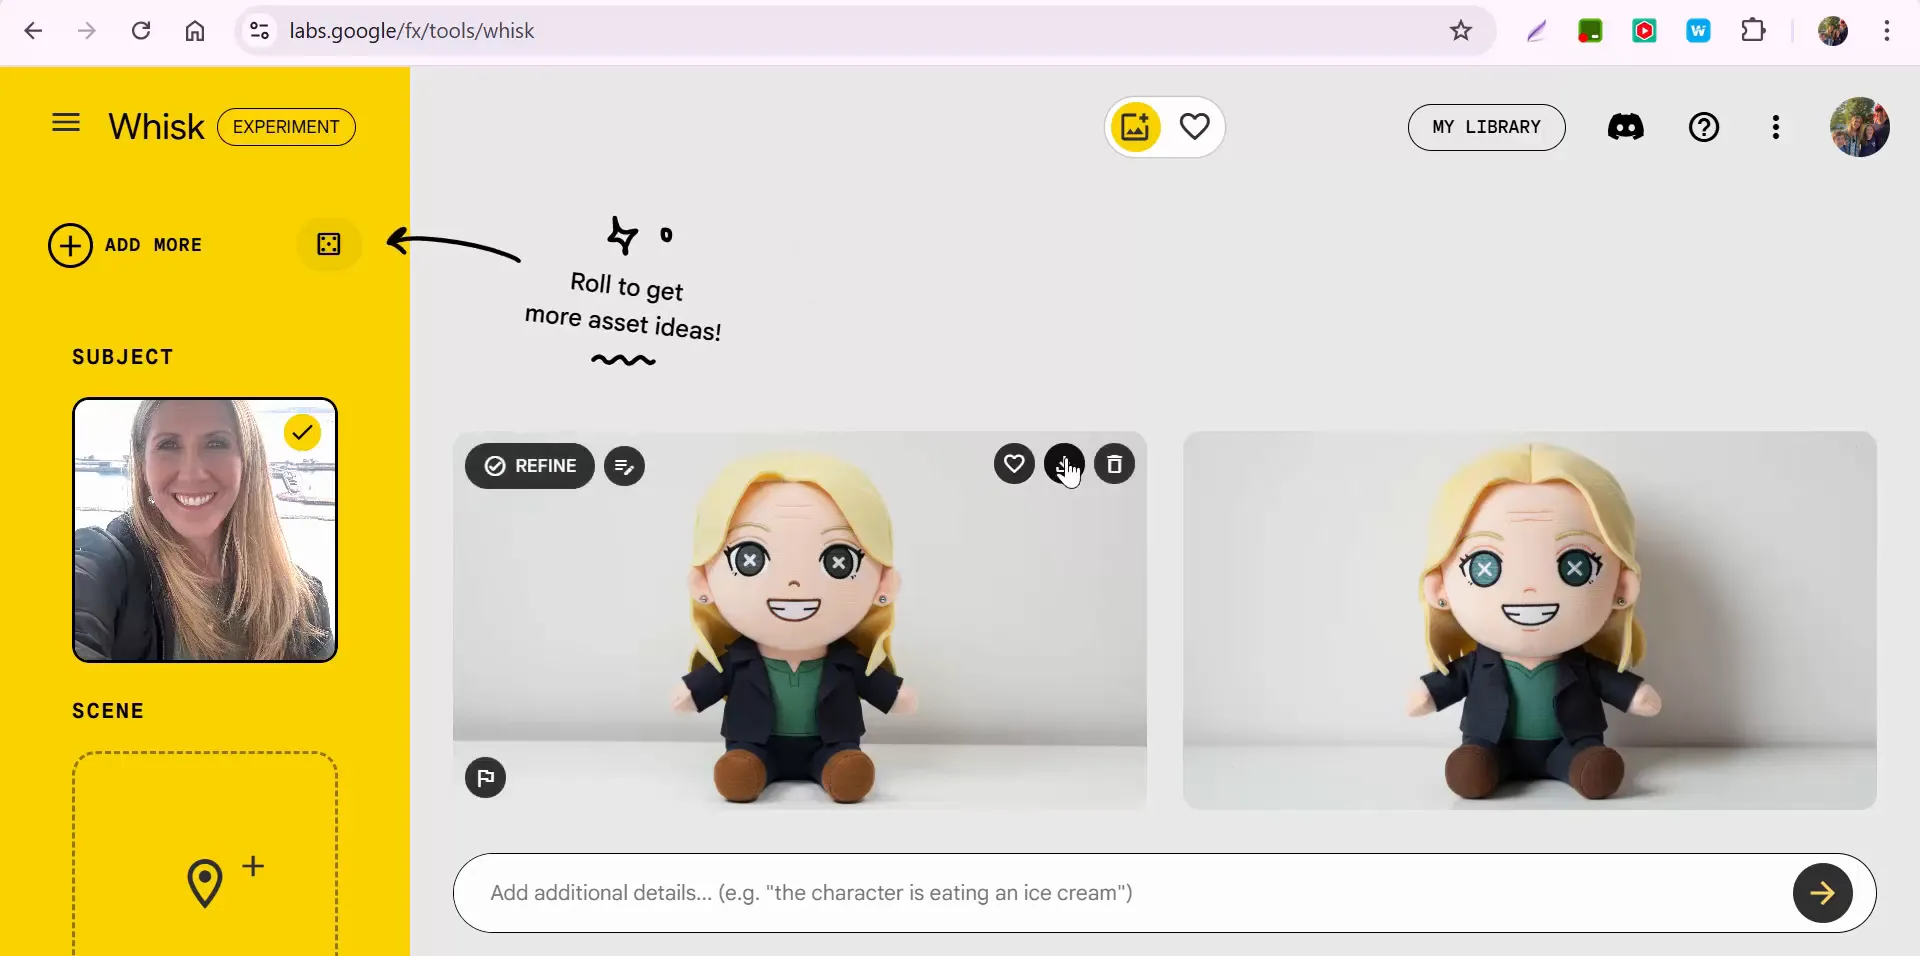
Once you’ve selected the plushie option, it’s time to choose an image to serve as your base. You can scroll through your images to find the perfect one. Here’s where the magic begins! After selecting an image, Whisk will generate a plushie based on your choice.
After a brief moment, your unique plushie will appear on the screen. Isn’t it amazing to see how the AI interprets your image and transforms it into something new? If you’re happy with the result, you can easily download it to save your creation.
Exploring Additional Features
Whisk offers more than just basic image creation. You can also add fun details to your plushie! For instance, you might want to specify that your character is enjoying a scoop of ice cream. This level of customization allows for a more personalized touch, enhancing your creative experience.
Adding Fun Details
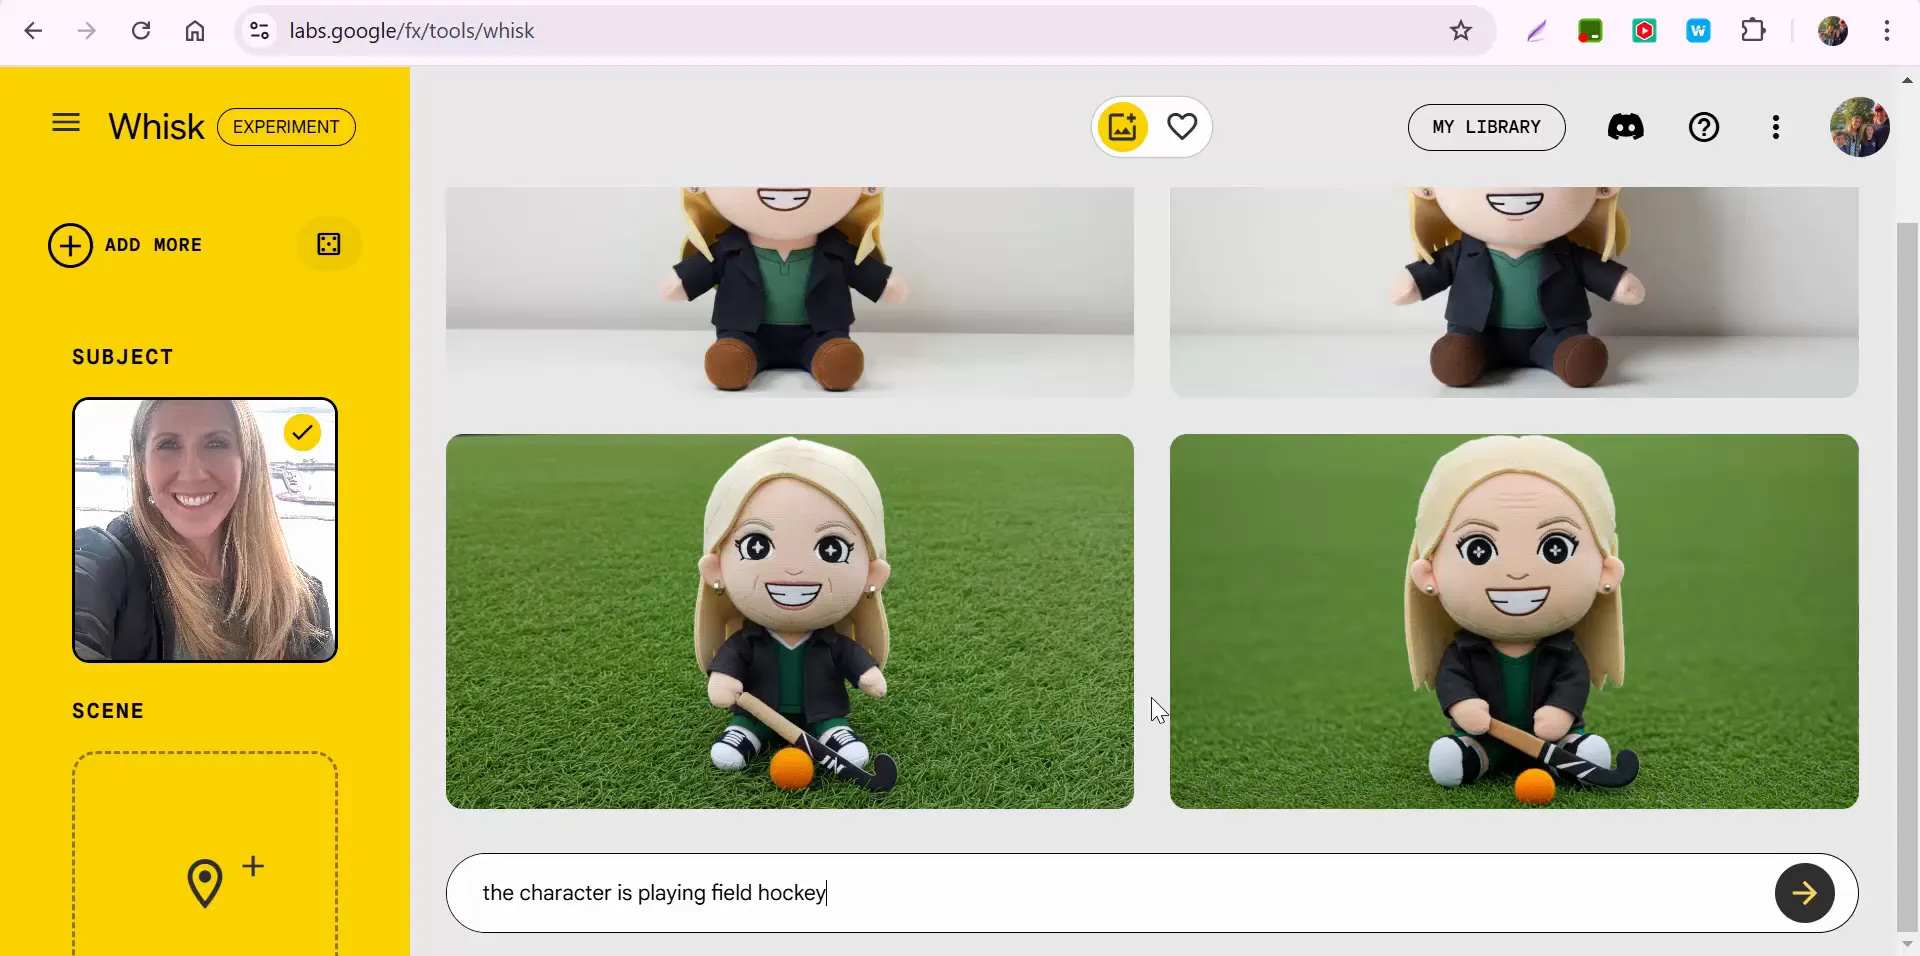
Let’s try adding a different action. What if our plushie character is playing field hockey? You can simply type in this new detail, and watch as Whisk generates a fresh version of your plushie, now engaged in a fun activity!
Why Use Whisk?
Whisk is not just about creating adorable images; it’s about exploration and playfulness. This tool encourages users to experiment with their ideas and see how AI can enhance their creative process. Whether you’re an artist looking for inspiration or simply someone who enjoys creating unique visuals, Whisk provides an engaging platform to unleash your creativity.
For Creatives and Hobbyists Alike
Whisk is beneficial for both professional creators and casual users. Artists can use it as a brainstorming tool, while hobbyists can enjoy the fun of creating personalized items. The potential applications are endless, from designing custom merchandise to generating unique art pieces for personal projects.
Sharing Your Creations
Once you’ve created your images, you might wonder how to share them. Whisk allows you to download your creations easily, enabling you to showcase your work on social media, or even print them out for physical use. Sharing your unique designs can help inspire others to explore their creativity through Whisk as well.
Final Thoughts
Whisk is a delightful experiment from Google Labs that invites users to play and create with AI-powered tools. Whether you’re making plushies, stickers, or enamel pins, the process is designed to be fun and engaging. So why not give it a try? Dive into Whisk, unleash your creativity, and see what unique designs you can come up with!
If you have any questions or need further assistance, feel free to reach out. Happy creating!
Thanks for joining me on this exploration of Google’s Whisk experiment. Until next time, take care and keep playing with your creativity!
Exploring Google’s Whisk Lab: Prompt Less, Play More!
Hey everyone, it’s Brad here! Today, I’m diving into a fun and creative tool from Google Labs called Whisk, where the motto is to prompt less and play more. If you're curious to explore it yourself, I'll include a link in this blog post and in the YouTube description. The official site provides tutorials and answers to common questions like how it works and how you can share your creations.
Let’s take a quick look at Whisk in action!
Trying Out Whisk
When you open Whisk, you’ll see a variety of creative options to choose from. For this example, I decided to check out the Plushy option. After selecting an image, Whisk quickly generated a fun plushy design.
Once your creation is ready, you have the option to:
Download and save your design
Try different formats like enamel pins
Customize your creation with additional details
Adding Creative Details
One of the cool features of Whisk is the ability to add extra details to your character. For instance, I tried adding a scenario where the character was playing field hockey, and the results were fantastic! It's such an easy and enjoyable way to bring your ideas to life.
Give It a Try!
If you're looking for a creative way to experiment with design and customization, Whisk is definitely worth checking out. Whether you want to create a plushy, a pin, or something else, it’s all about having fun with minimal effort.
Got questions? Feel free to reach out. Thanks for reading, and happy creating!
Welcome to this exploration of WordSift.org, a powerful tool that helps visualize text data in a way that is both informative and engaging. Unlike some other tools that have fallen out of favor, WordSift remains a reliable option for anyone looking to analyze text effectively. Whether you're a teacher, student, or just curious about the words in a piece of writing, WordSift can help you sift through the noise and uncover valuable insights.
What is WordSift?
WordSift is a web-based tool designed to create word clouds, providing a visual representation of text. By inputting a body of text, users can quickly identify the most frequently used words, giving insight into the main themes and ideas present. This capability is especially useful for educators, writers, and anyone involved in text analysis.
Getting Started with WordSift
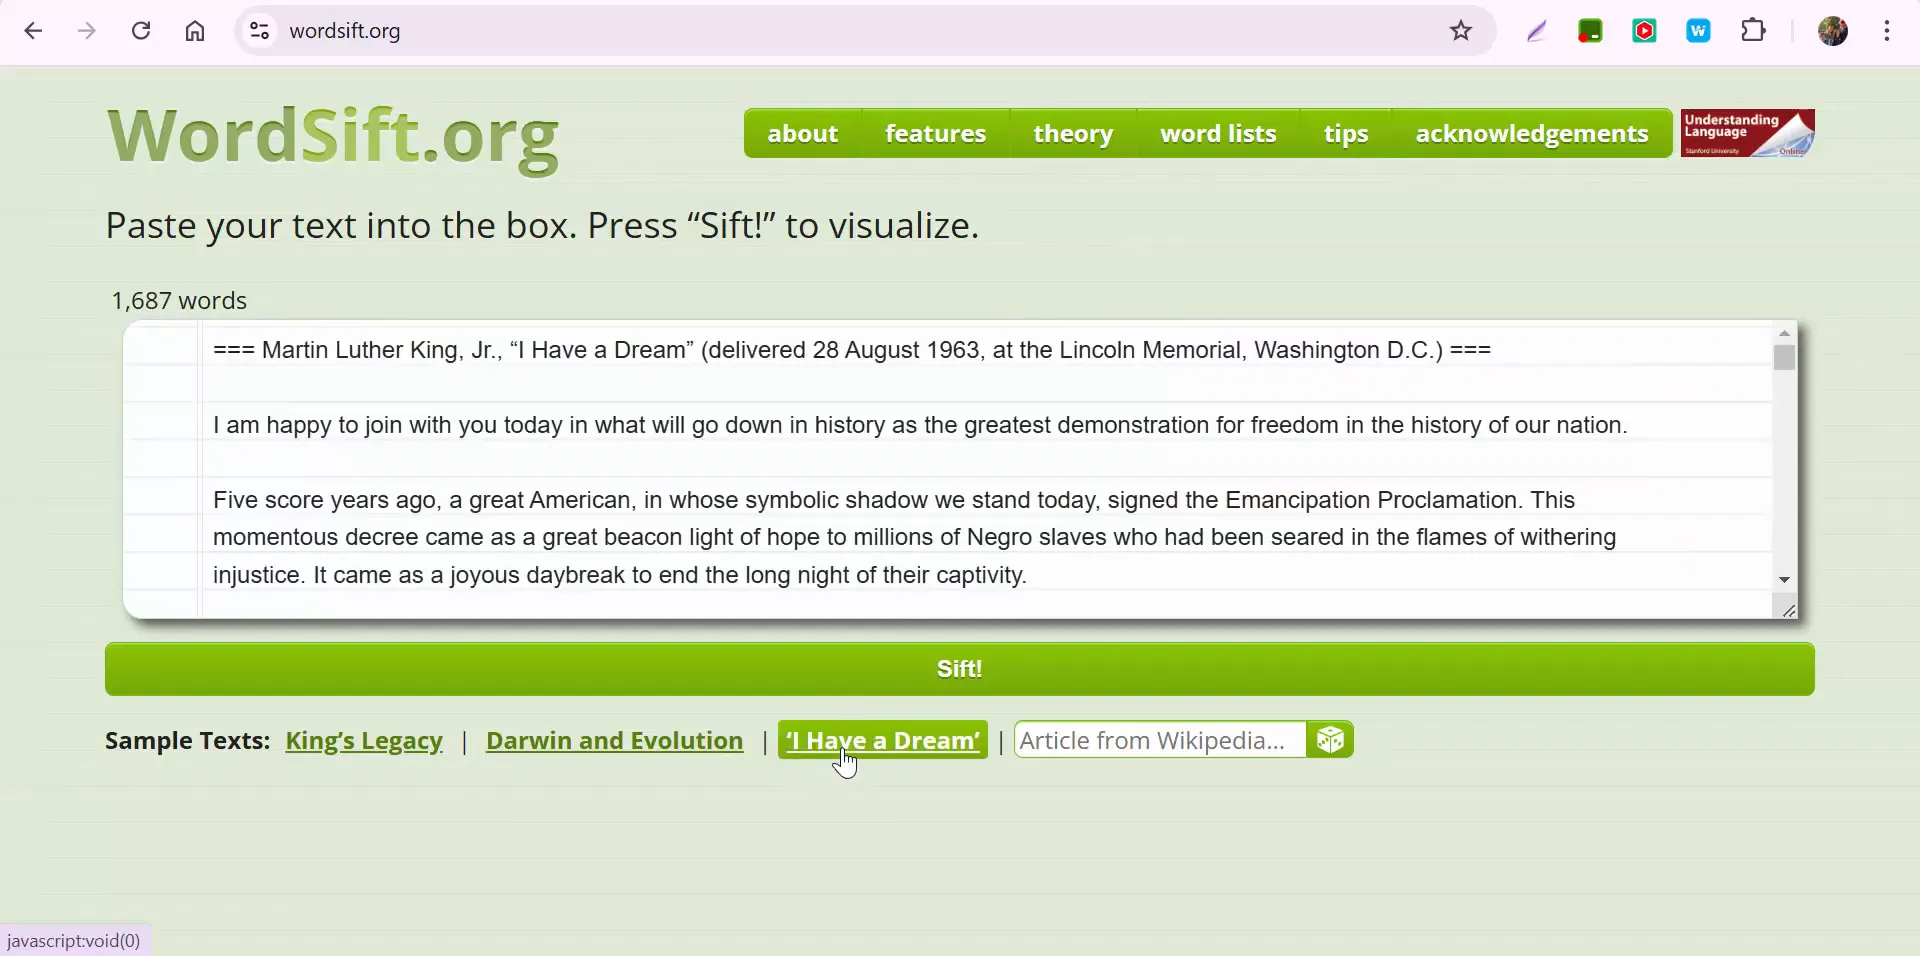
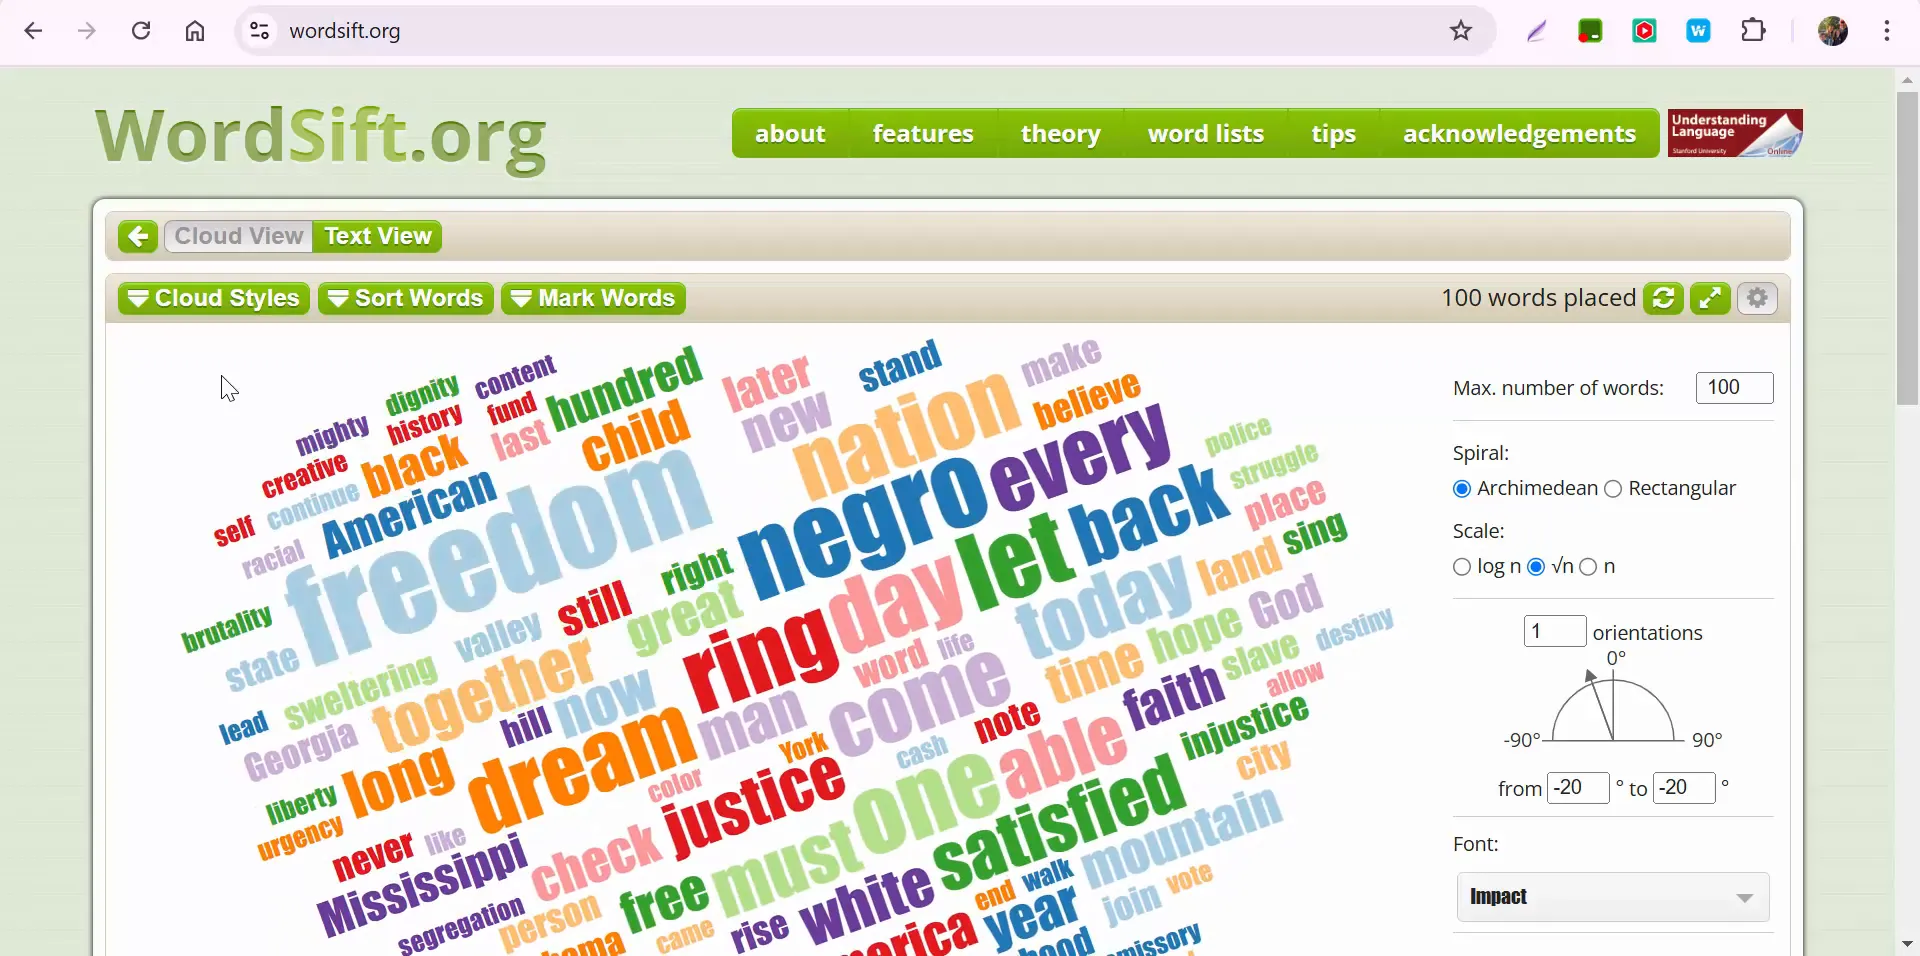
To begin using WordSift, simply visit the website and paste your text into the input box. For demonstration purposes, let’s use Martin Luther King Jr.'s iconic "I Have a Dream" speech, which contains 1,687 words. Once you input the text, select the "sift" button to generate your word cloud.
Understanding the Output
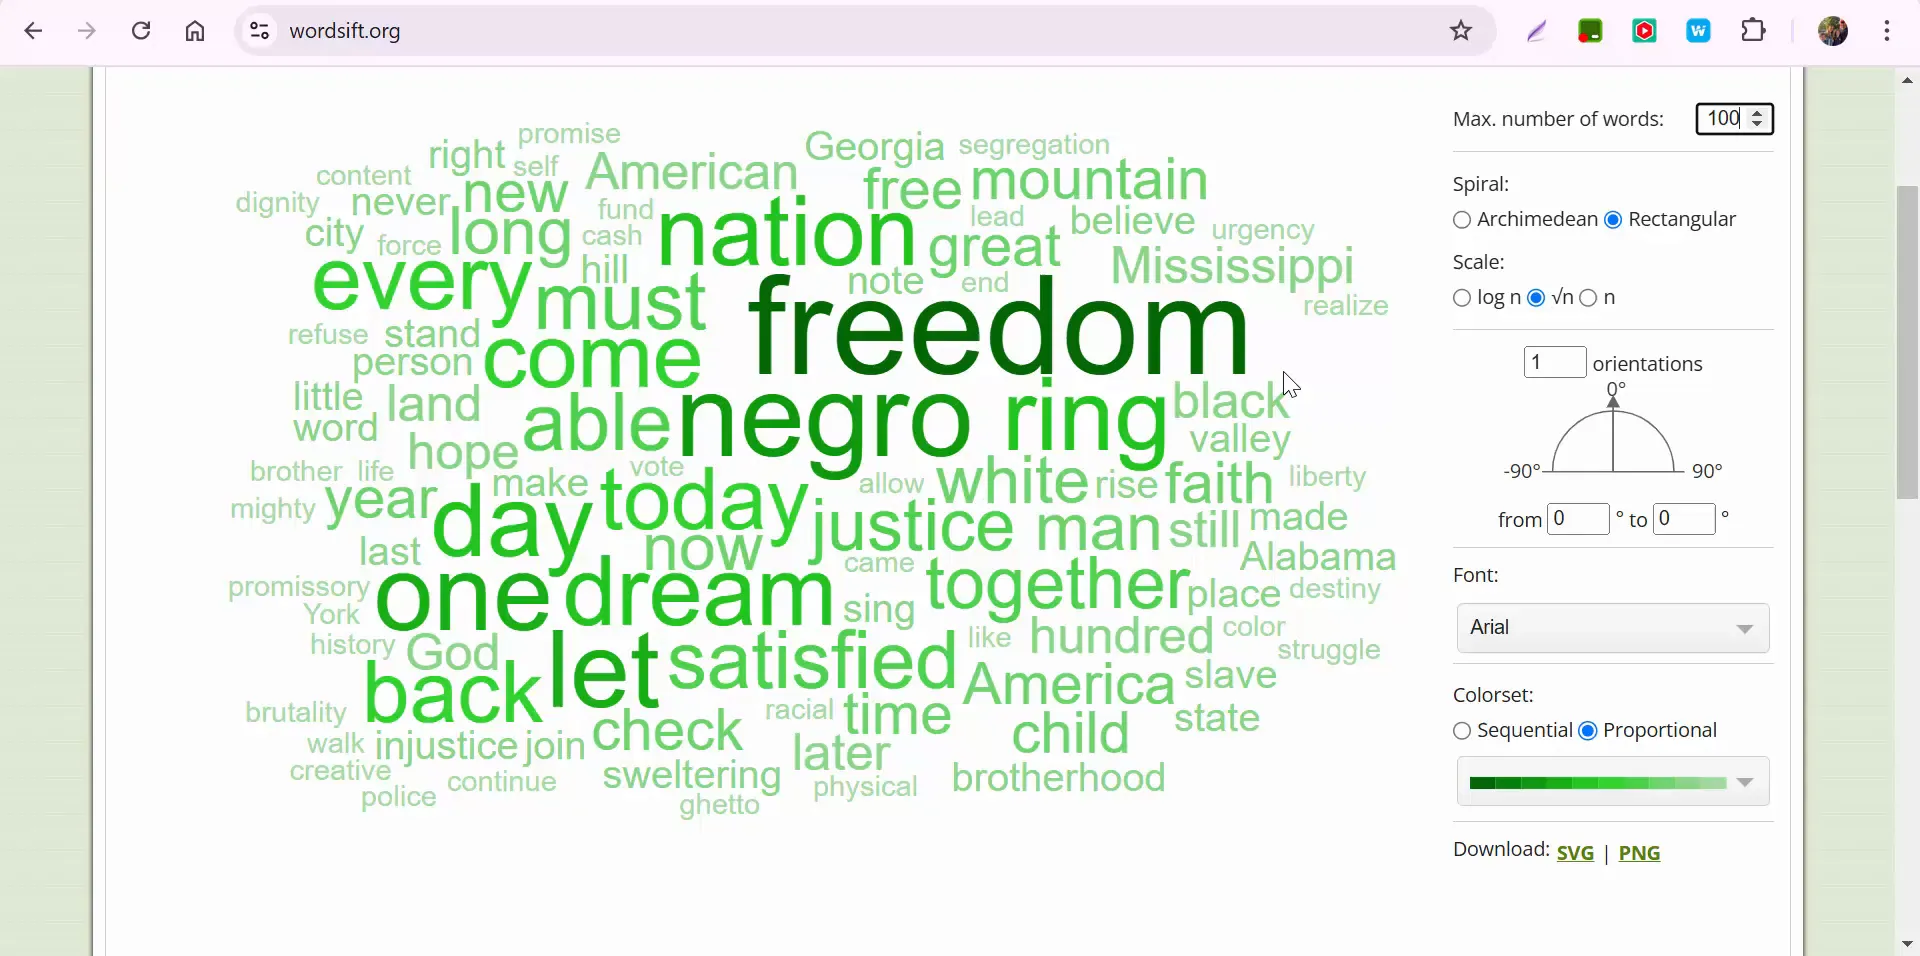
After sifting through the text, you'll see a visual representation of the most frequently used words. Initially, WordSift limits the output to 50 words. However, if you want to analyze more words, you can adjust the settings. Click on the "cloud settings" option, increase the word count to 100, and hit enter.
Customizing Your Word Cloud
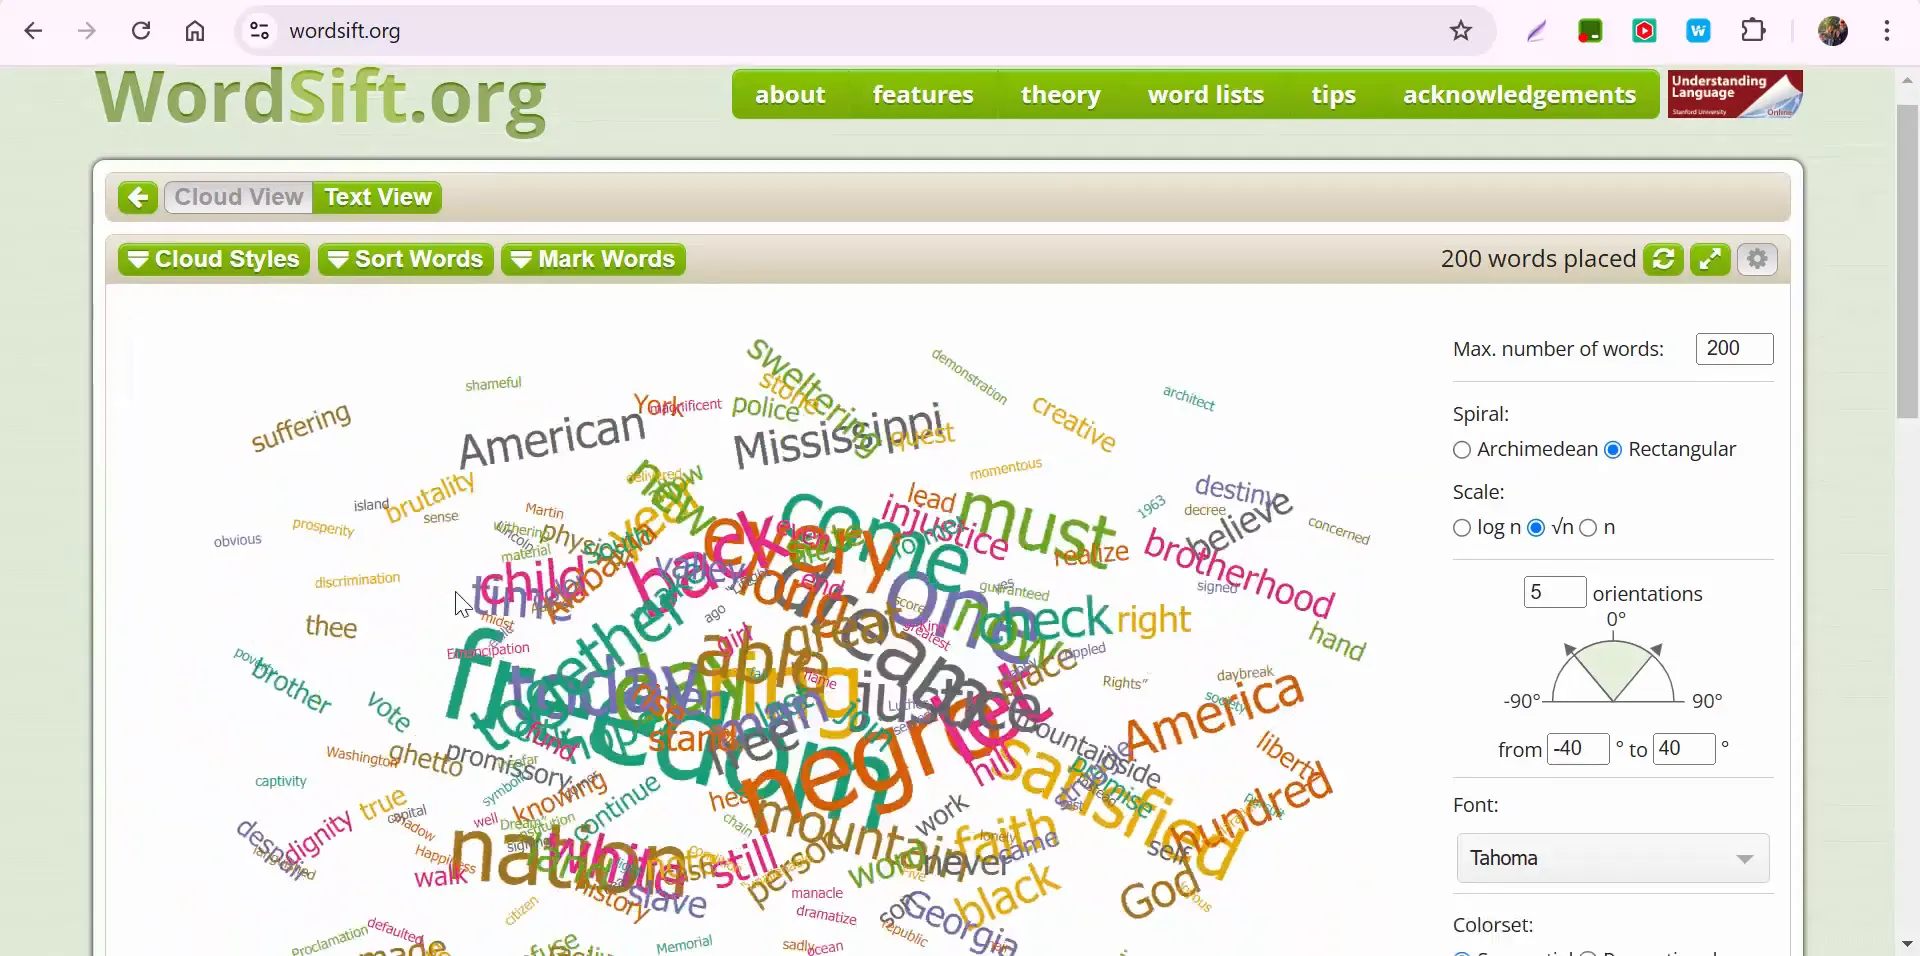
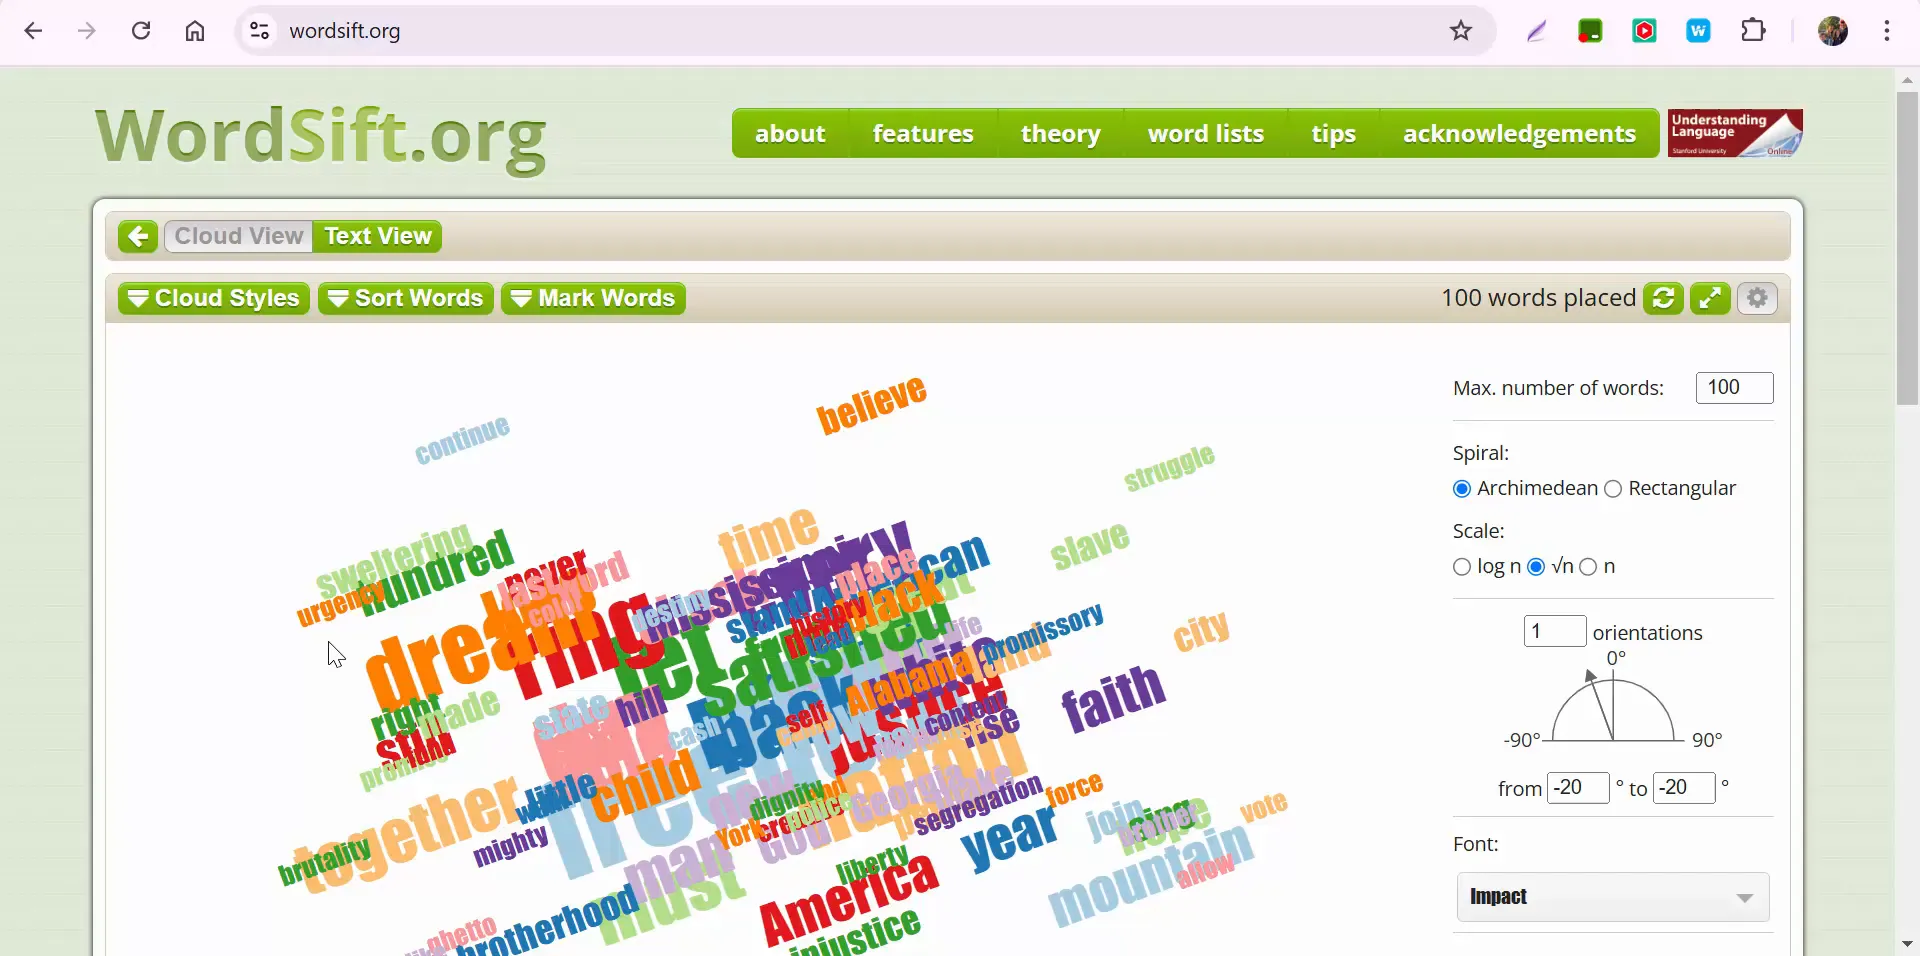
WordSift offers various customization options to enhance your word cloud. You can change the font, layout, and color scheme to suit your preferences or the needs of your audience. After making adjustments, click on "redraw the cloud" to see your updated visual.
Exploring Cloud Styles
In addition to basic settings, WordSift provides different "Cloud Styles." You can hover over each style to see how many times words have been used in the text. This feature allows you to explore the text's richness and frequency of word usage further.
Filtering and Sorting Options
Another excellent feature of WordSift is its sorting options. You can sift the words alphabetically, both from A to Z and Z to A. This is particularly helpful if you're looking for specific terms or want to see the text's structure in a different light.
Why Use WordSift?
WordSift stands out for several reasons:
Visual Learning: The word cloud format makes it easier to grasp complex texts and identify key themes at a glance.
Eliminating Redundancy: By visualizing word frequency, you can pinpoint overused words and phrases, helping you refine your writing.
Engagement: The interactive nature of the tool encourages exploration and deeper understanding of the text.
Educational Value: Teachers can use WordSift to help students analyze literature, speeches, and other texts effectively.
Practical Applications
WordSift can be applied in various contexts:
Education: Teachers can use it to analyze student essays or literature, helping students understand the importance of word choice and theme.
Content Creation: Writers can visualize their drafts to identify repetitive language and refine their work.
Research: Researchers can analyze large bodies of text, such as articles or reports, to uncover trends and themes.
Public Speaking: Speakers can use WordSift to analyze their speeches, ensuring clarity and impact in their messaging.
Conclusion
WordSift.org is an invaluable resource for anyone looking to unlock insights from text. Its user-friendly interface, coupled with powerful visualization capabilities, makes it a must-try tool for educators, writers, and researchers alike. Whether you're analyzing a famous speech or your own writing, WordSift can help you see the words in a whole new light. If you have any questions or need assistance, don’t hesitate to reach out!
Thanks for exploring WordSift with me. Happy sifting!
Exploring Word.org: A Powerful Tool for Visualizing Text
Hey everyone, it’s Brad! Today, let's dive into Word.org, an excellent tool for creating word clouds. If you've used similar sites in the past that no longer work, you’ll be happy to know that this one does—and it’s packed with features that make it a valuable resource for both educators and students.
Why Use Word Clouds?
Word.org is fantastic for several reasons, such as:
Visualizing Text: It offers a quick way to see which words appear most frequently in a given passage.
Identifying Overused Words: If you're working on refining writing, word clouds help spot overused terms.
Aesthetic Appeal: Sometimes, it’s just fun to create visually appealing representations of text.
Getting Started
To show how Word.org works, I tested it with famous speeches, like the Gettysburg Address. When pasting text, keep in mind that fewer than 300 words are not recommended for optimal visualization. Instead, I opted for Martin Luther King Jr.’s I Have a Dream speech, which contains 1,687 words—perfect for analysis.
Once you input your text, simply hit the Sift button. This generates a word cloud based on your input, and as you scroll down, you’ll find additional insights and data.
Customizing Your Word Cloud
One of the great features of Word.org is its flexibility. By default, it displays the top 50 words, but you can easily adjust this. Here’s how:
Change Word Count:
Select Cloud Settings, adjust the word count (e.g., increase it to 100), and hit Enter to update the visualization.
Modify Fonts & Styles:
Want a different look? Explore various fonts to personalize your word cloud.
You can also choose different Cloud Styles and see how often words appear by hovering over them.
Sorting Options:
Arrange words alphabetically, either A to Z or Z to A, for a different perspective on your content.
Final Thoughts
Word.org is an easy-to-use, versatile tool that can help students, writers, and educators analyze and present text creatively. Whether you're looking to identify key themes in a speech, avoid redundancy in writing, or simply create a fun visual, it’s definitely worth exploring.
If you have any questions, feel free to reach out. Thanks for reading, and happy word clouding!
Hey everyone! I’m Brad, and today we’re diving into Google's latest experiment, Music FX. This innovative tool allows you to unleash your creativity and bring fresh musical ideas to life in a fun and interactive way. Whether you're a seasoned musician or just someone looking to explore the world of music, Music FX has something for everyone. Let's jump in!
Getting Started with Music FX
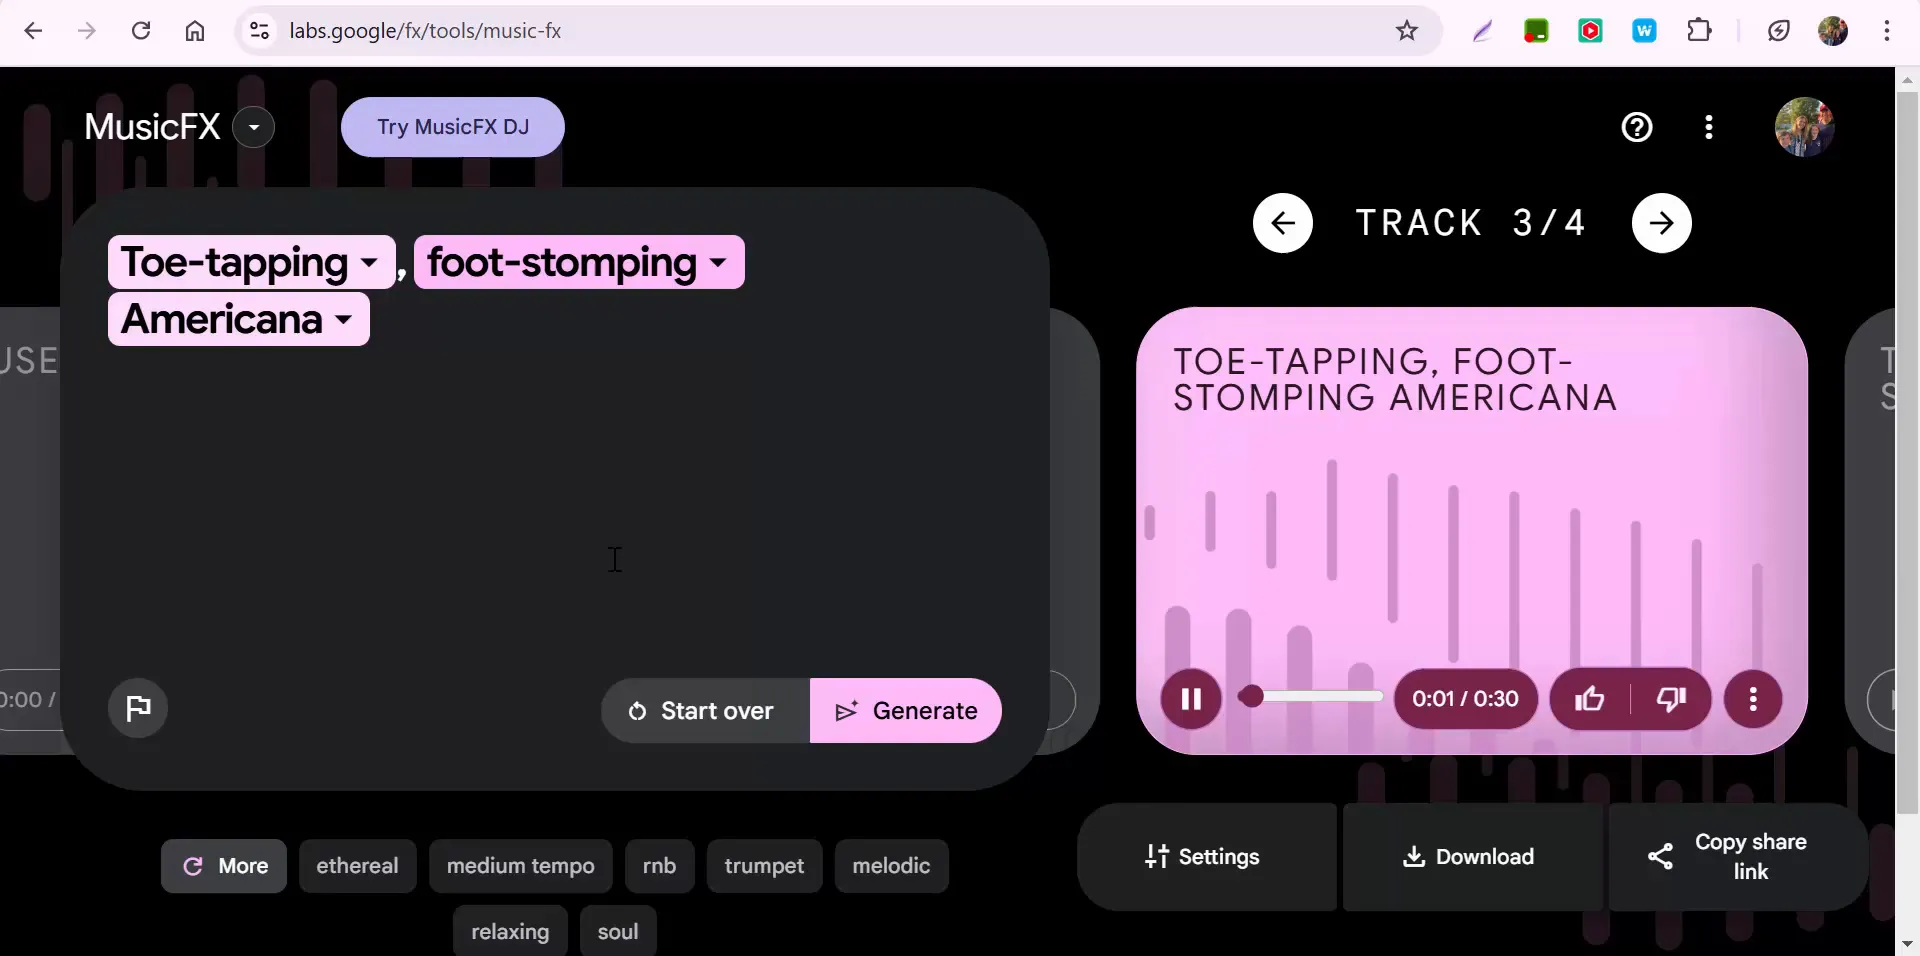
When you first open Music FX, you'll be greeted by a simple interface that invites you to start creating right away. Are you feeling lucky? You can use the “I’m feeling lucky” button to generate a random musical idea. Or, if you have something specific in mind, you can type in your own prompt. For instance, let’s try typing in “toe-tapping foot-stomping Americana.”
Customizing Your Musical Experience
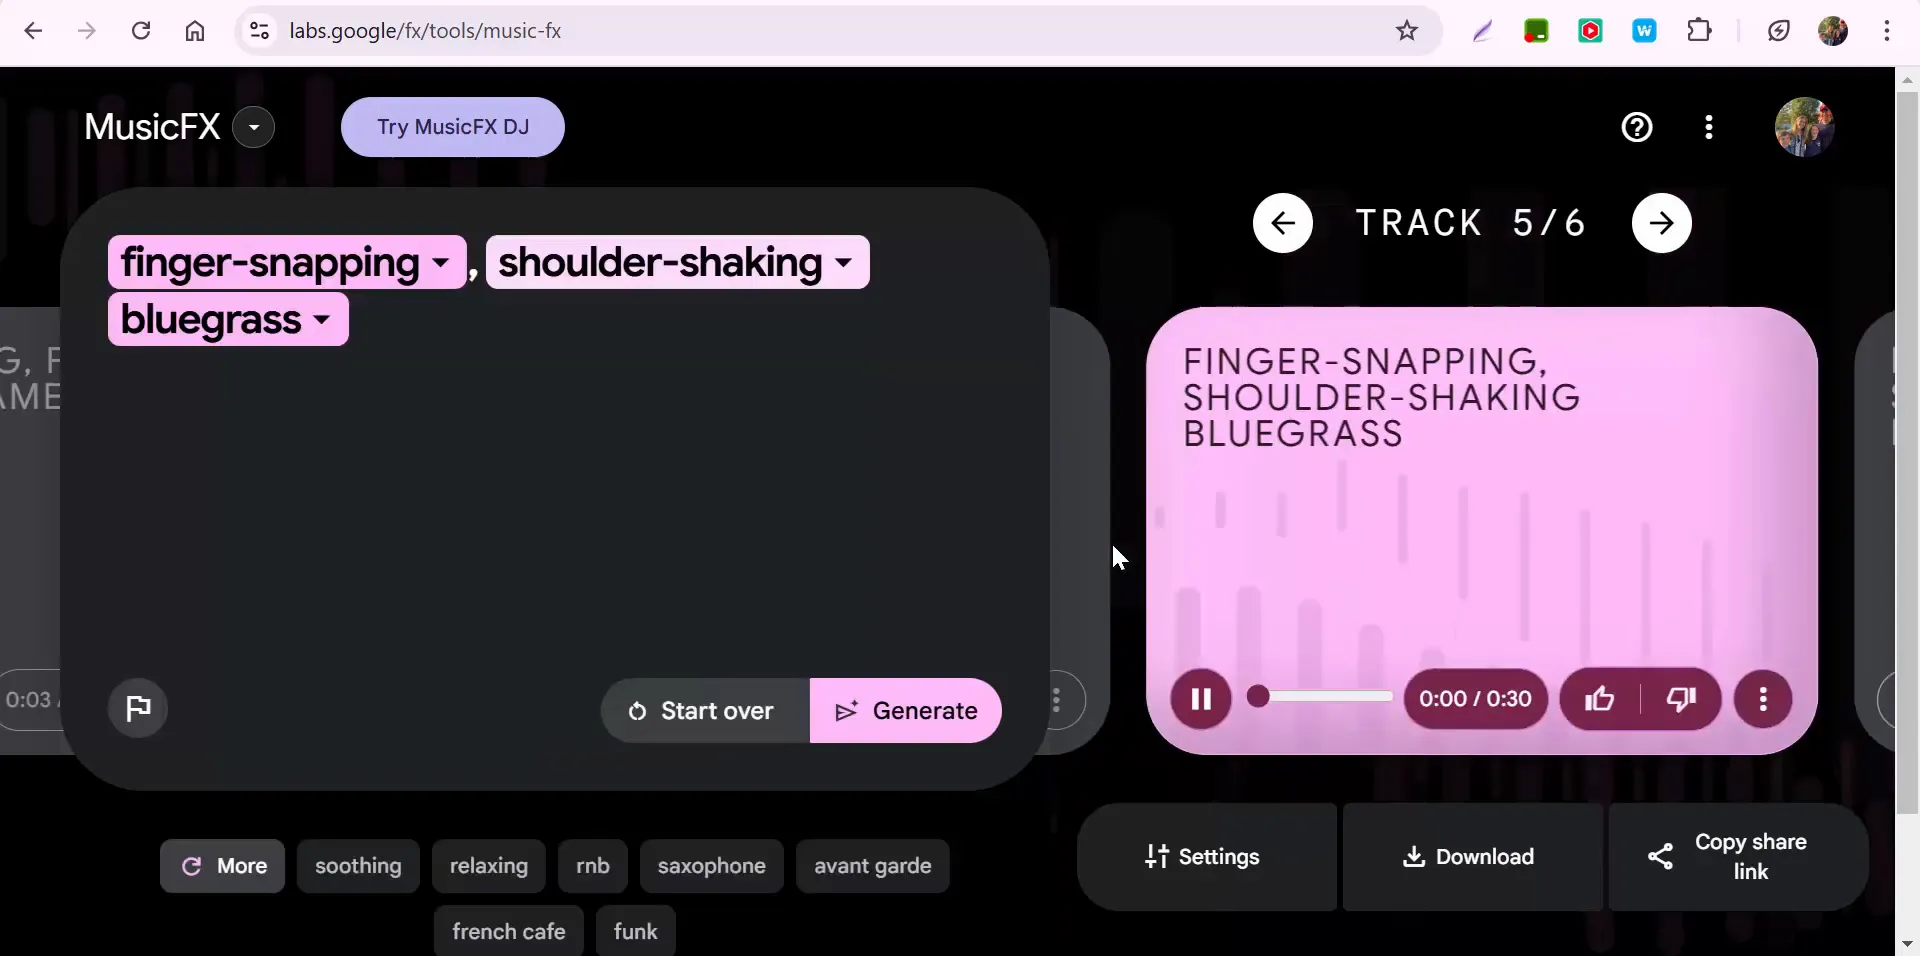
Once you input your prompt, you can pause the music anytime to make adjustments. Feel like adding a little rhythm? You can switch it up to something like “finger snapping” or “shoulder shaking.” Let’s change our style to “bluegrass” and generate a new track!
Exploring Features and Settings
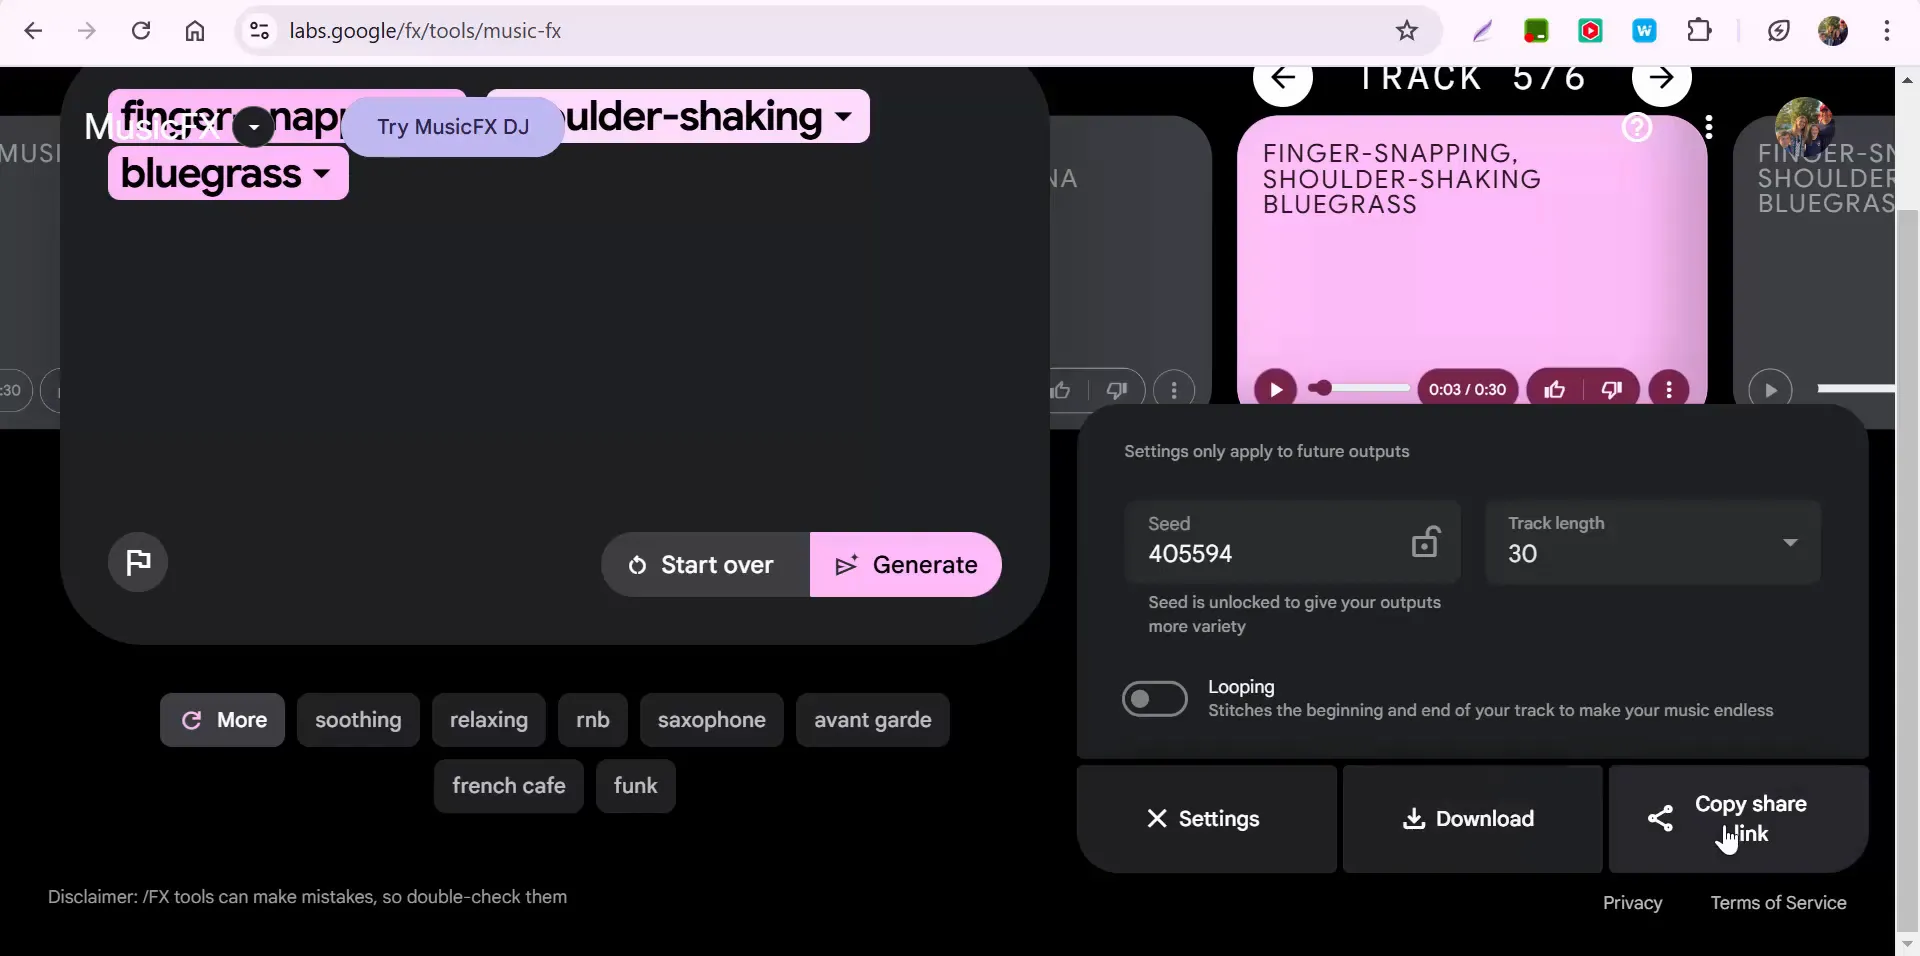
After generating your music, you’ll notice several options available to enhance your experience. If you love what you hear, you can give it a thumbs up. You can also copy the prompt for future use or flag the output if it doesn’t meet your expectations. There are settings to adjust the track length, allowing you to create longer pieces or loop sections of the music for repetitive play.
Sharing and Downloading Your Creations
Music FX makes it easy to share your creations with friends. You can download your track or copy a shareable link to send it out. This feature is perfect for collaborating with others or just showcasing your musical prowess on social media.
Starting Over with New Ideas
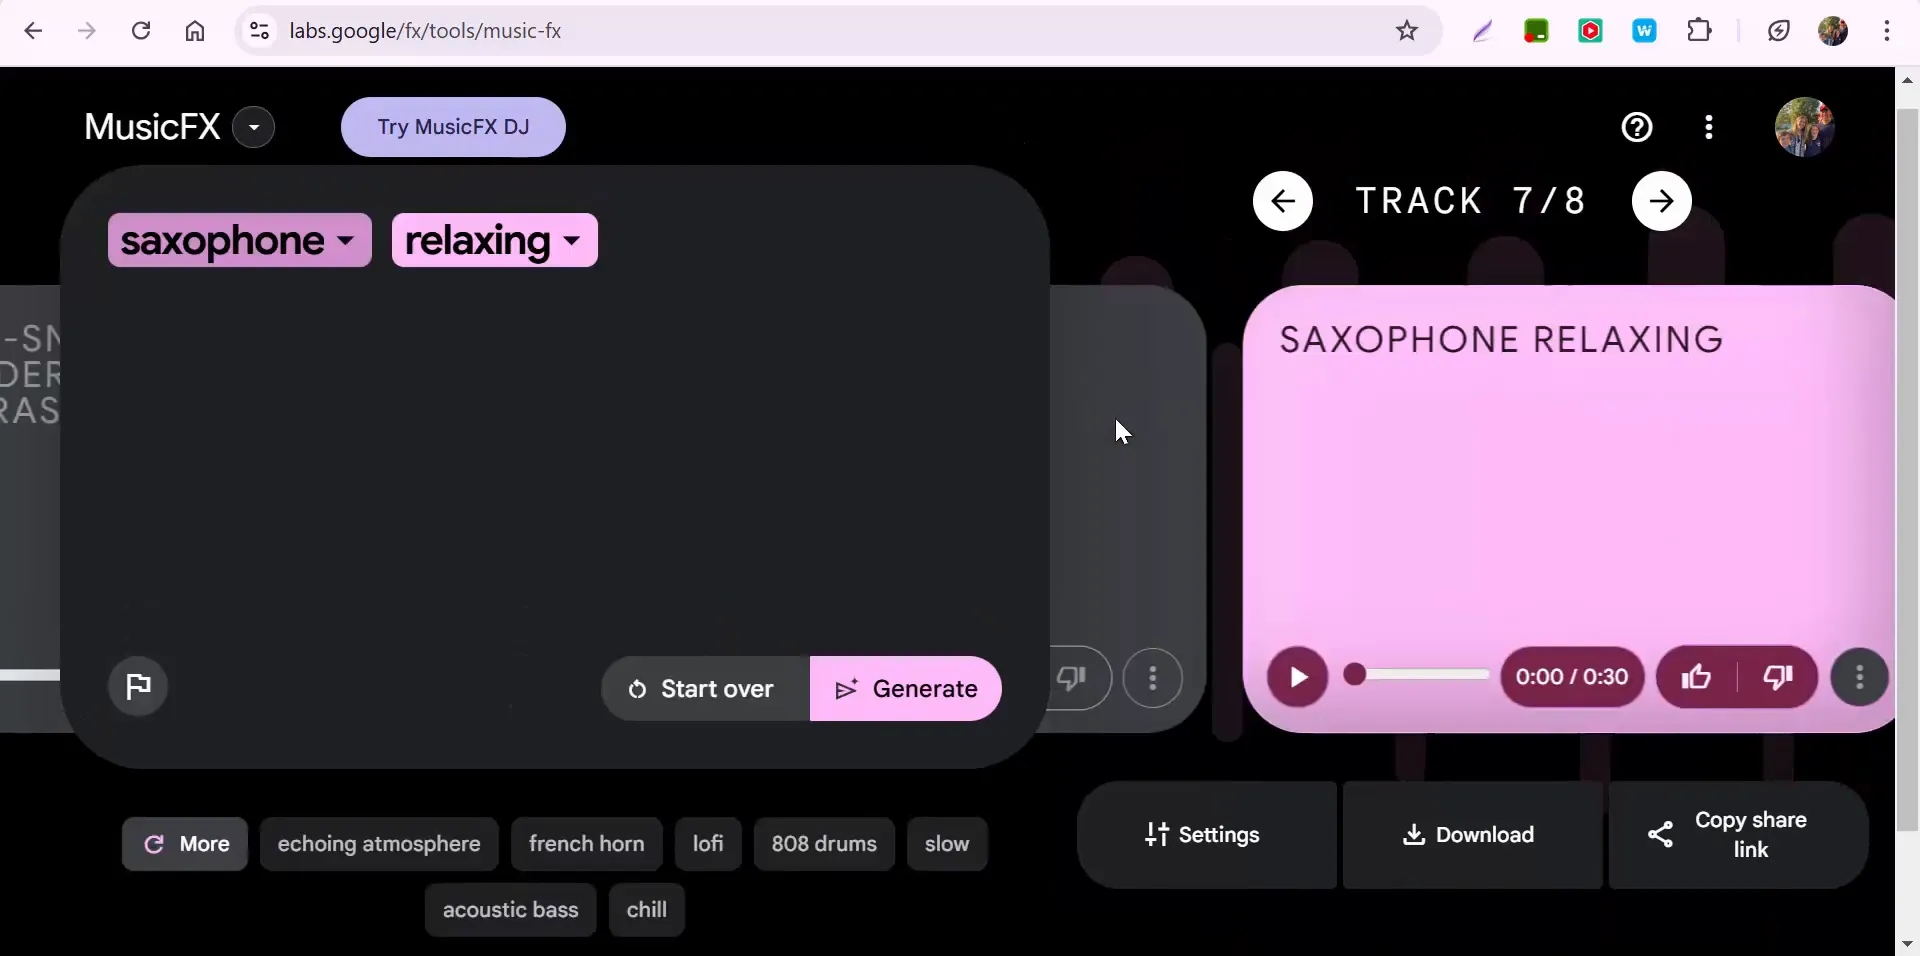
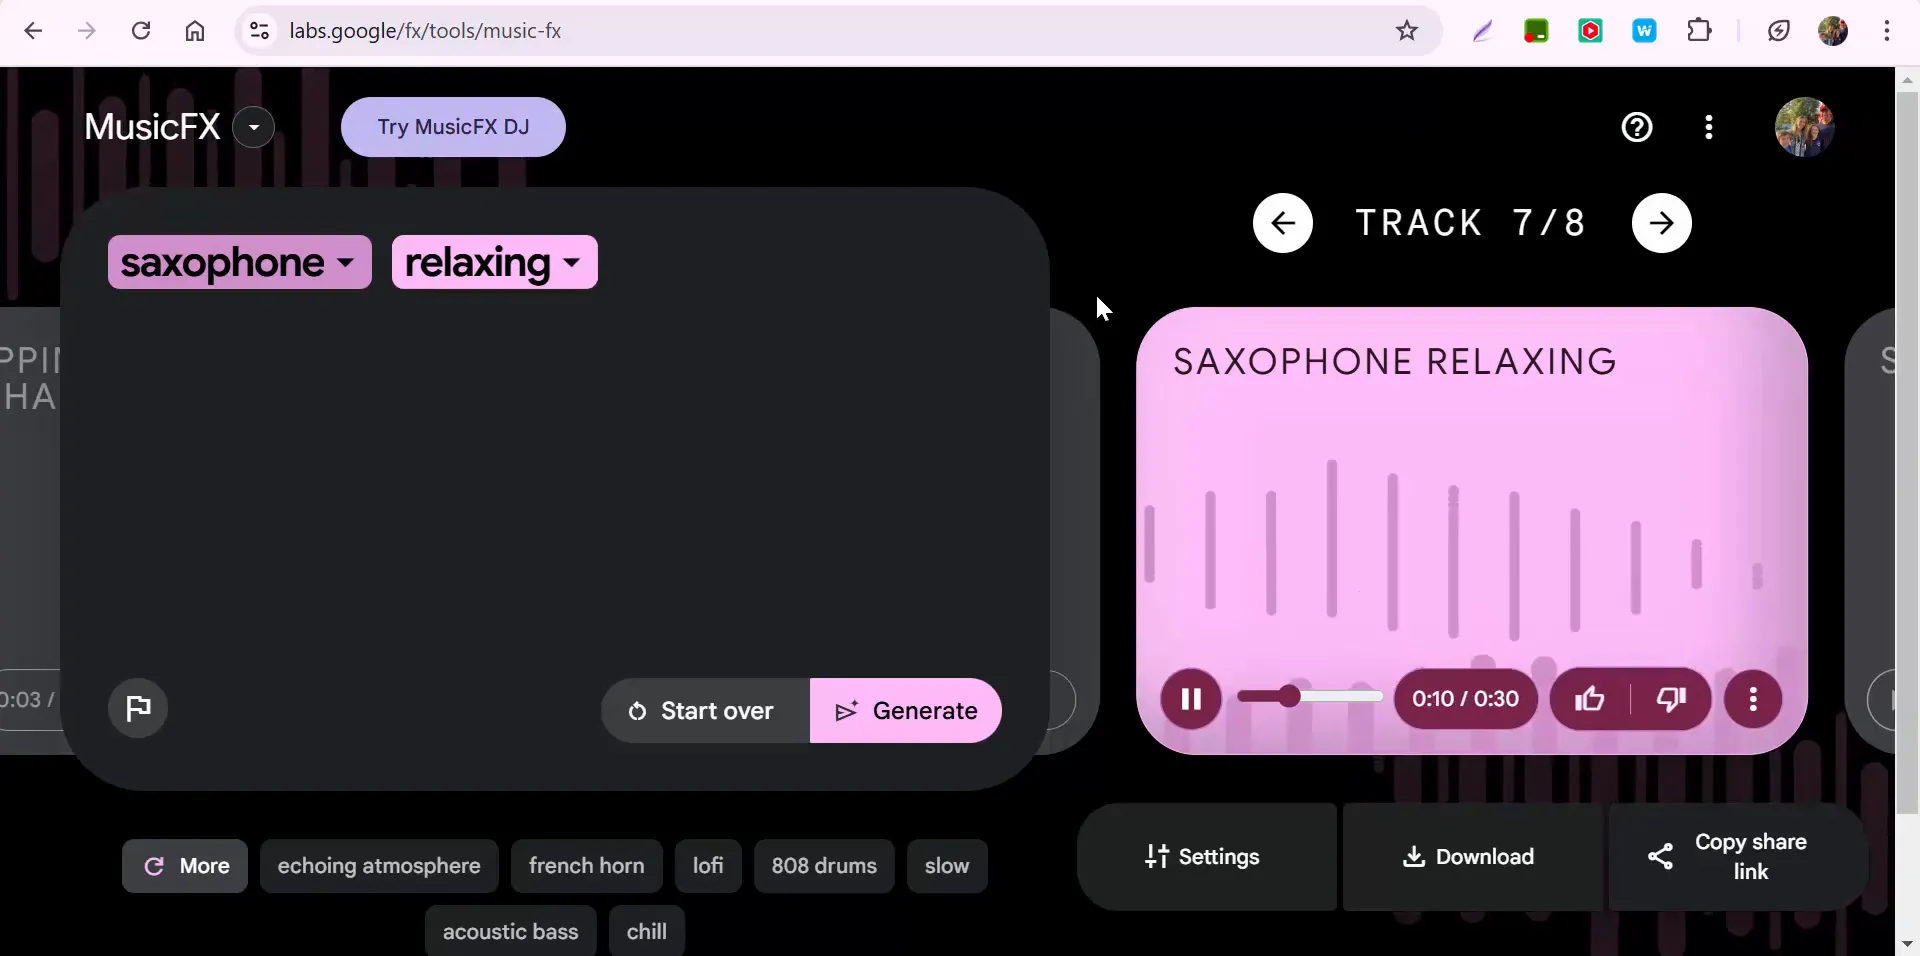
If you want to pivot and try something entirely different, you can easily start over. For instance, let’s add “saxophone relaxing” to our prompts and see what kind of vibe we get from that.
Experimentation is Key
The beauty of Music FX lies in its ability to encourage experimentation. You can play around with various prompts, styles, and instruments until you find the perfect combination that resonates with you. This tool is not just for seasoned musicians; it’s designed for anyone who wants to explore and create.
Final Thoughts
As we wrap up, I hope you feel inspired to dive into Music FX and start creating your own musical pieces. This tool is a fantastic way to experiment with music, whether you’re looking to unwind or spark some creativity. If you have any questions or need assistance, feel free to reach out. Thanks for joining me today, and happy music-making!
Exploring Google Lab’s MusicFX: Bring Your Musical Ideas to Life
Hi everyone, this is Brad! Today, we’re taking a look at another exciting Google Lab experiment—MusicFX—a creative tool that helps bring new musical ideas to life with just a few clicks.
Getting Started with MusicFX
MusicFX provides a user-friendly interface where you can input a musical prompt or select the "I'm Feeling Lucky" option to generate a random style. For example, you can try out prompts like "toe-tapping, foot-stomping Americana" and hear what the AI generates. If you'd like to refine your selection, simply pause the track and tweak the elements by adding descriptions such as "finger snapping" or "shoulder shaking."
Customizing Your Sound
Once you’ve generated a track, you have several options to personalize it:
Change the genre – Switch to styles like Bluegrass, Jazz, or other genres that suit your taste.
Adjust settings – Extend the track length, enable looping, or fine-tune other playback features.
Download and share – Save your favorite tracks or copy a shareable link to send to friends and collaborators.
If you ever want to start fresh, you can reset the tool and experiment with new prompts, such as adding elements like "saxophone relaxing" for a smooth vibe.
Final Thoughts
MusicFX is a great way to explore different musical styles and spark creativity, whether you're a musician, educator, or just someone looking for a little fun with AI-generated music. Give it a try and see what unique compositions you can create!
If you have any questions, feel free to reach out. Thanks for reading, and happy music-making!